TripleSpec4.1 Observing Guide (SOAR)
This page gives basic information on TripleSpec4 observing strategies. The subjects covered in this document are:
- Detector Orientation on the Sky
- Daytime Calibrations
- Telescope Zero-Point
- Telescope Focus
- Object Acquisition
- Taking Spectra
- TripleSpec Step-by-Step Observing Guide (PDF)
Detector and Slit Orientation:
The slit for TripleSpec4 is aligned along the rows of the imaging detector. The orientation of the detector on the sky depends upon the Cassegrain rotator. The Rotator Angle is not the same as the Instrument Position Angle. In many cases the observer will want to observe the object of interest at a specific instrument position angle such as the parallactic angle for a stellar object or along the major axis for an extended object. Please note that the acceptable range of rotator angles for TripleSpec4 excludes the range from 88-92 degrees due to a physical limit of the rotator mechanism
TripleSpec4 is mounted at the Cassegrain focus of the Blanco 4-m telescope. When the Rotator Angle is 0 degrees, the Instrument Position Angle is 90 degrees (North Up and East Left).
Daytime Calibrations:
Spectroscopic Calibrations:
(1) Make sure that all dome lights are off.
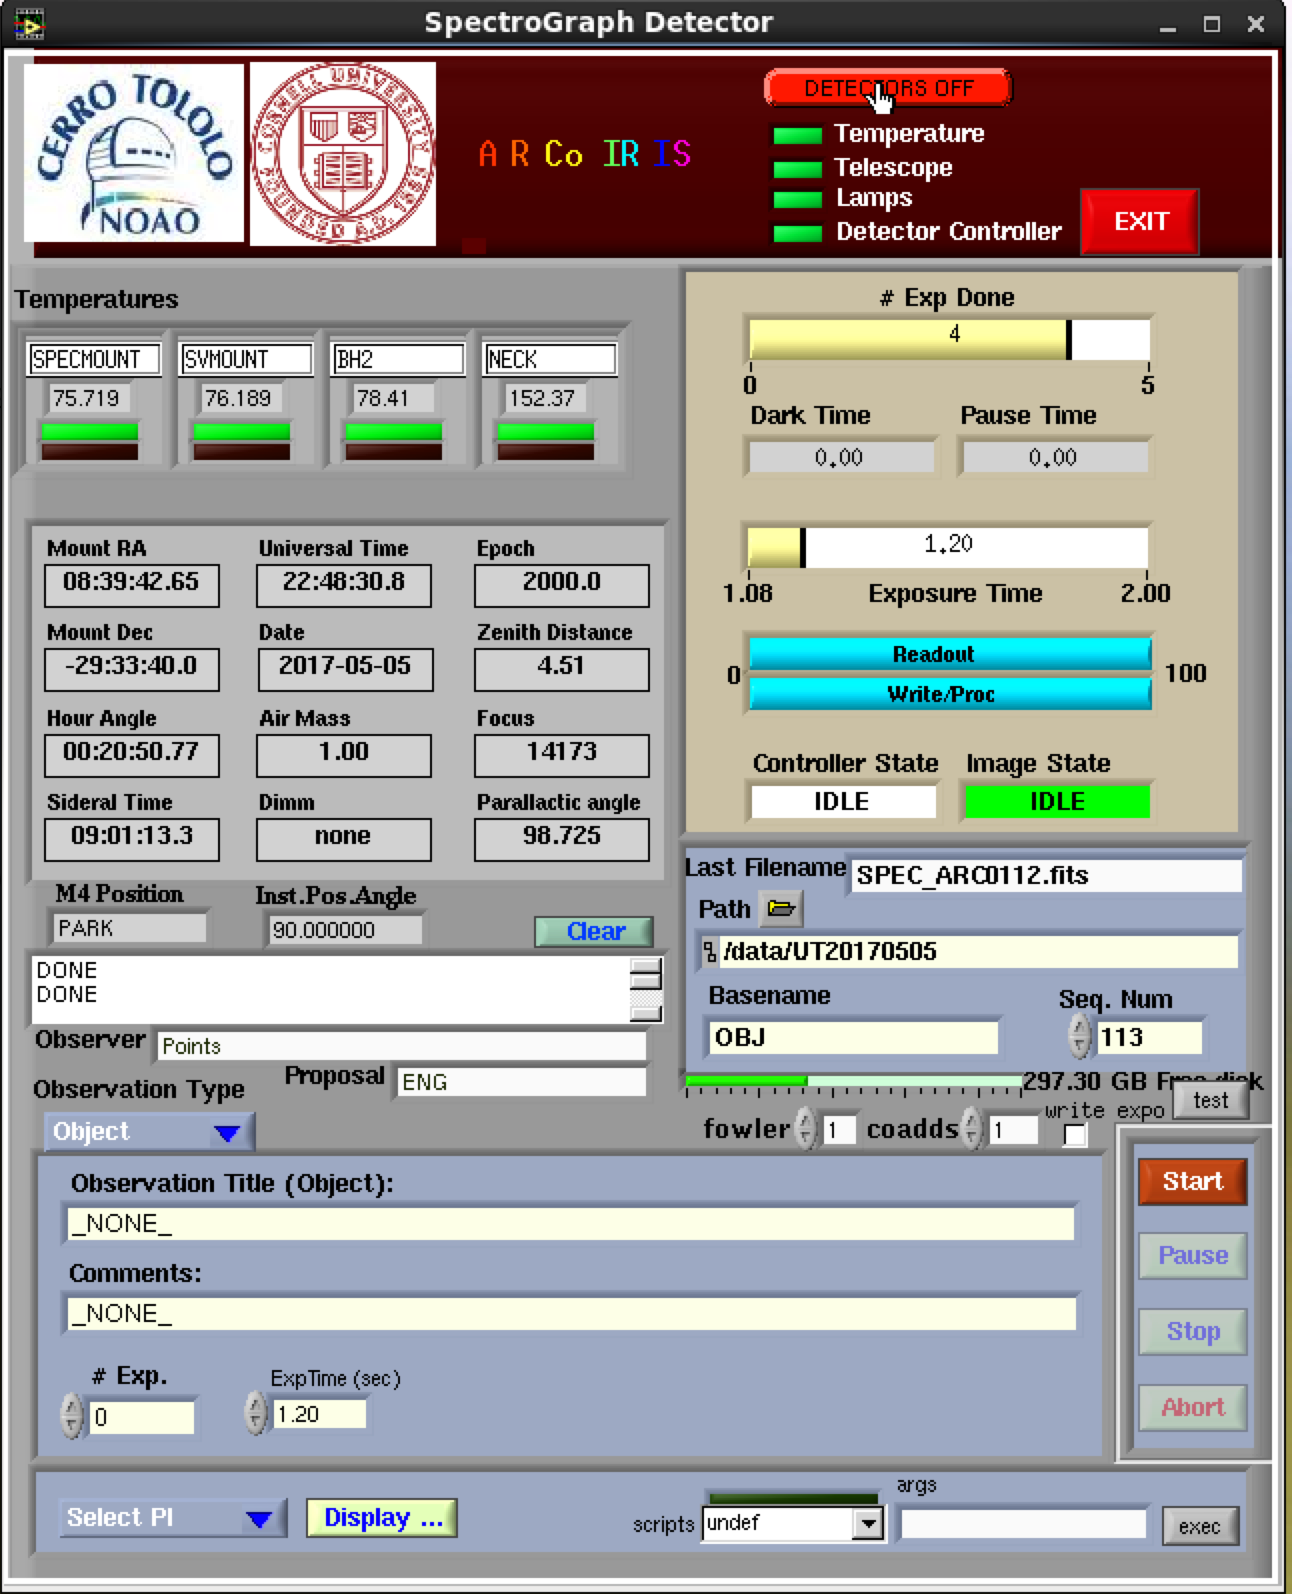
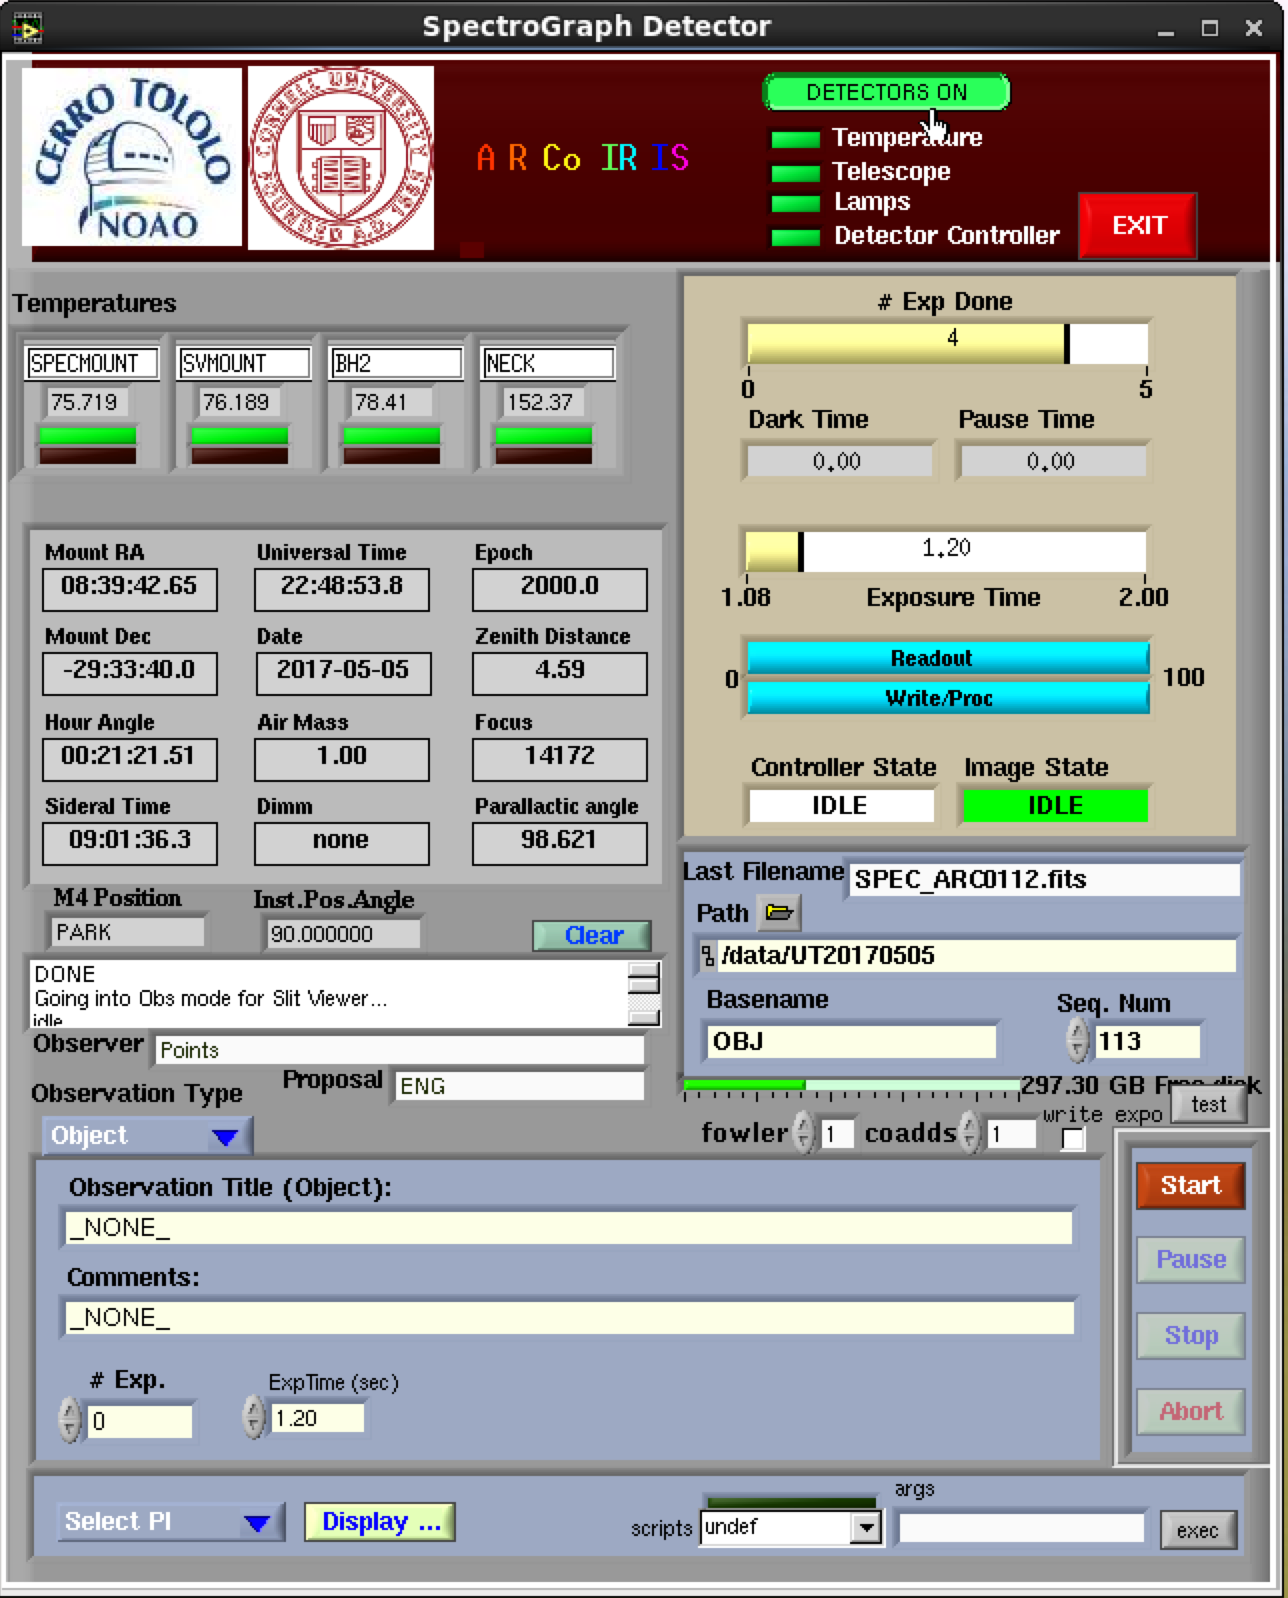
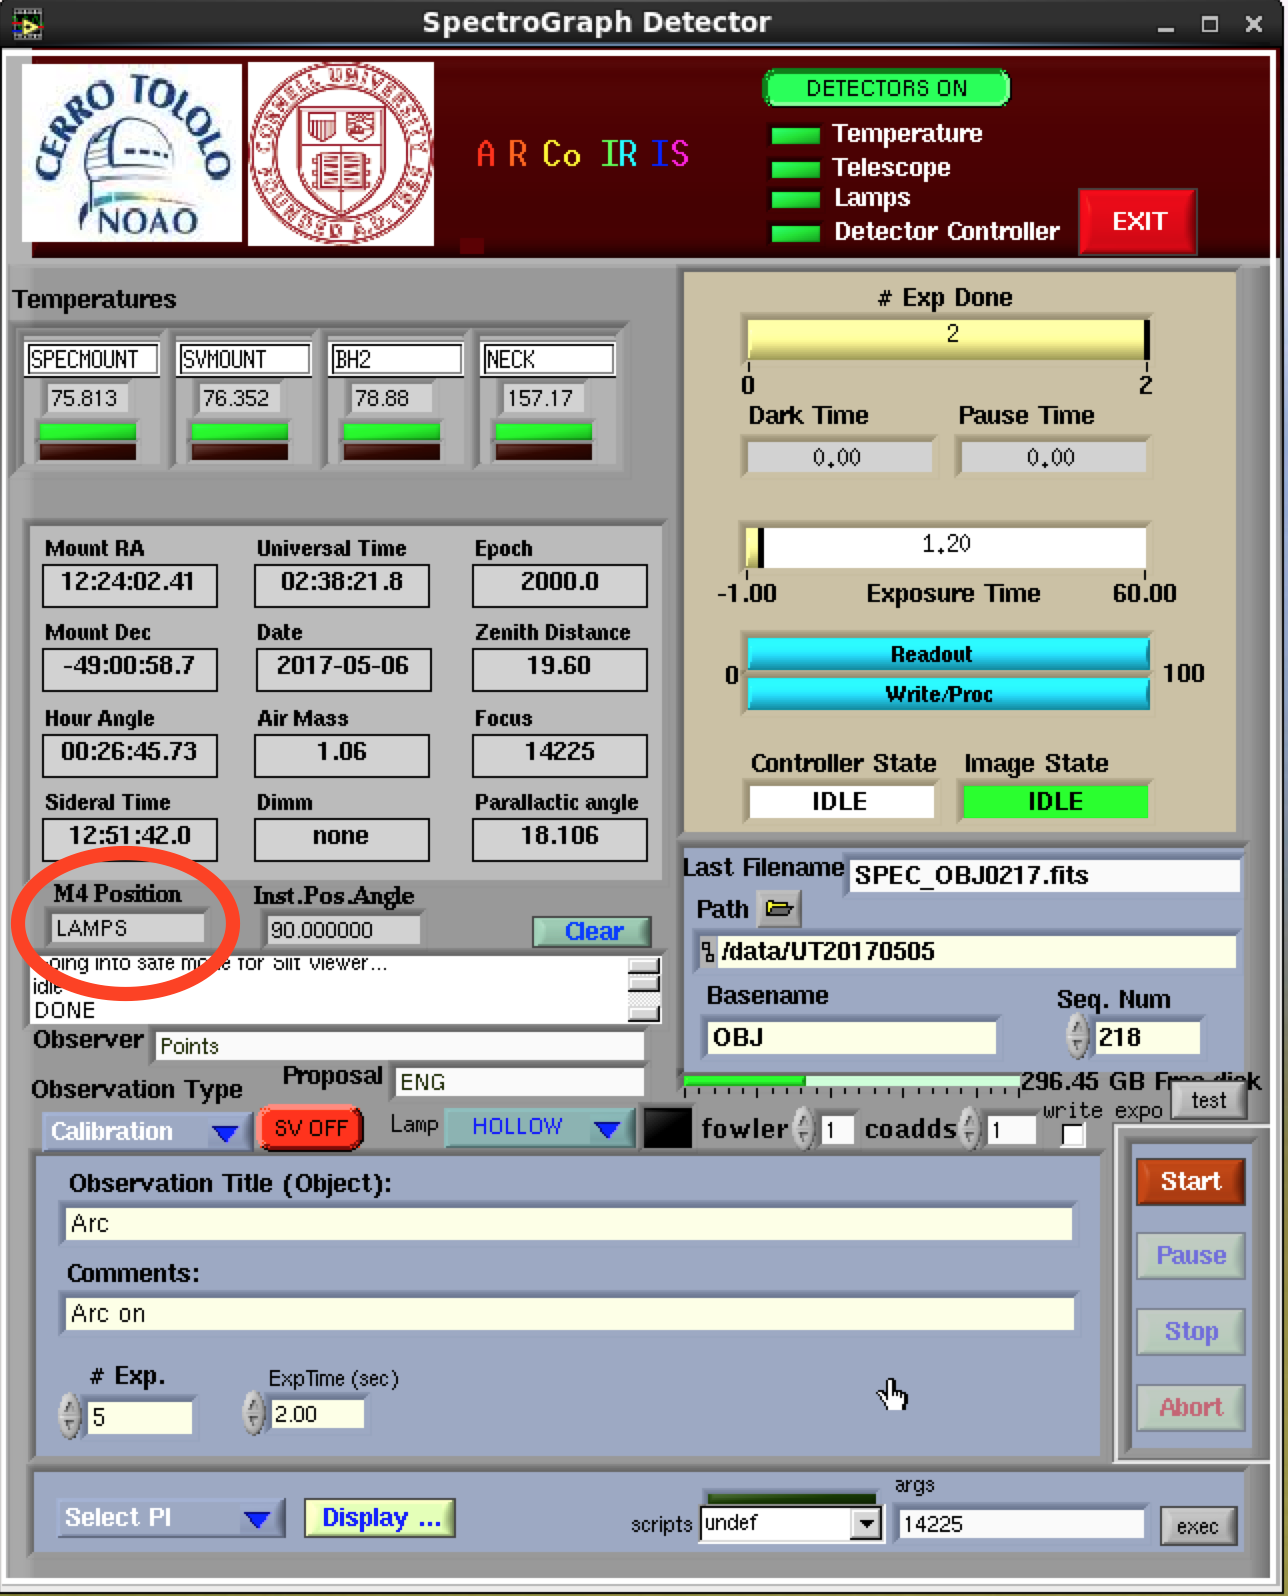
(2) TripleSpec4 starts with both detectors off. Turn on the detectors by clicking the red "Detectors Off" button in the Spectrograph Detector window.
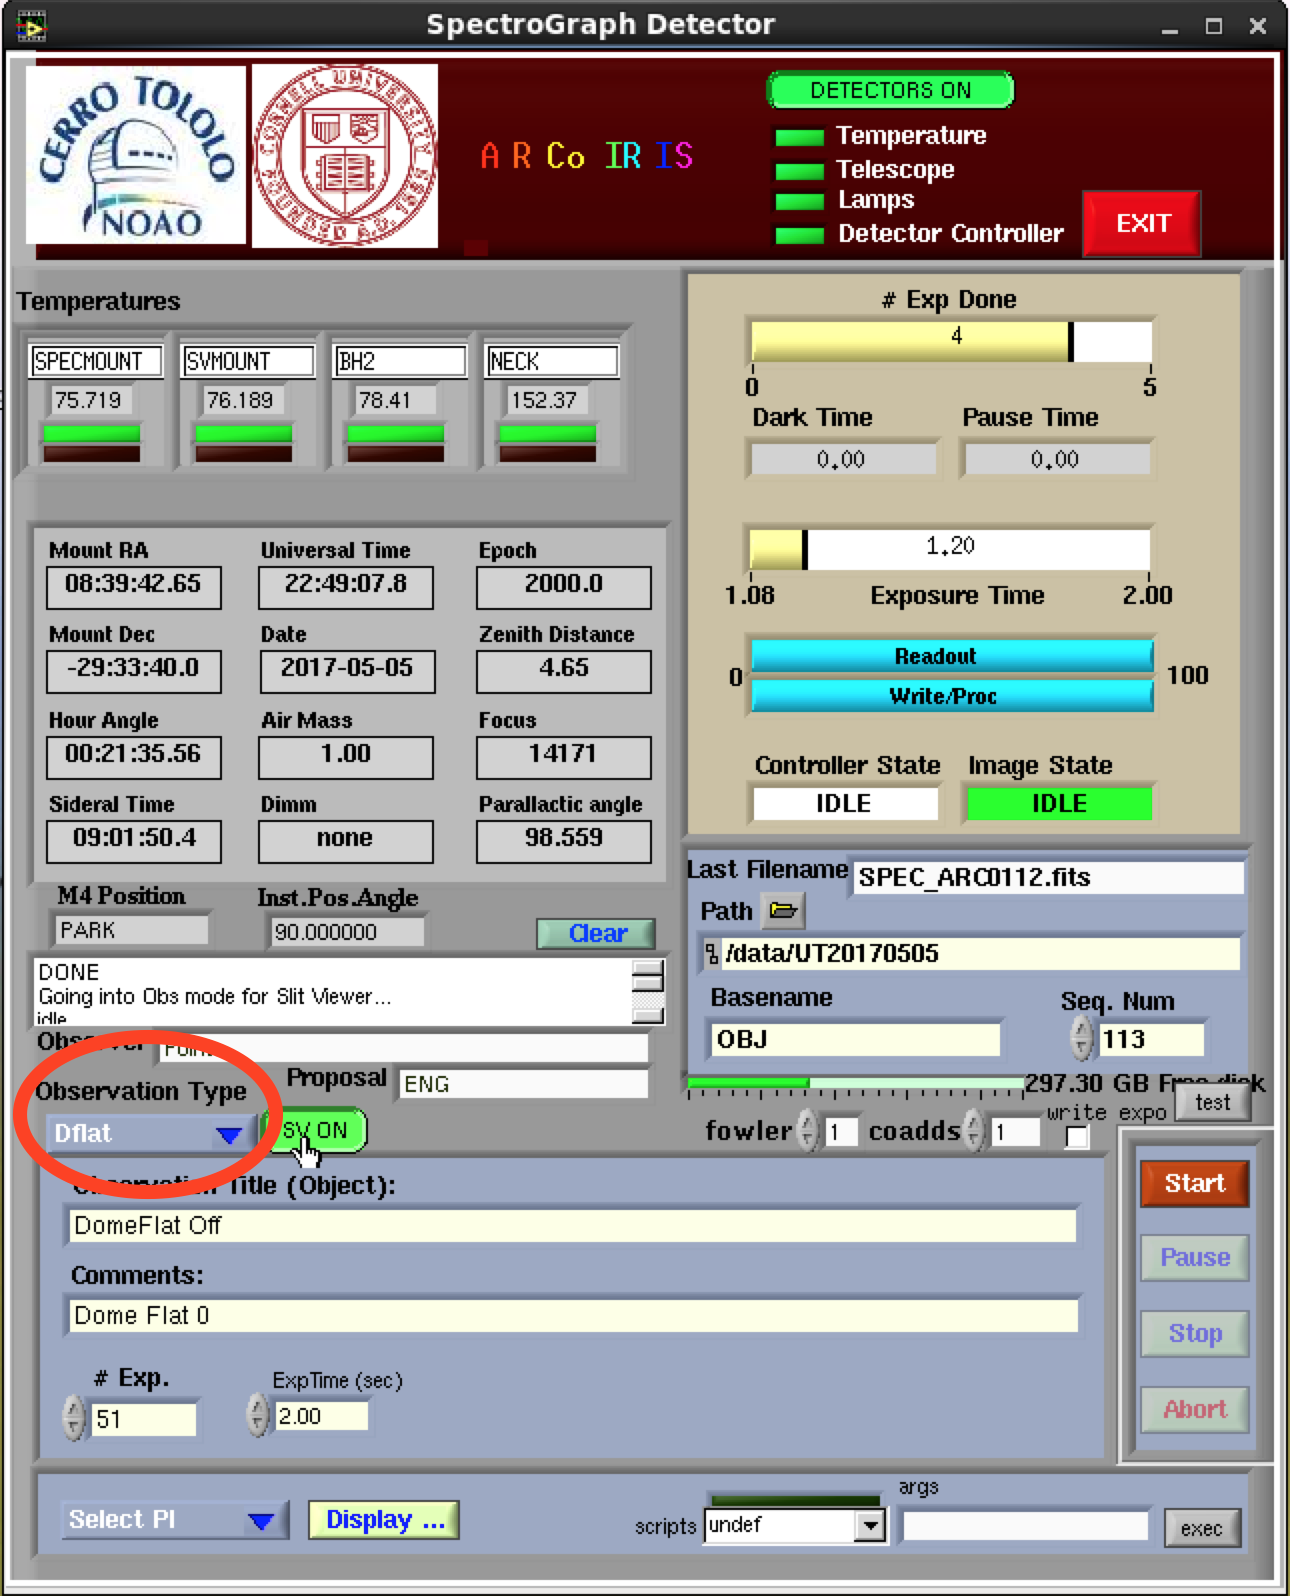
(3) Select the Observation Type to be "Dflat" in the Spectrograph Detector window.
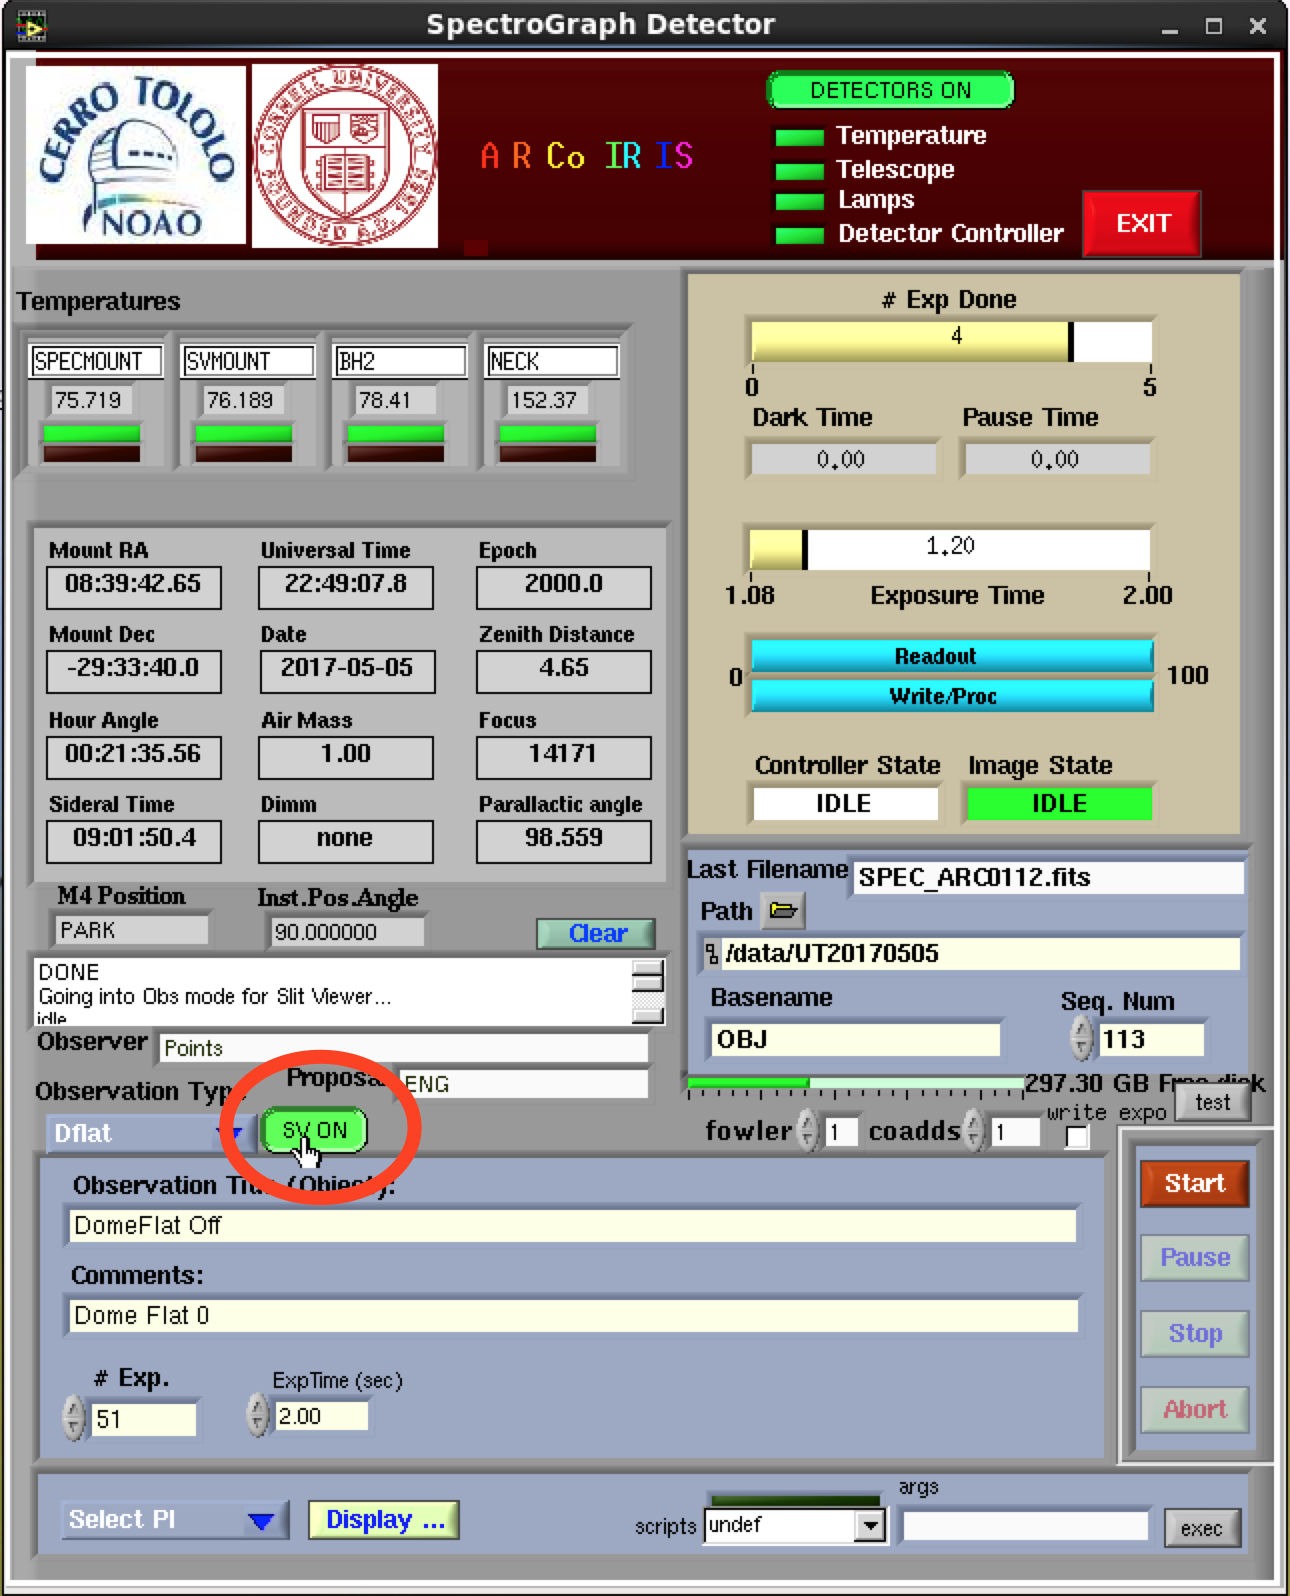
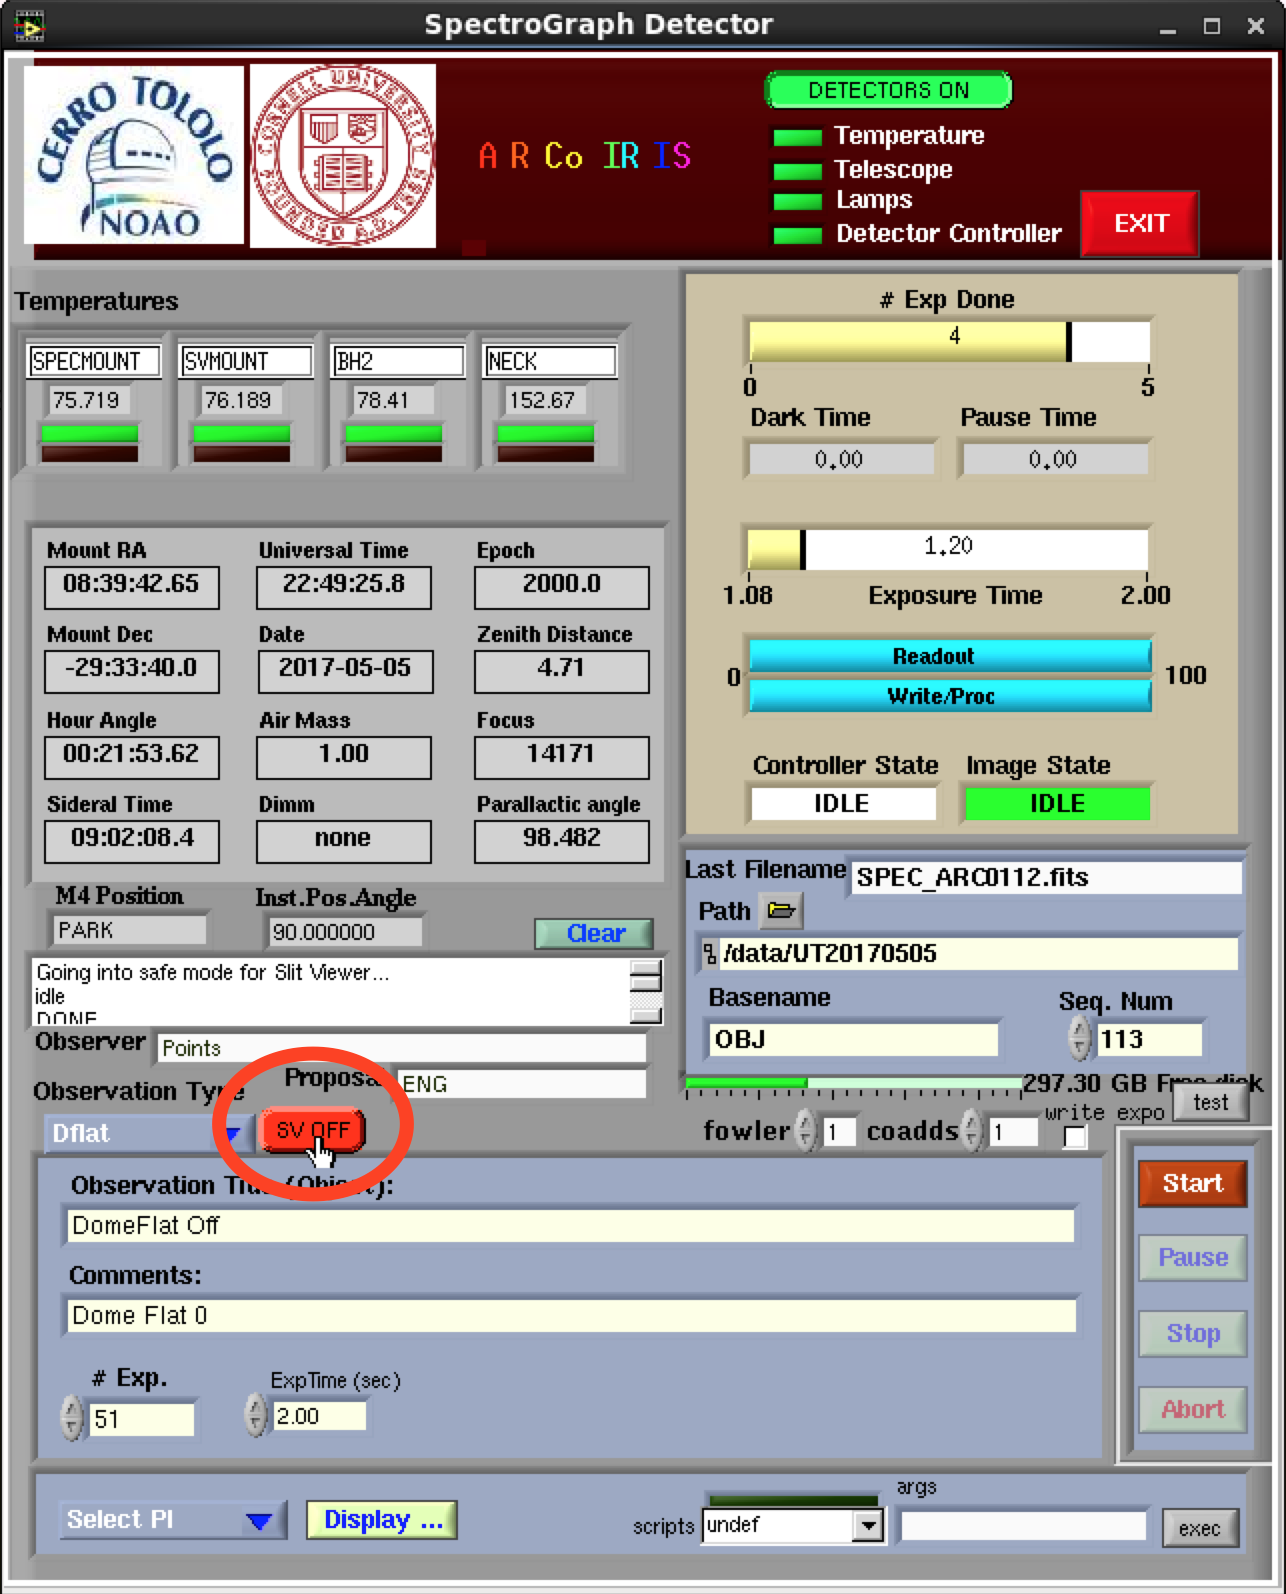
(4) Turn off the SV detector by clicking the SV On button
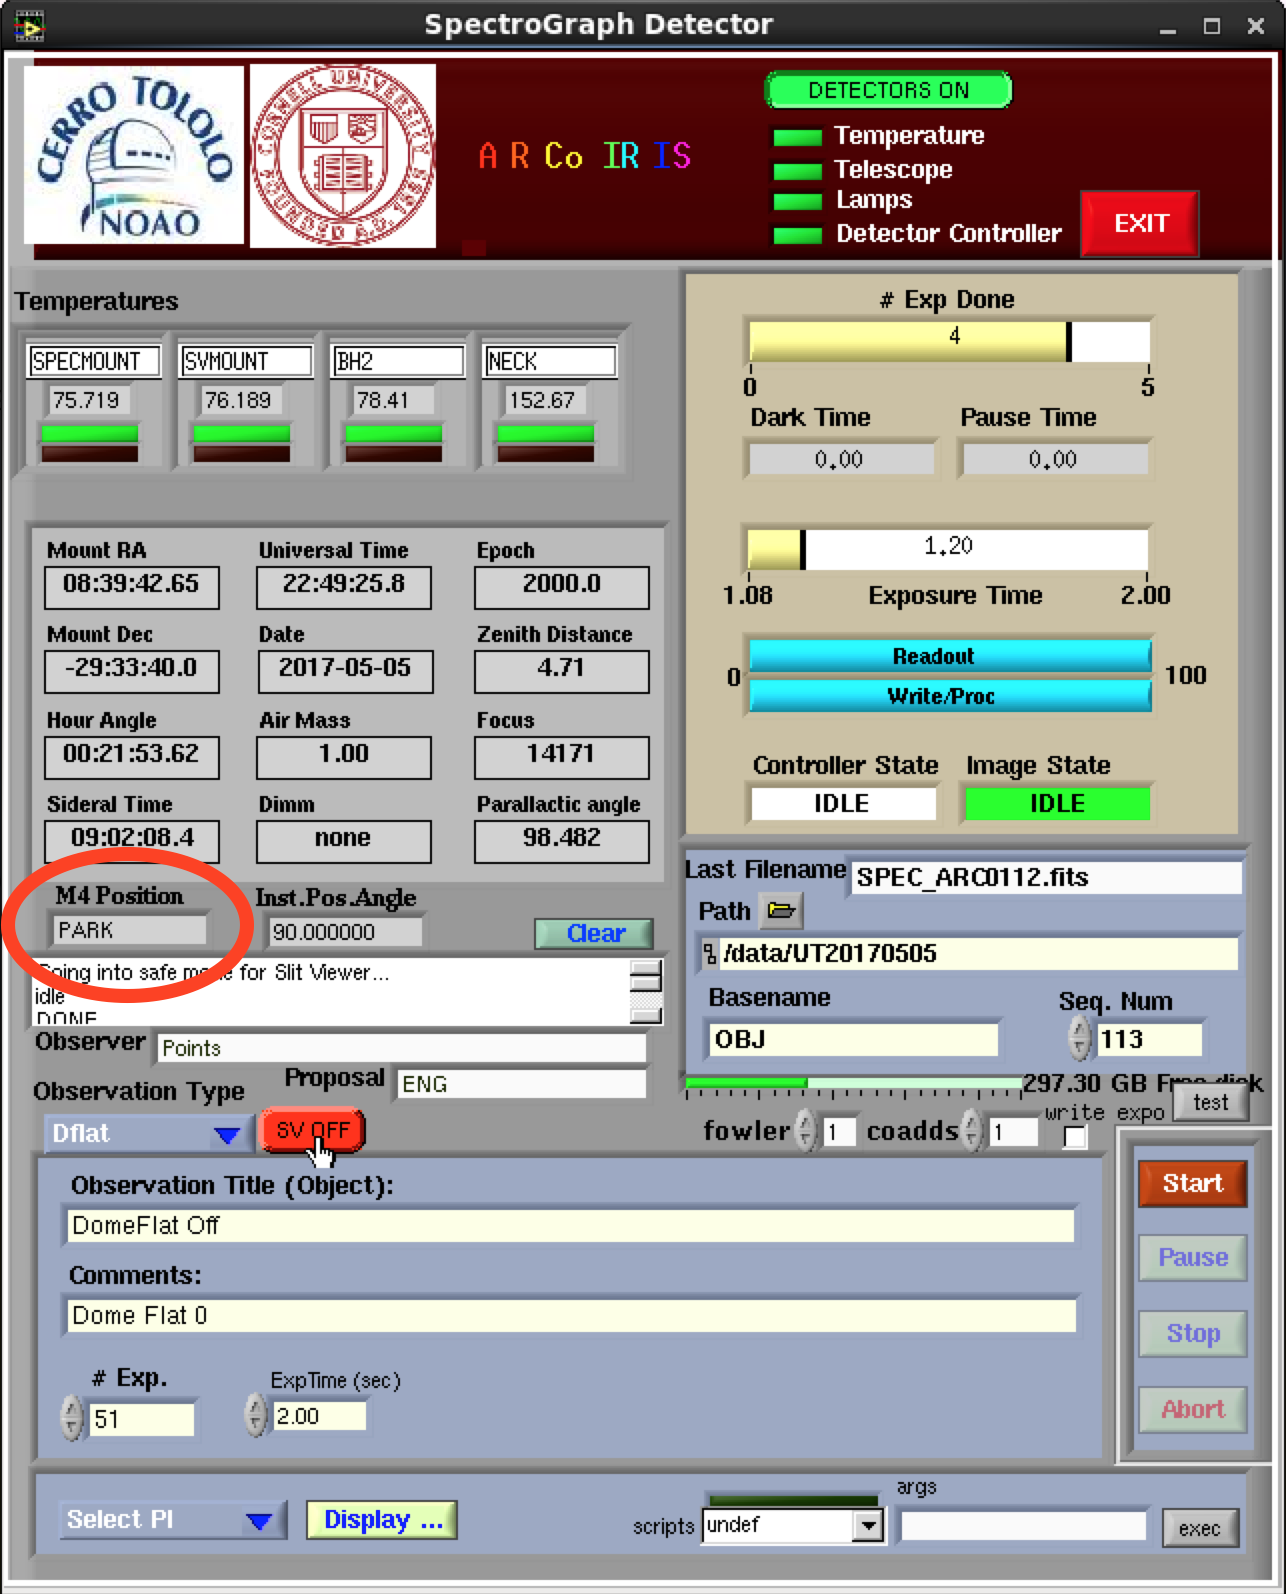
(5) Make sure that the calibration system mirror, M4, is in the "Park" position.
(6) Ask the telescope operator set the dome flat lamp intensity to 40%.
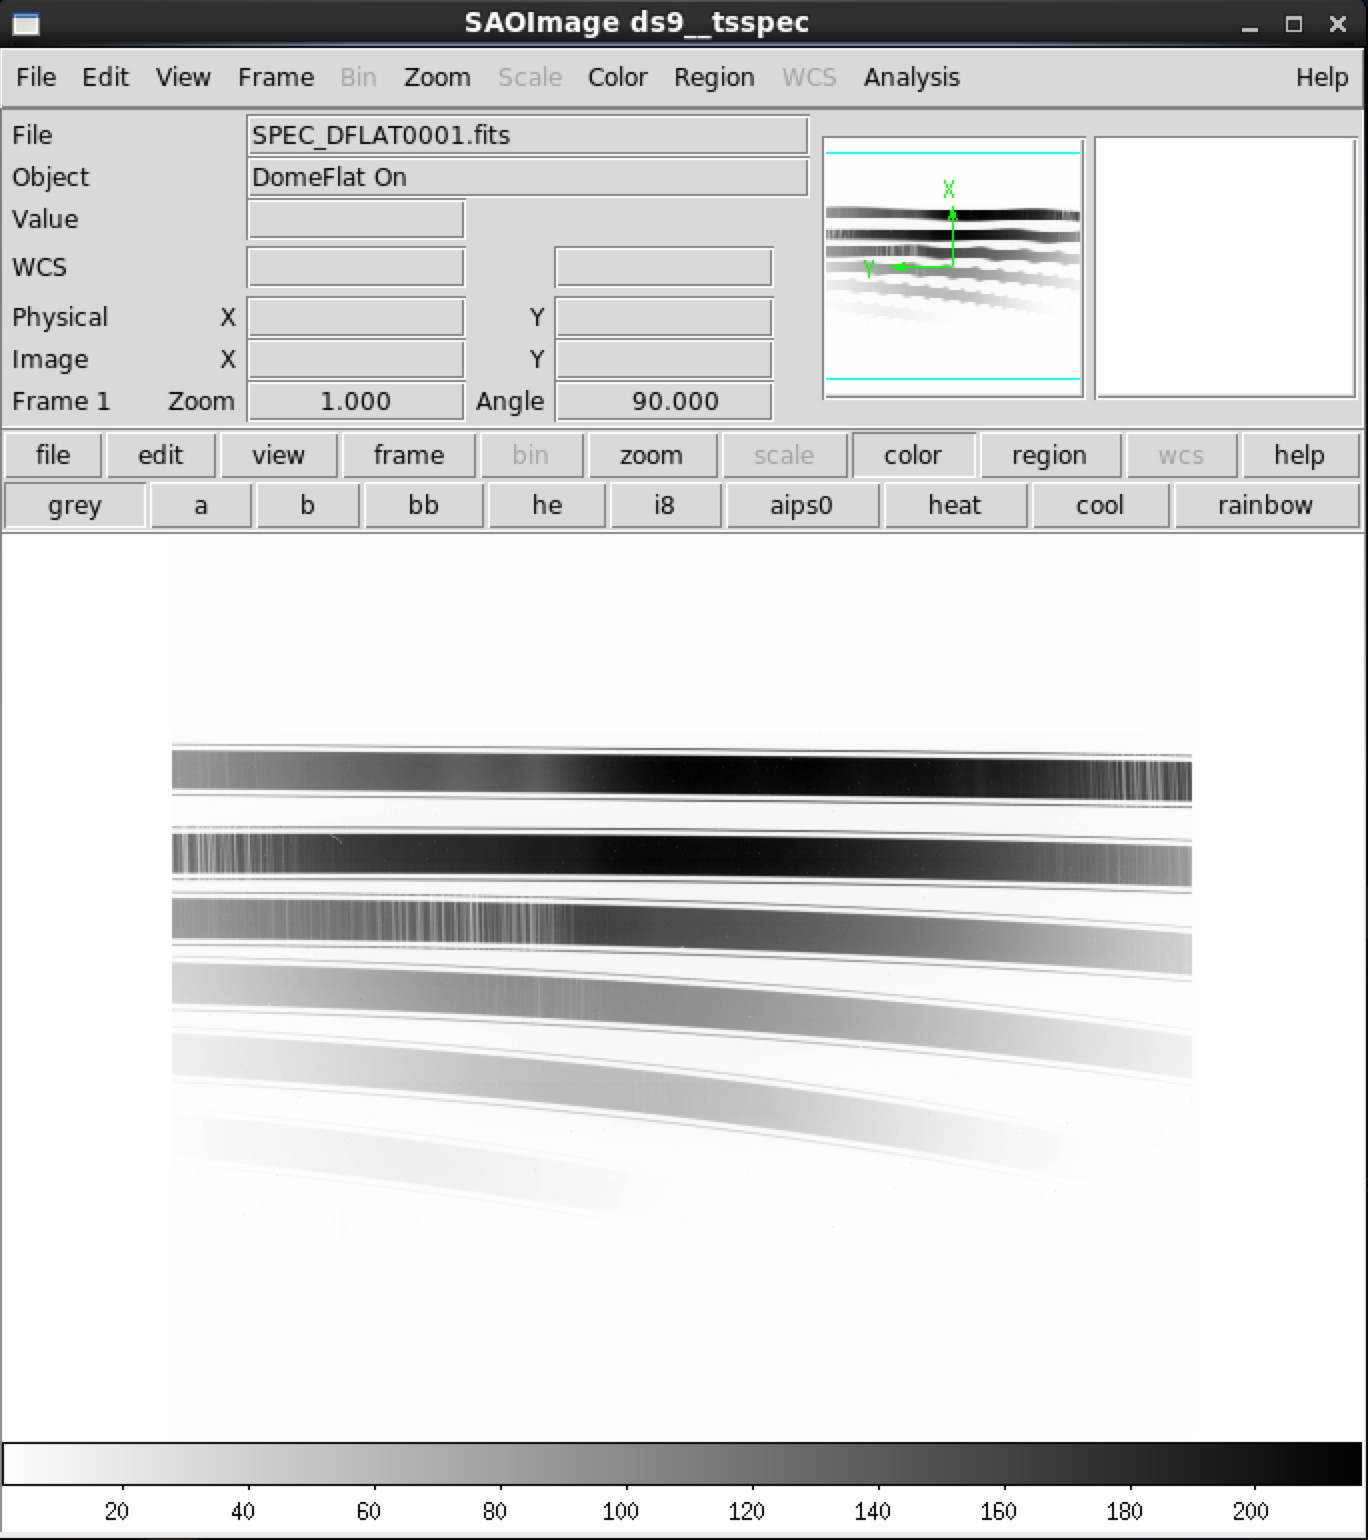
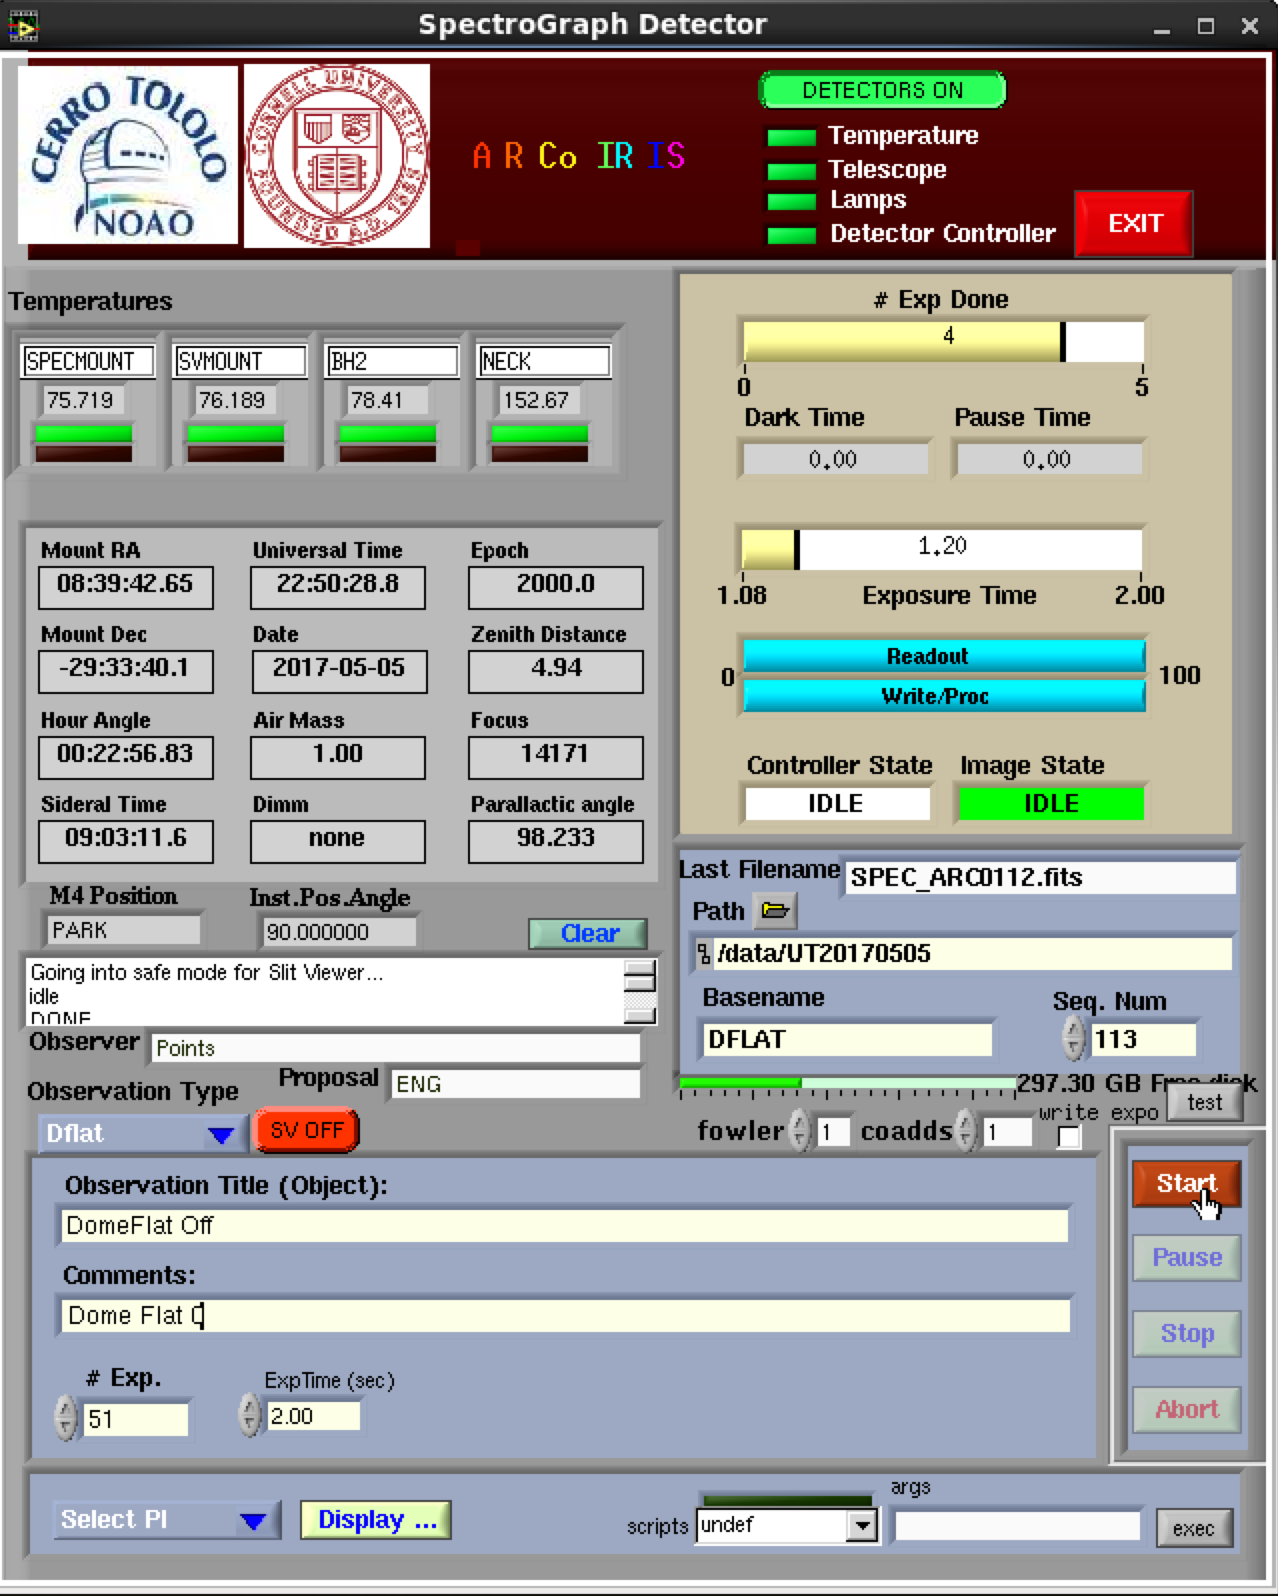
(7) Take dome flats with an exposure time of 2 seconds by pressing the "Start" button.
(8) Turn the dome flat lamps off, i.e., lamp intensity 0%.
(9) Take dome flats with the lamps off and an exposure time of 2 seconds by pressing the "Start" button.
(10) Ask the telescope operator to place the calibration system mirror, M4, in the "Lamps" position.
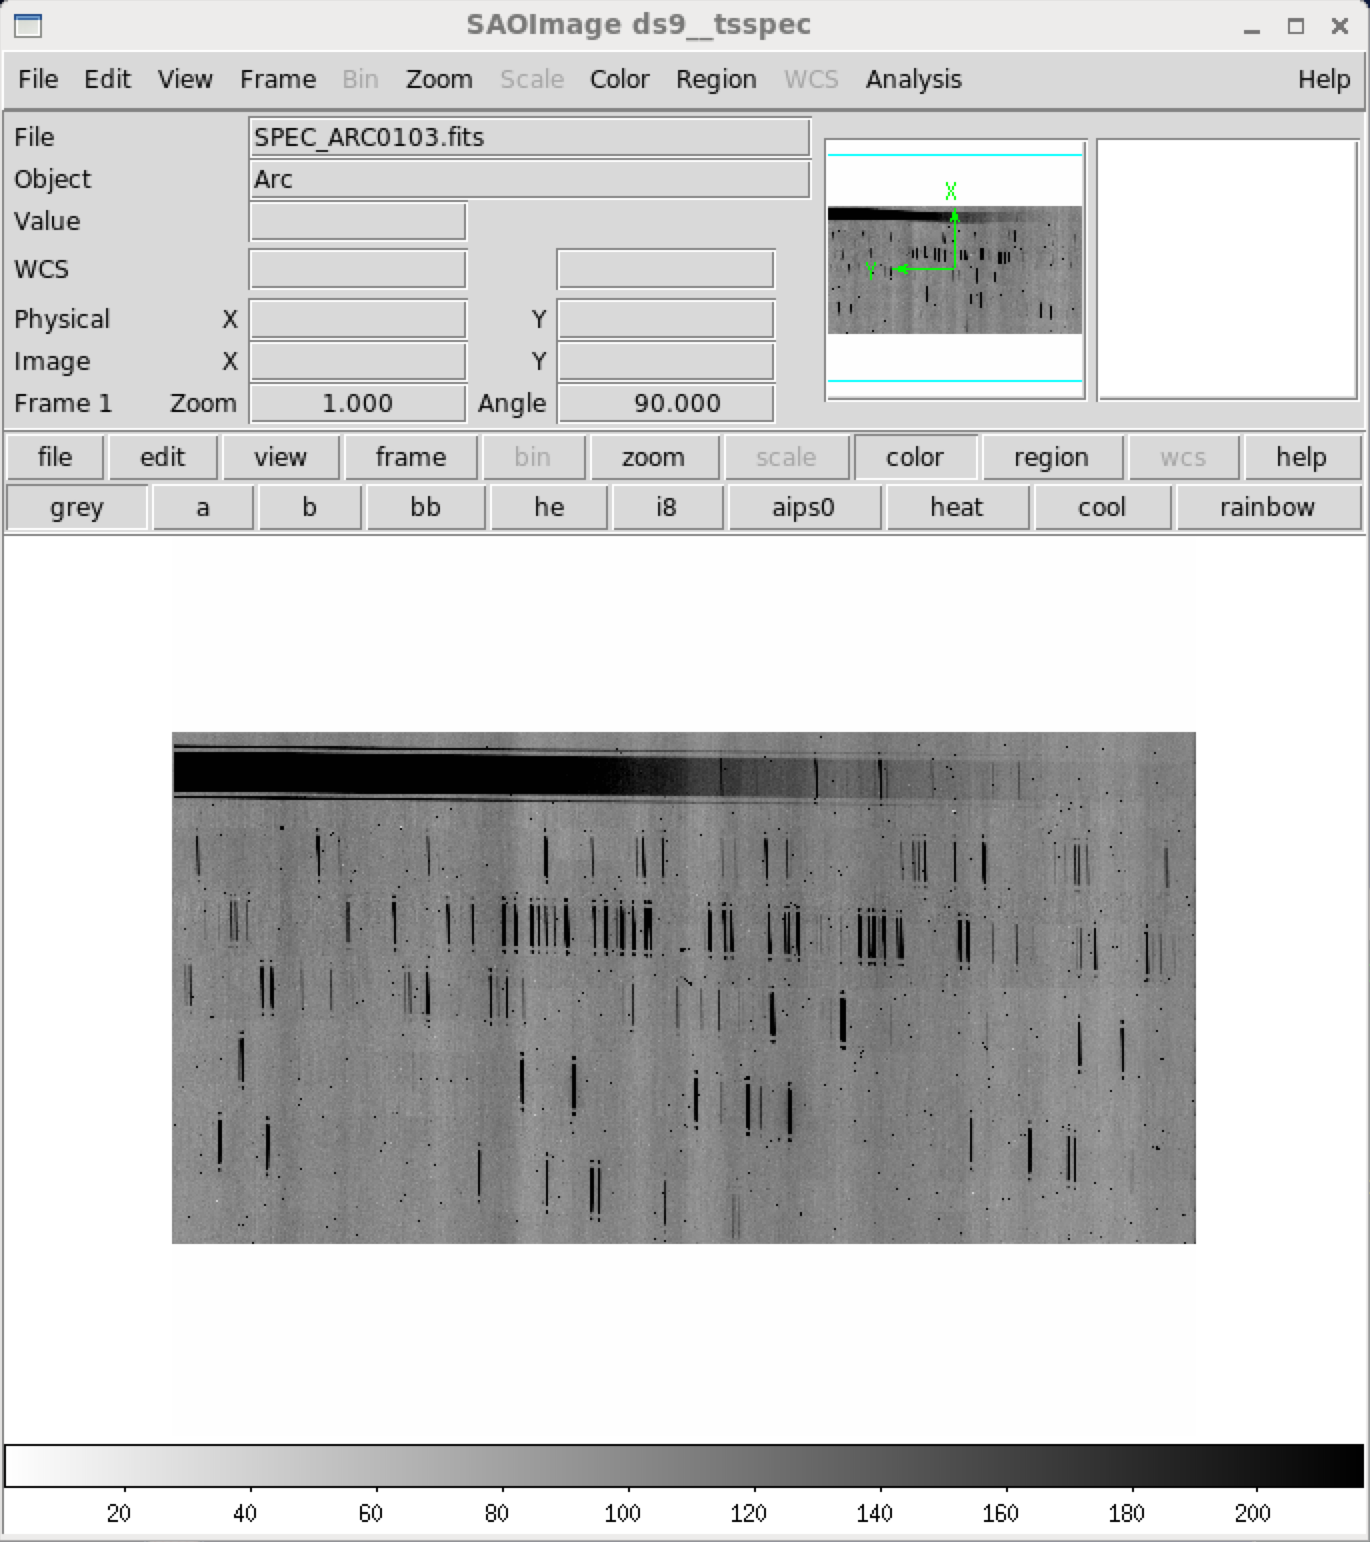
(11) Select the Observation Type to be "Calibration" and select the "Hollow Cathode" lamp. The hollow cathode lamp is a CuHeAr that shows He and Ar lines.
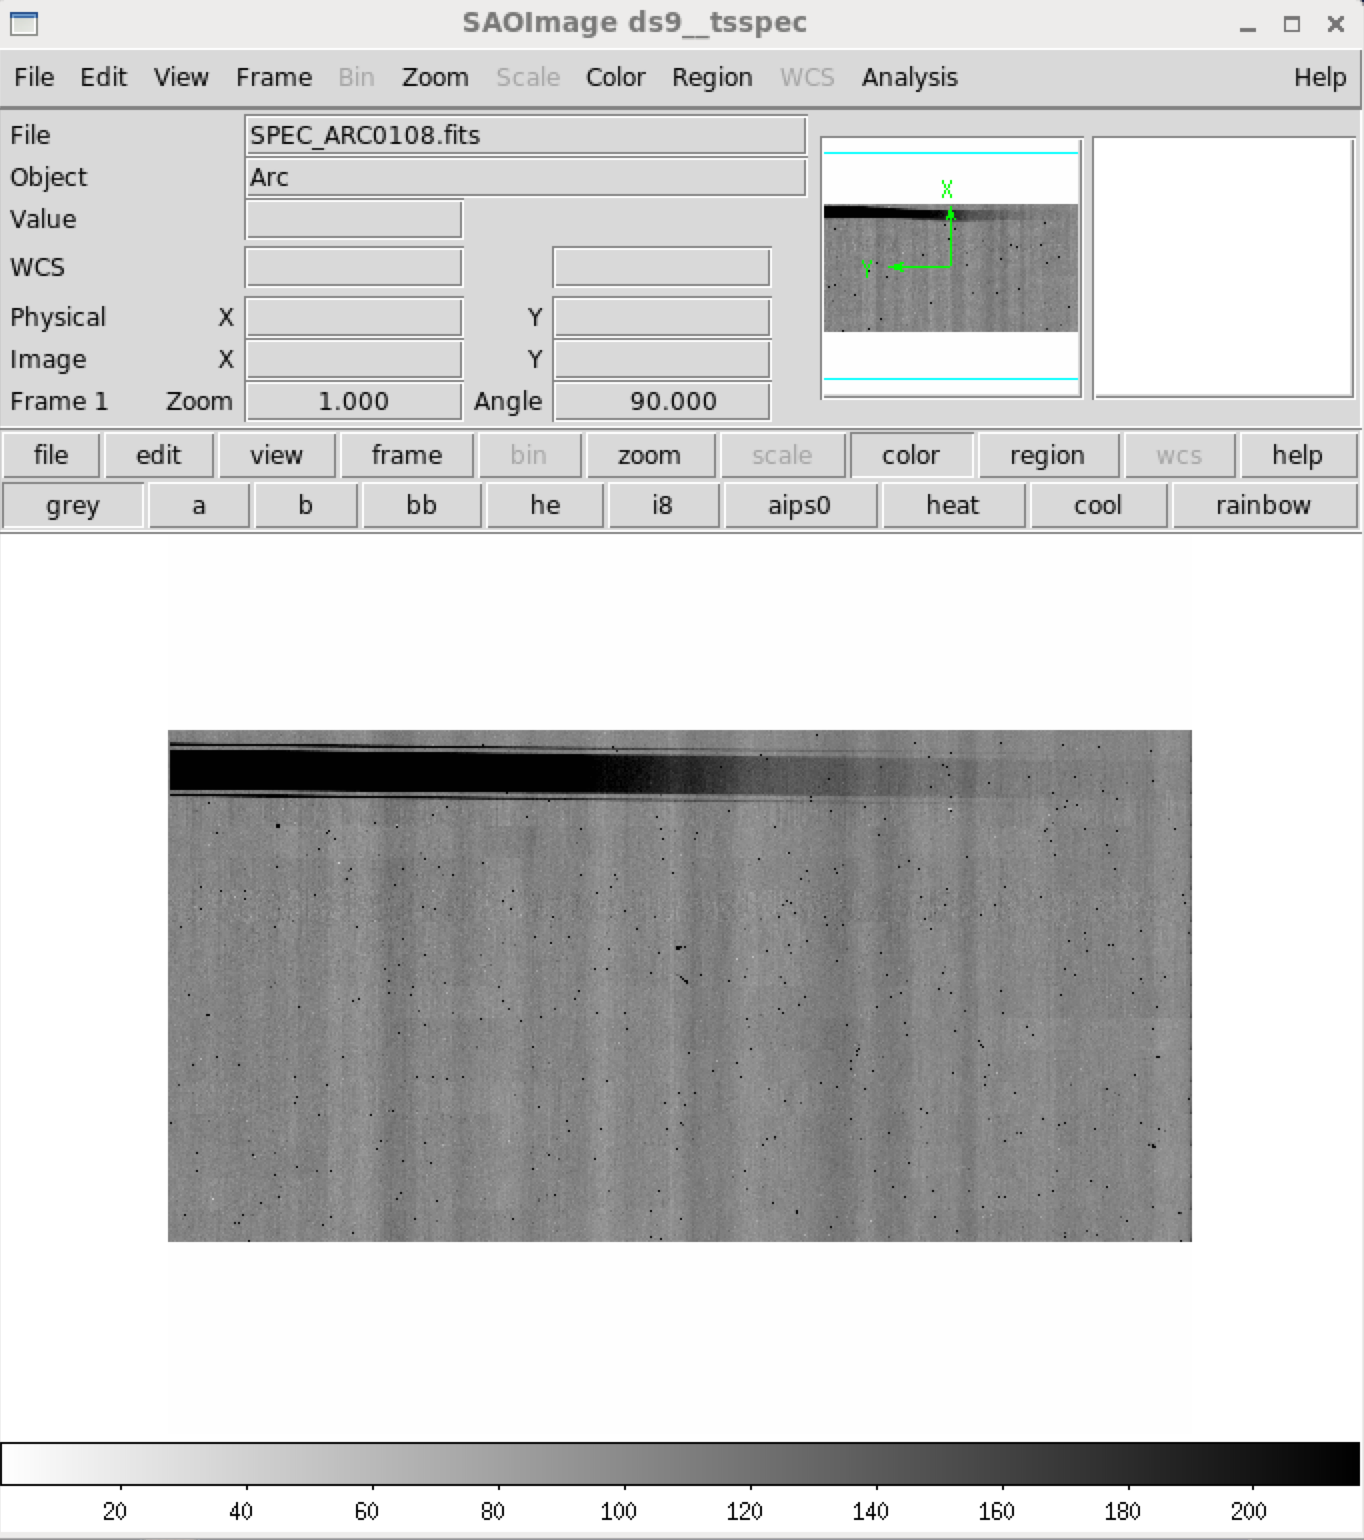
(12) Take five 2-second arc lamp exposures with the lamp on and five 2-second exposures with the lamp off. This will be done automatically by clicking on the "Start" button in the Spectrograph Detector window.
Imaging Calibrations:
Some observers may want use the J-band images obtained with the SV detector for science purposes. In this case, they will want to take some dome flats for the SV detector.
(1) Make sure that all dome lights are off.
(2) TripleSpec4 starts with both detectors off. Turn on the detectors by clicking the red "Detectors Off" button in the Spectrograph Detector window.
(3) Select the Observation Type to be "Dflat" in the Spectrograph Detector window.
(4) Make sure that the SV detector is on.
(5) Make sure that the calibration system mirror, M4, is in the "Park" position.
(6) Ask the telescope operator set the dome flat lamp intensity to 4%.
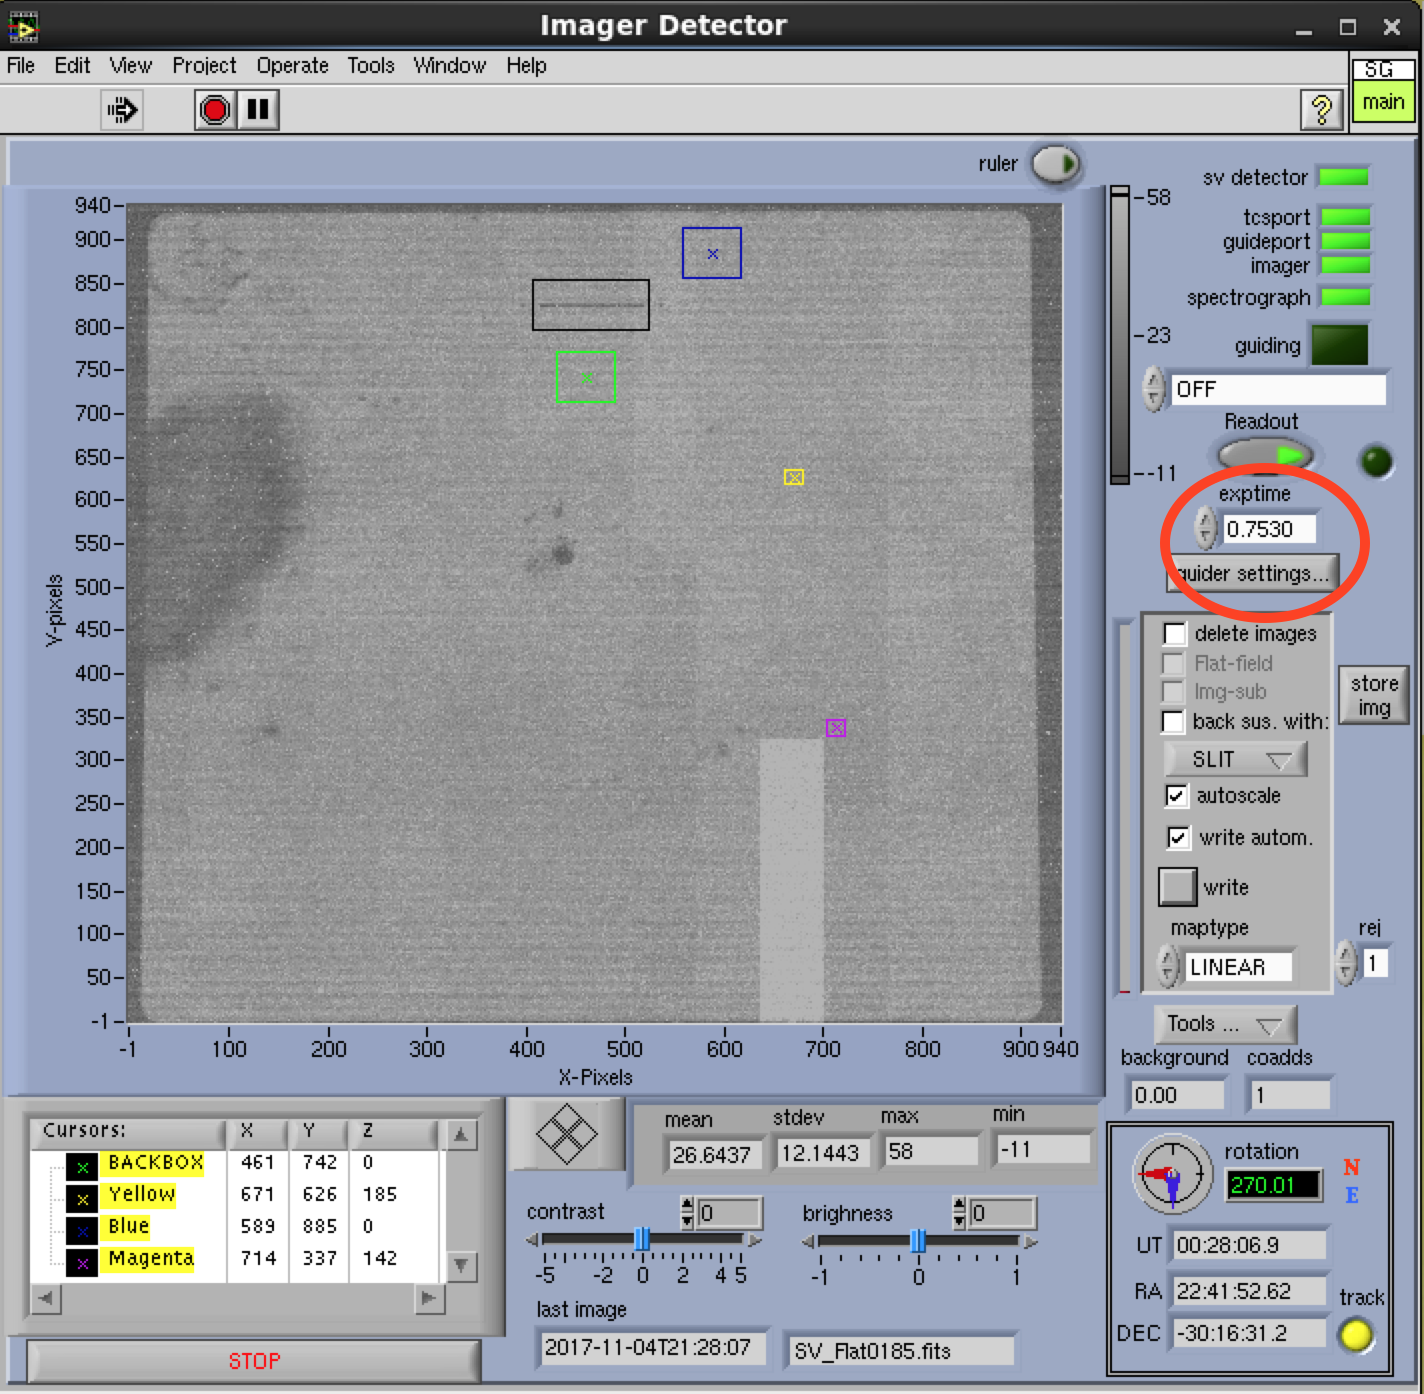
(7) Set the SV Detector to the minimum exposure time (0.75 sec).
(8) Make sure the SV detector Readout is enabled.
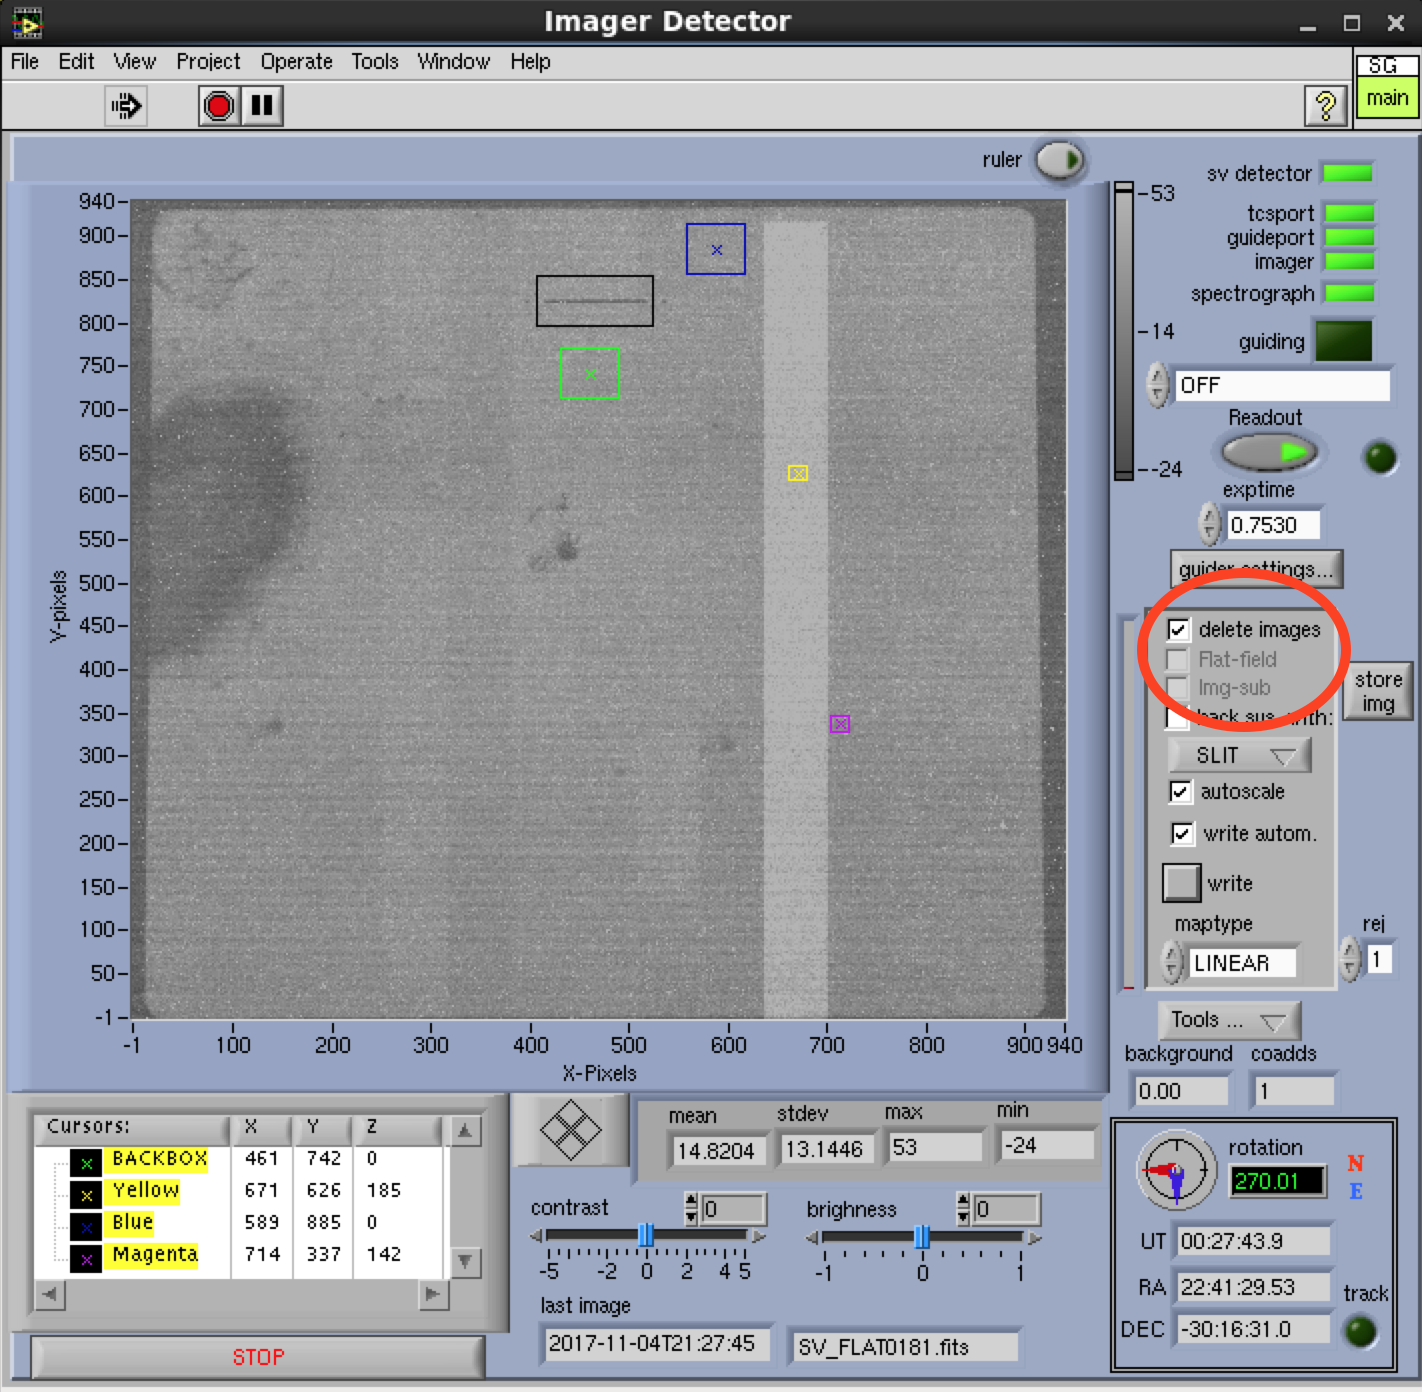
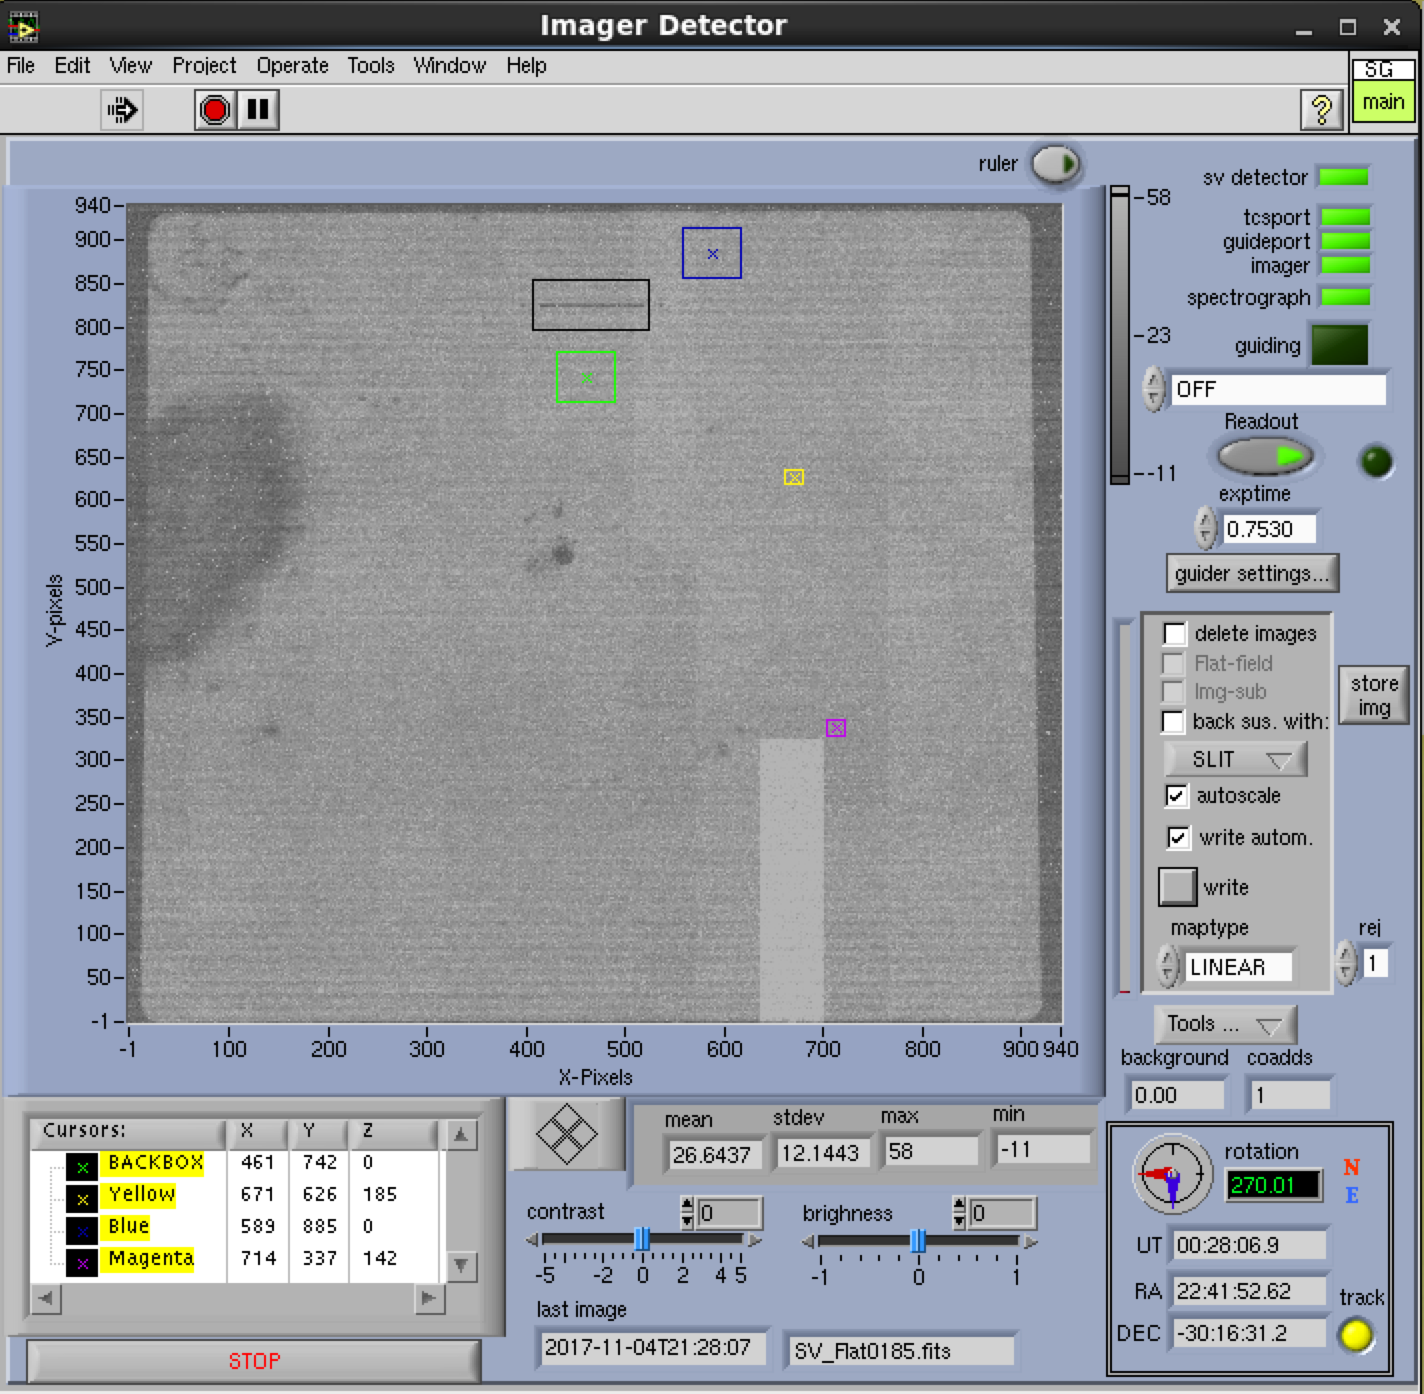
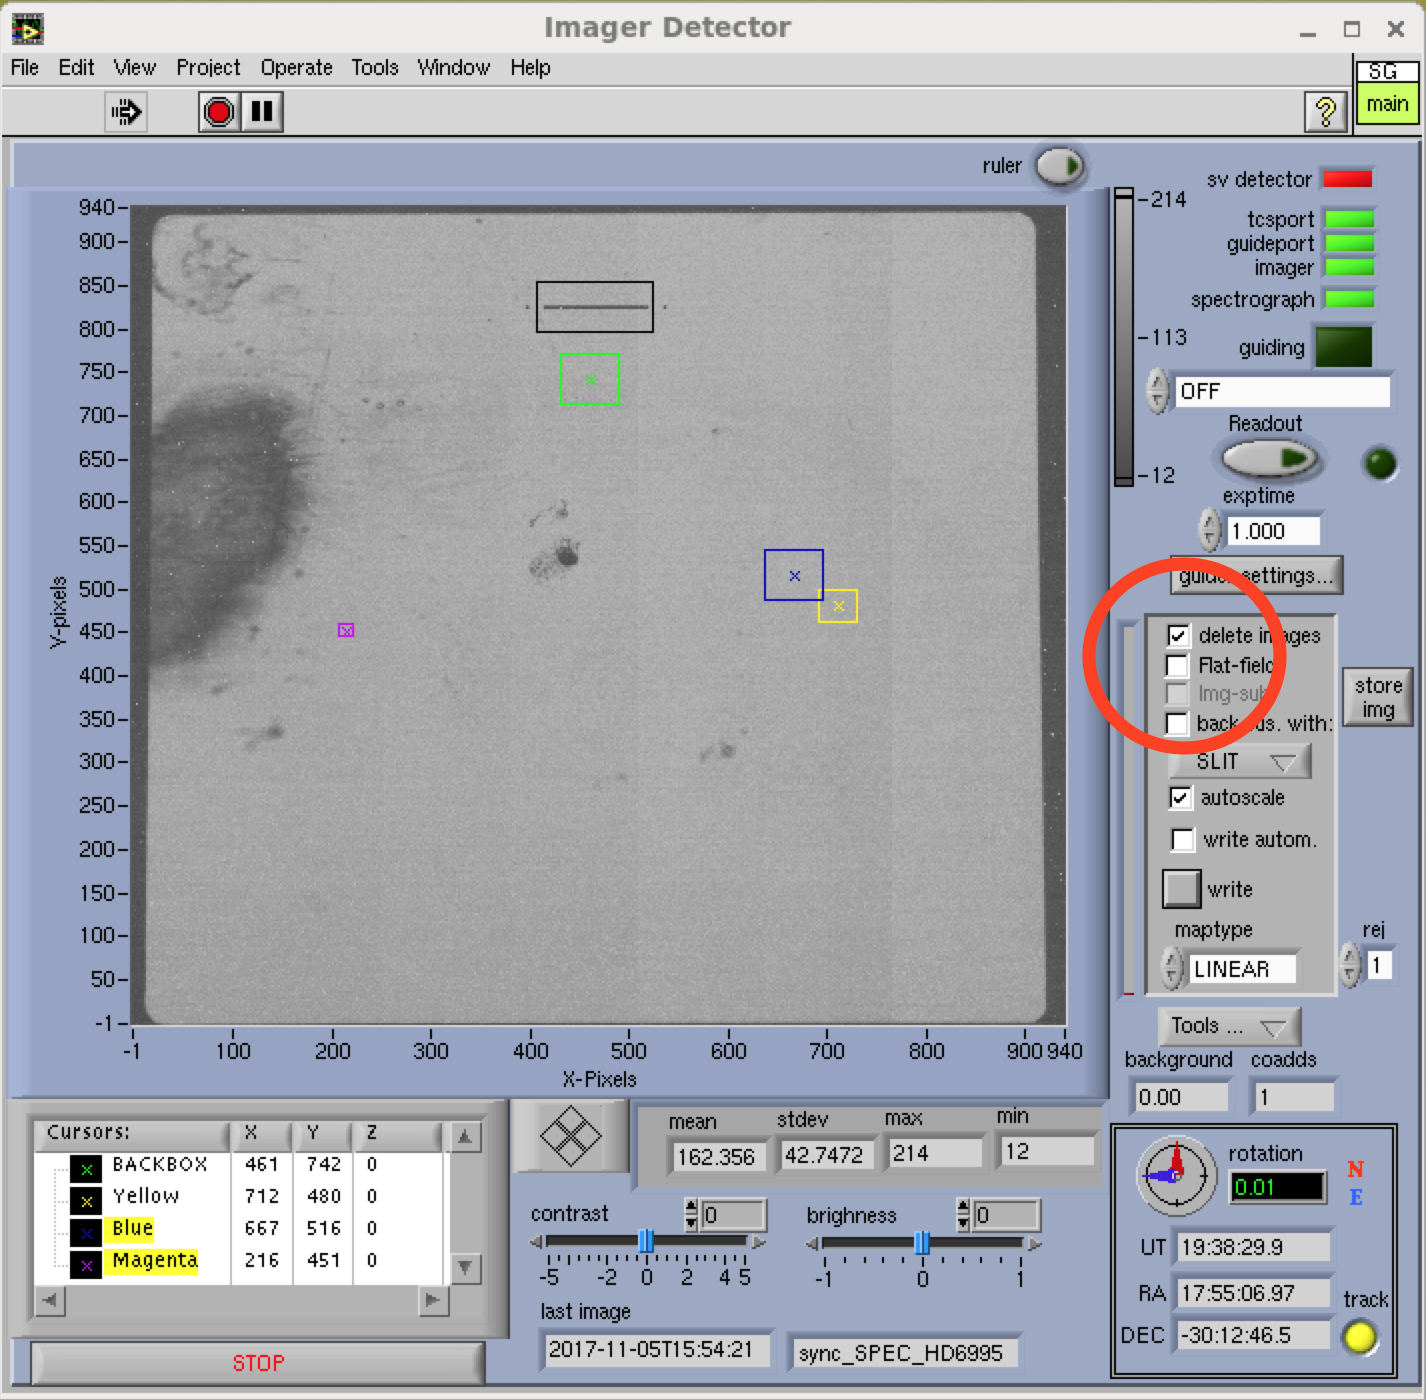
(9) Uncheck the "delete images" box in the SV detector window. This will automatically take SV imaging flats until you recheck the "delete images" button. The data appear in the directory /home2/data/UTYYYYMMDD on tspec0. When you have enough SV imaging flats (~31), recheck the "delete images" box.
(10) Ask the telescope operator to set the dome flat lamp intensity to 0%.
(11) Uncheck the "delete images" box in the SV detector window. This will automatically take SV imaging flats with the lamps off until you recheck the "delete images" button. The data appear in the directory /home2/data/UTYYYYMMDD on tspec0. When you have enough SV imaging flats (~31), recheck the "delete images" box.
Telescope Zero-Point:
(1) Ask the telescope operator to move to a "bright" star near zenith.
If the telescope pointing is good, the star should appear in the 4' by 4' FOV in the "Image Detector" window.
(2) You can then move the star to the region of the imaging detector where you would like to zero-point with offset tool.
(3) The star will now be centered in the field.
Telescope Focus:
(1) Move the telescope to a field. This can be one of your science fields or your zero-point field. Make sure that the guiding is turned off.
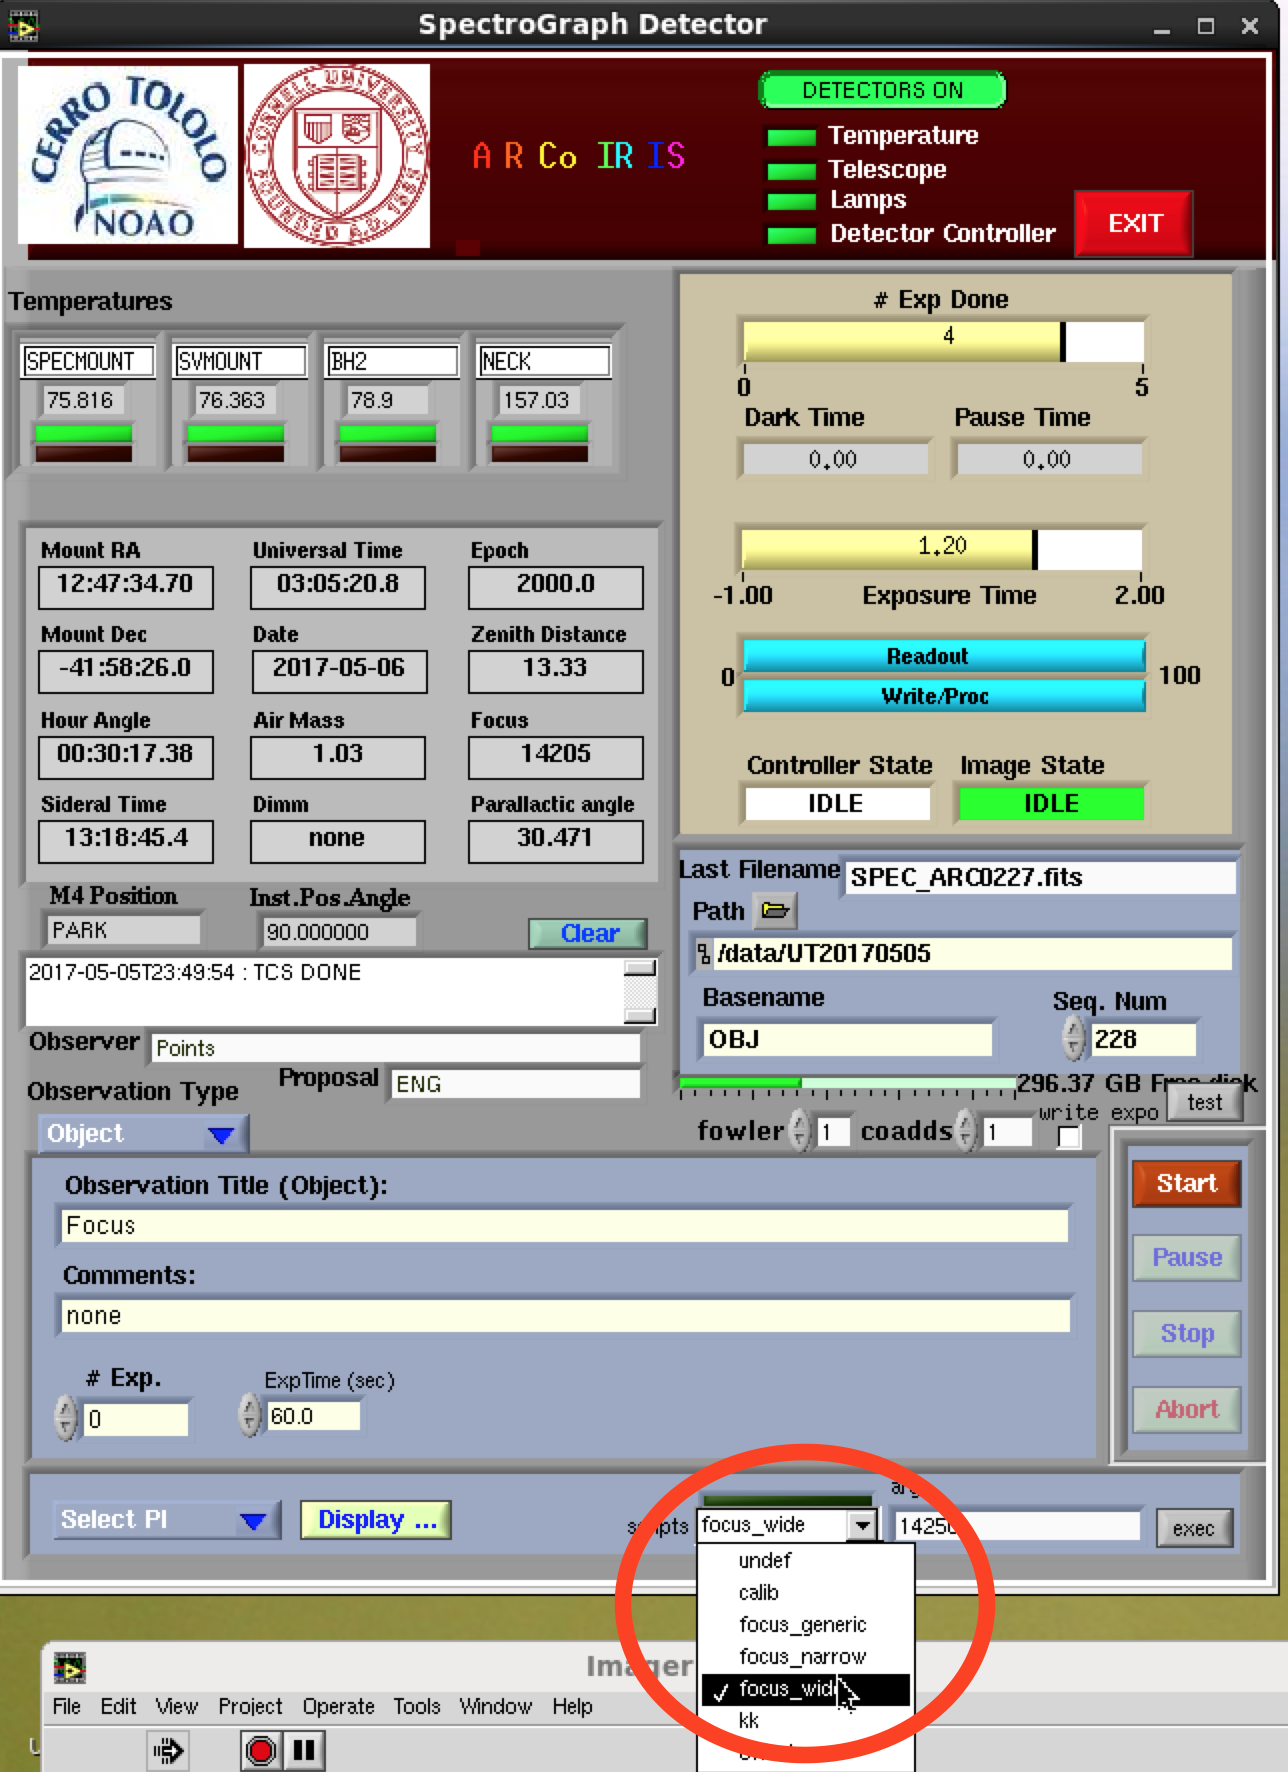
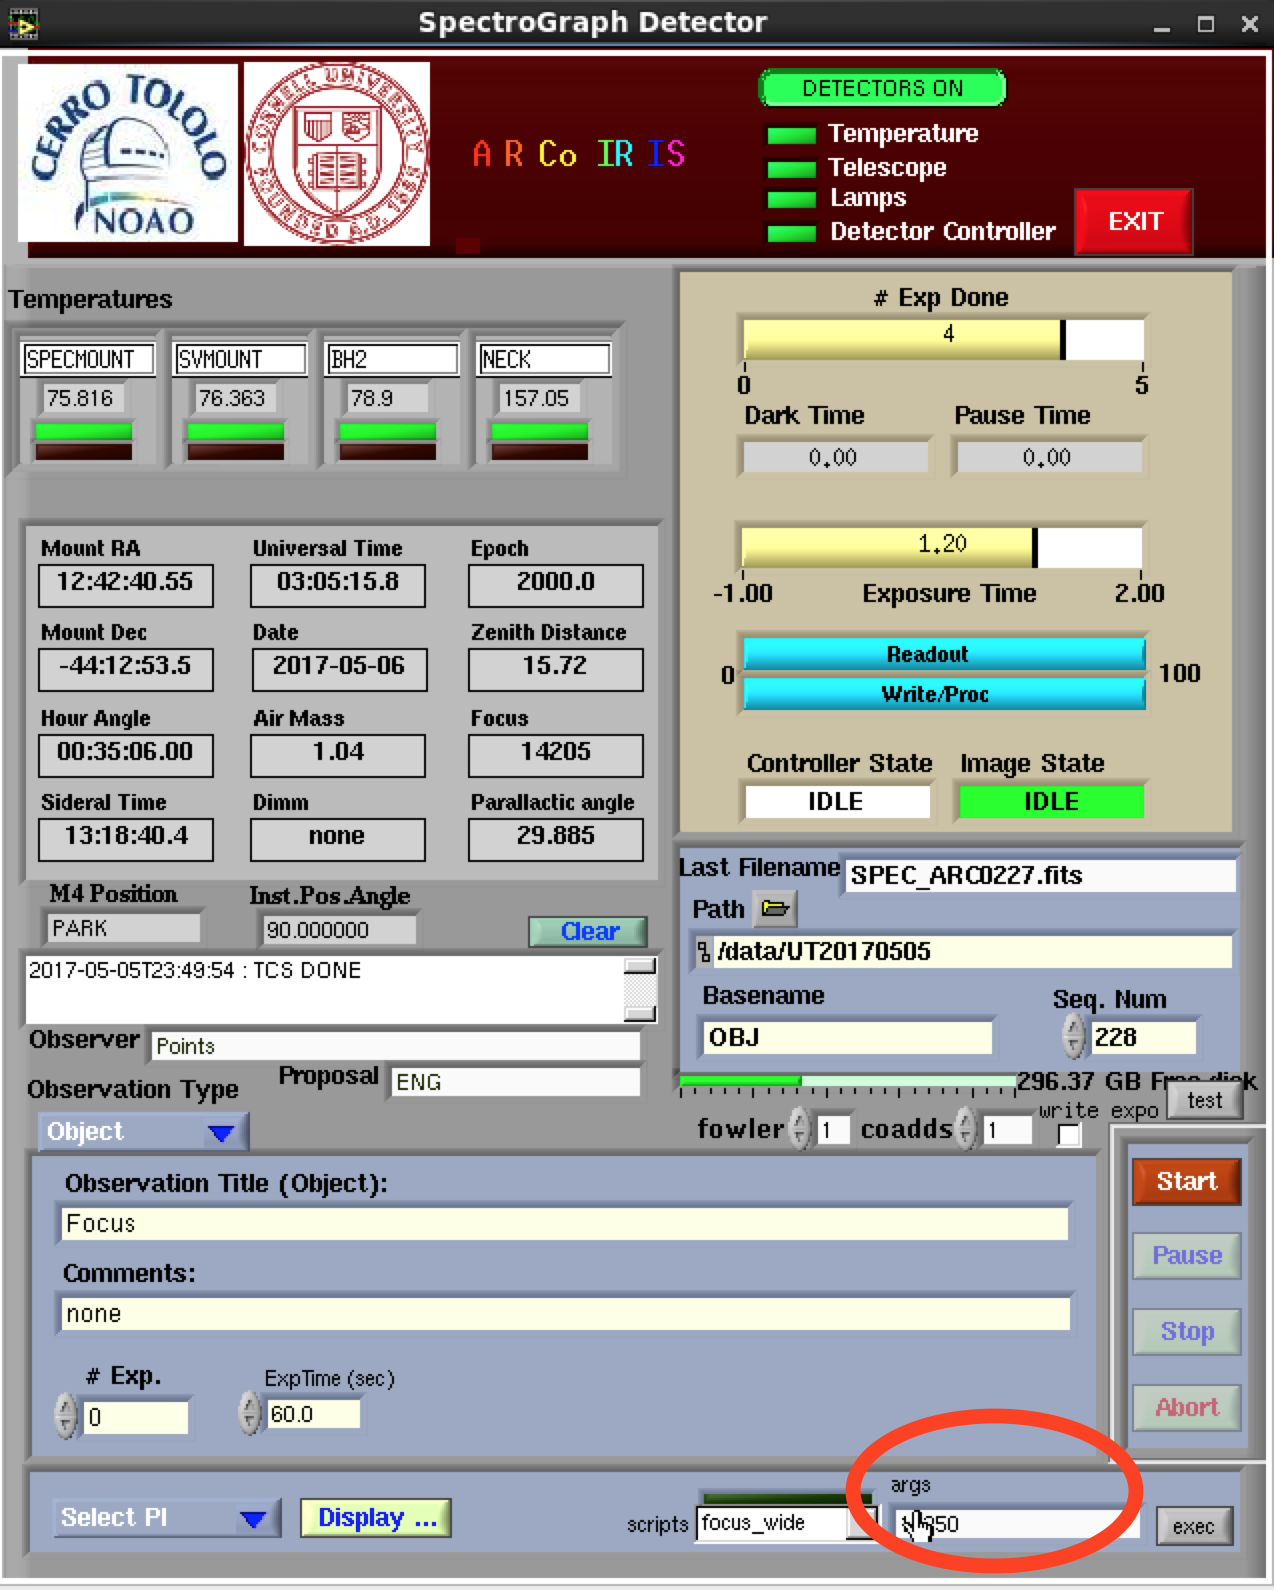
(2) Select the "Focus Wide" script in the Spectrograph Detector window
(3) Ask the telescope operator for the appropriate best focus value that is calculated from the TCS. This value will be the middle value of the focus sequence. Enter the value in the "args" box next to the script menu.
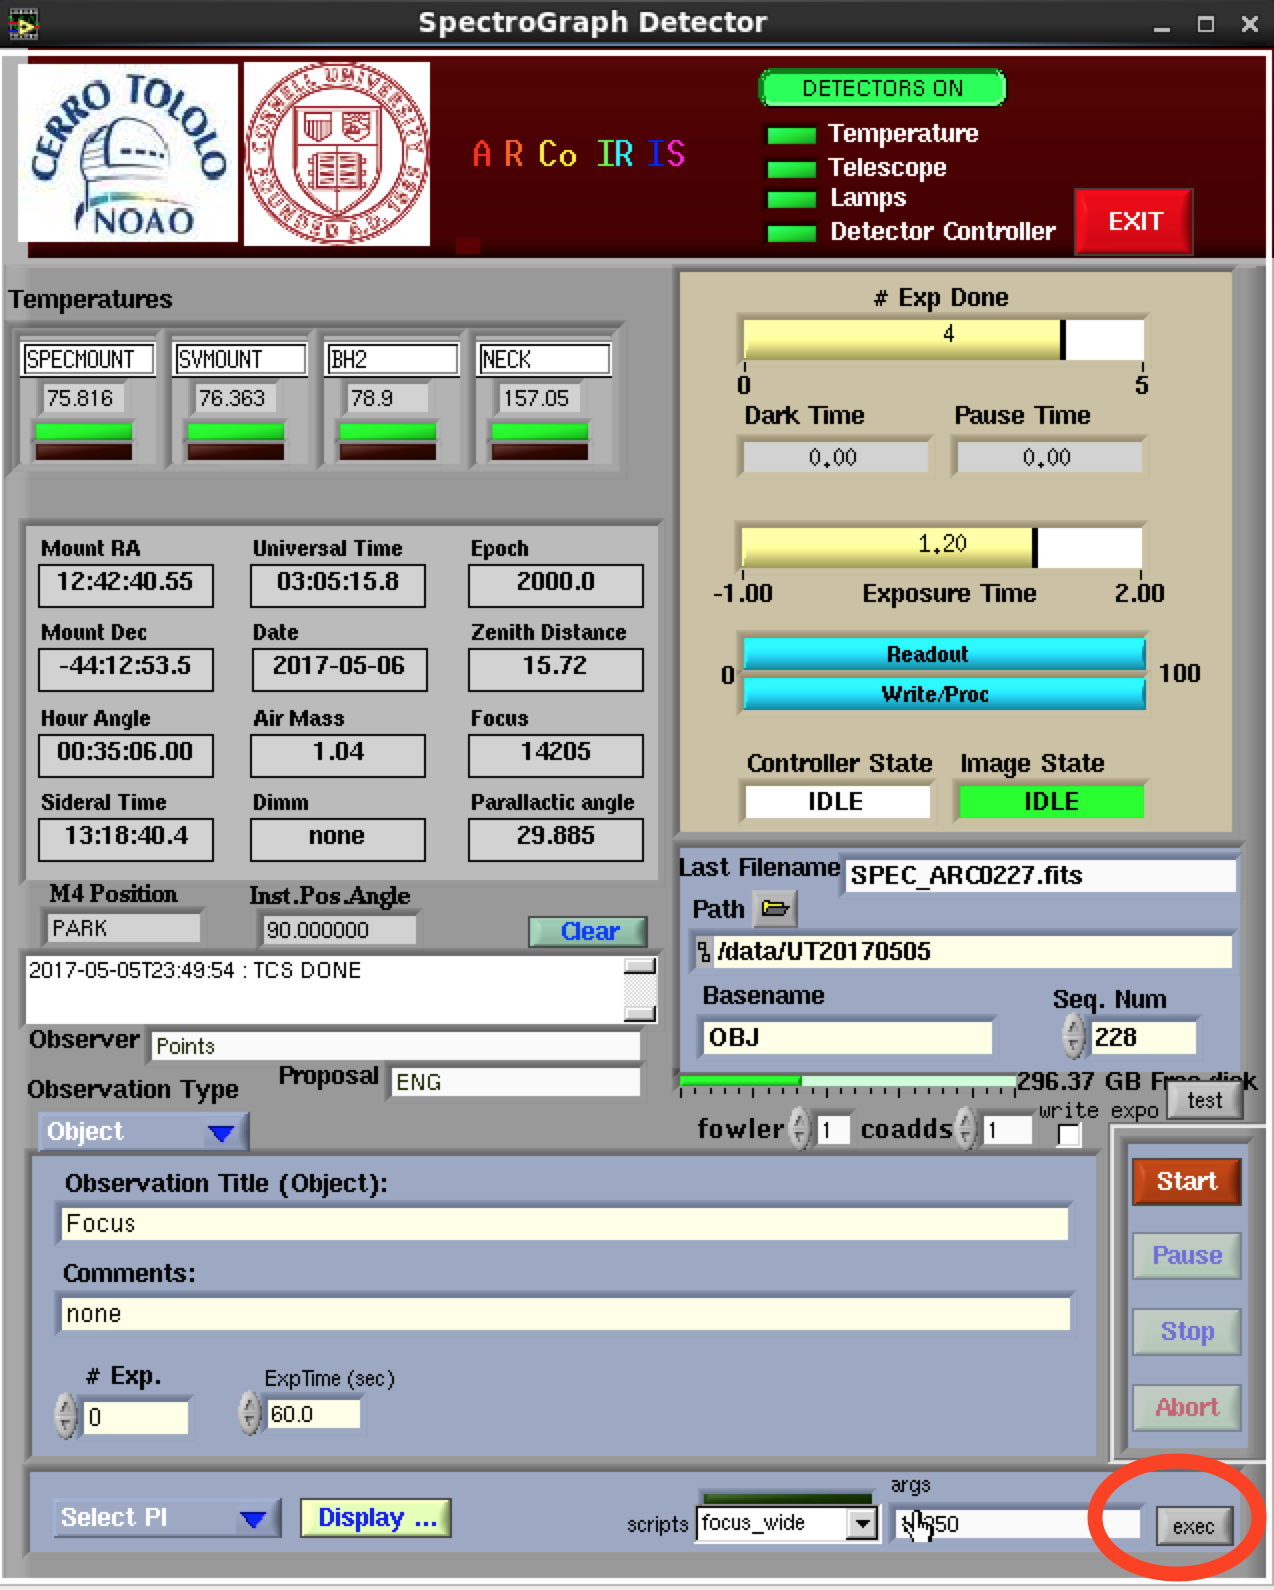
(4) Execute the script by pressing the "exec" button in the Spectrograph Detector window.
(5) The focus_wide script will now run. It takes seven images of the field at different focus values. The focus value previously entered will be center value.
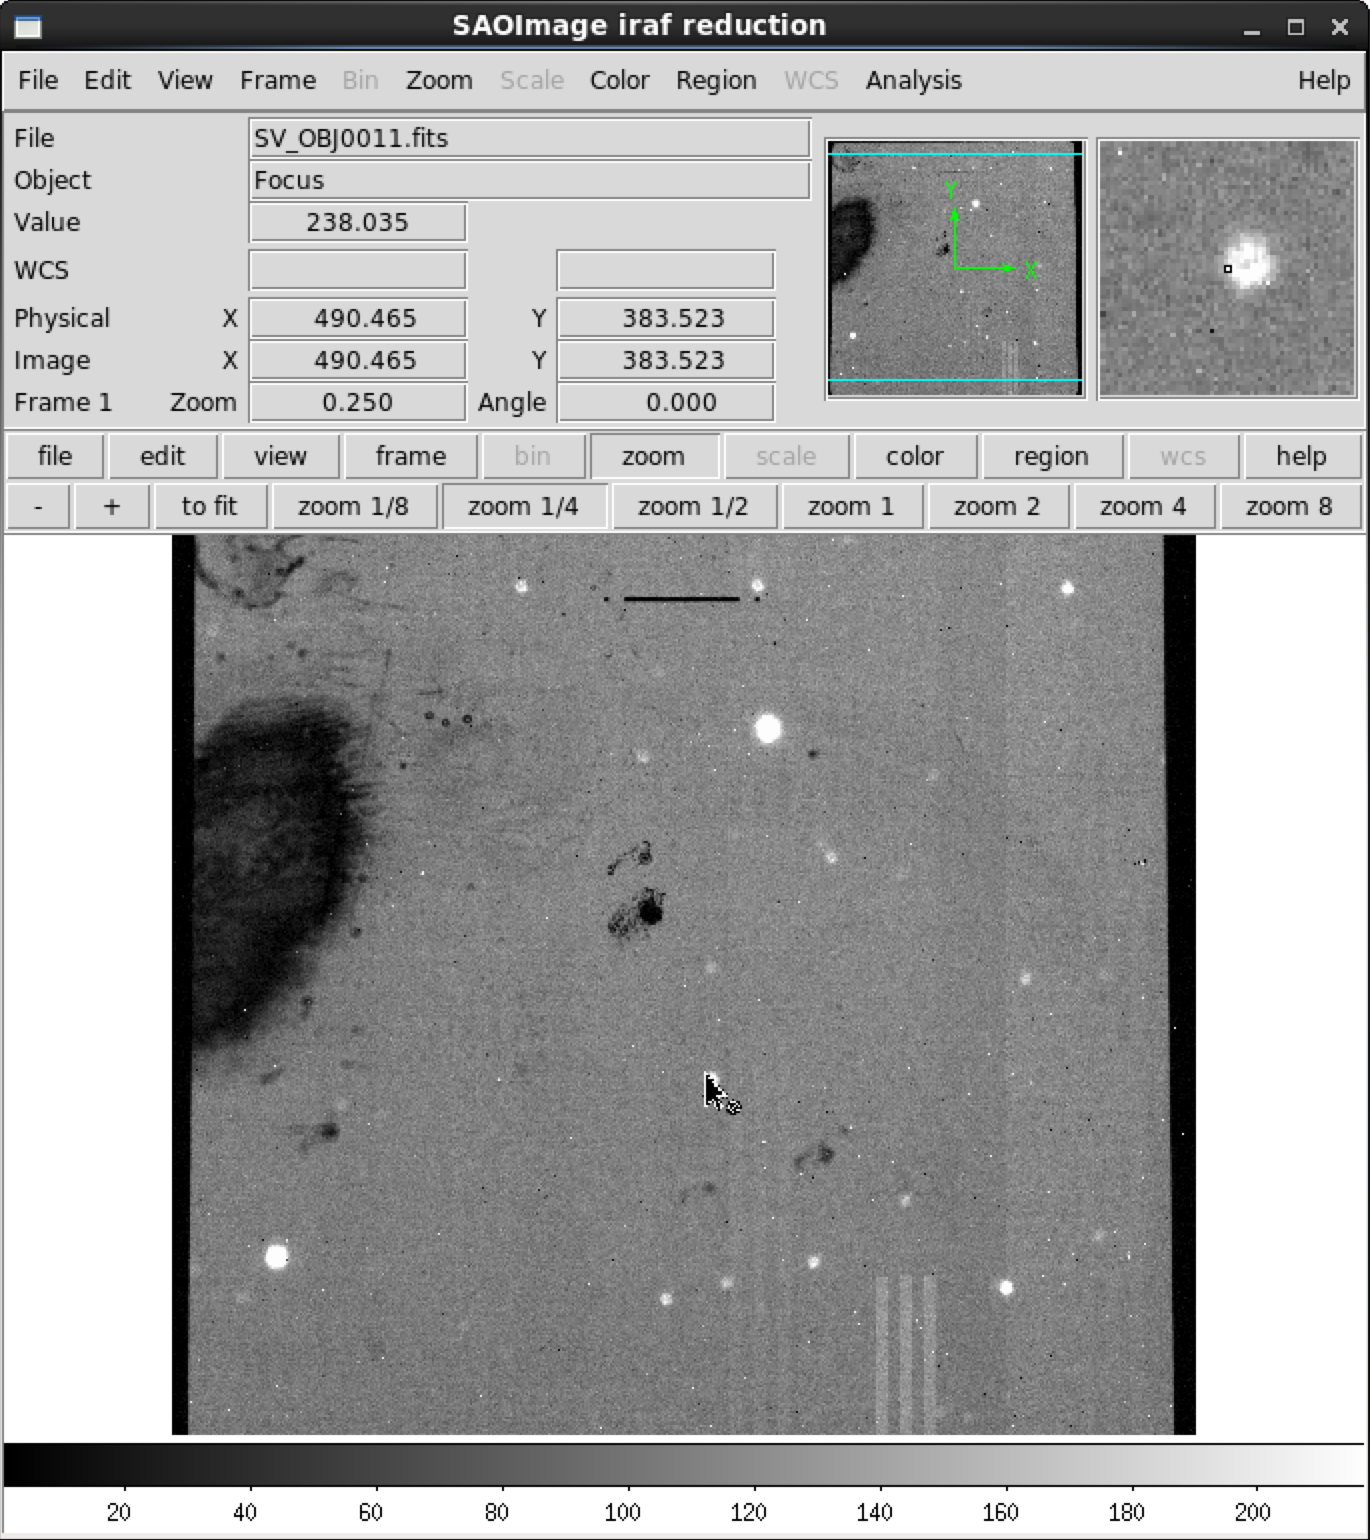
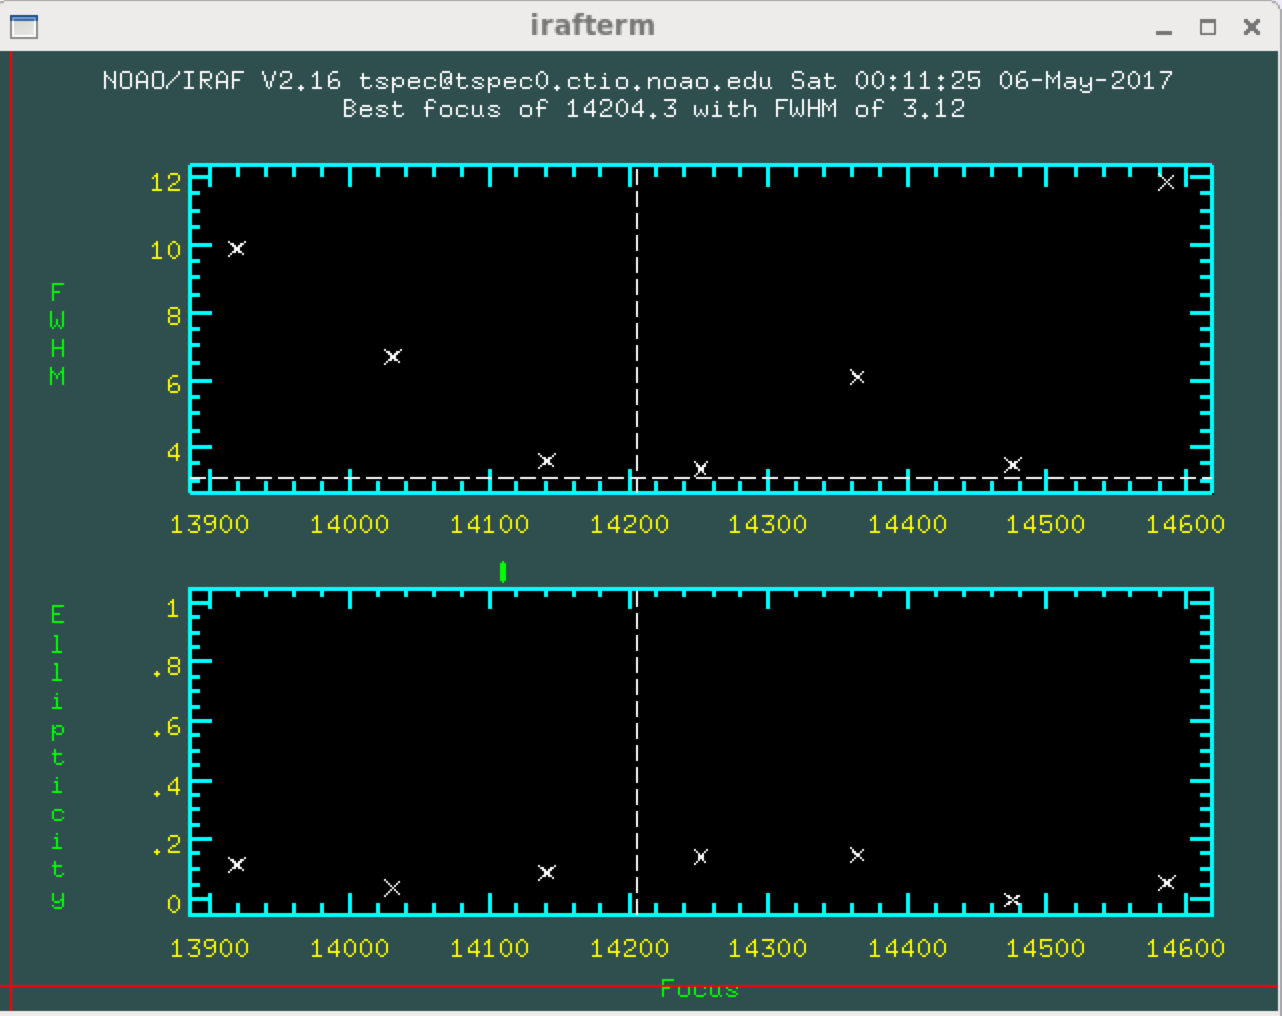
(6) When the script is completed, run the "ts4focus" task in the IRAF window. Select stars by marking them with the "m" key and hit "q" to quit.
(7) The "ts4focus" task will then plot a curve of FWHM of the measured star(s) versus focus.
(8) You should see a parabola with the best focus noted. If not you can display the images in IRAF and examine them with the "imexam" task.
Object Acquisition:
For all objects:
(1) Ask the telescope operator to set the instrument to the desired position angle.
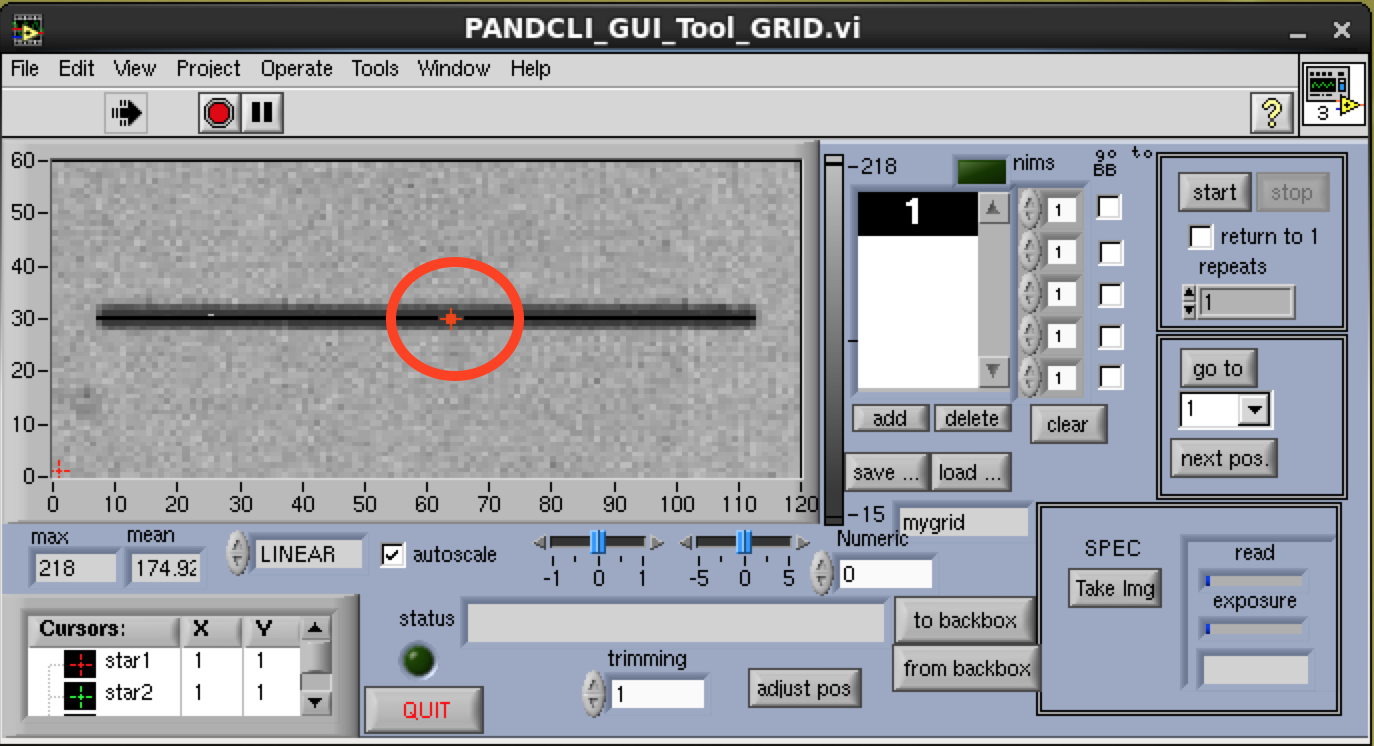
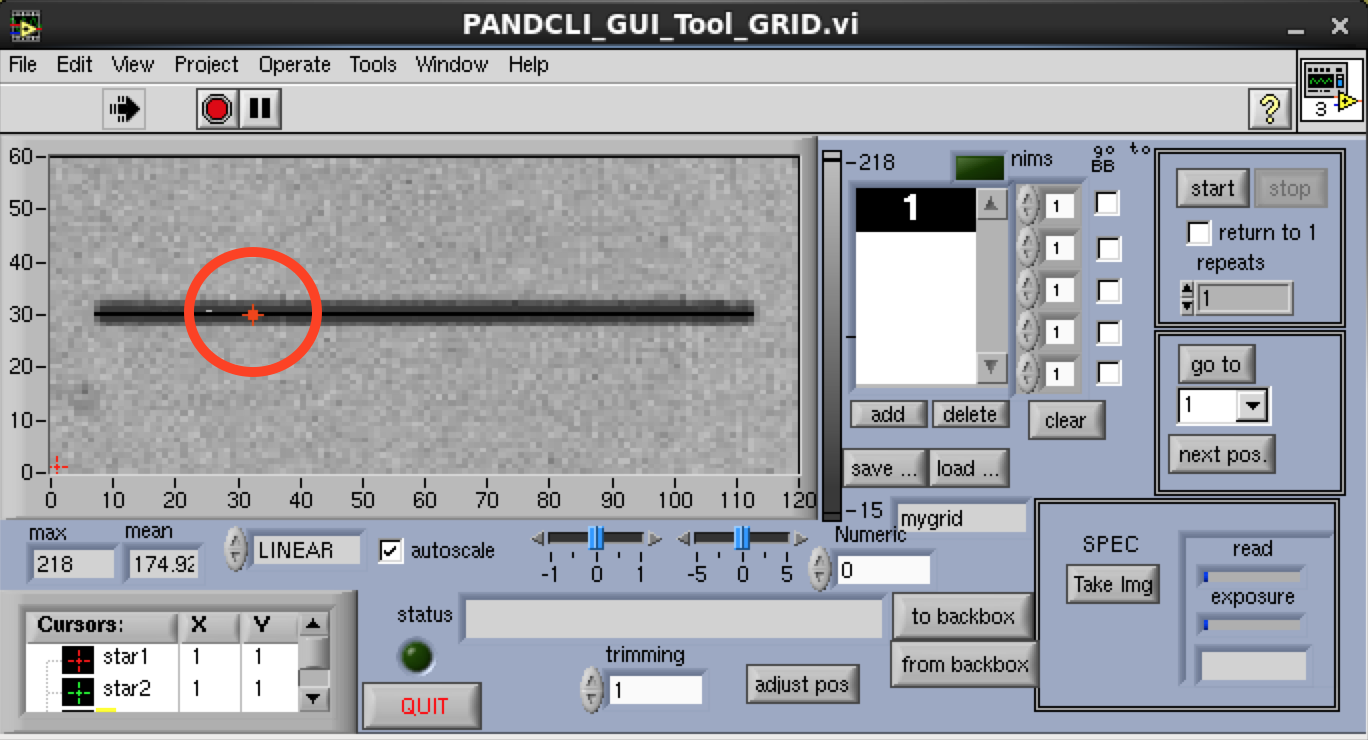
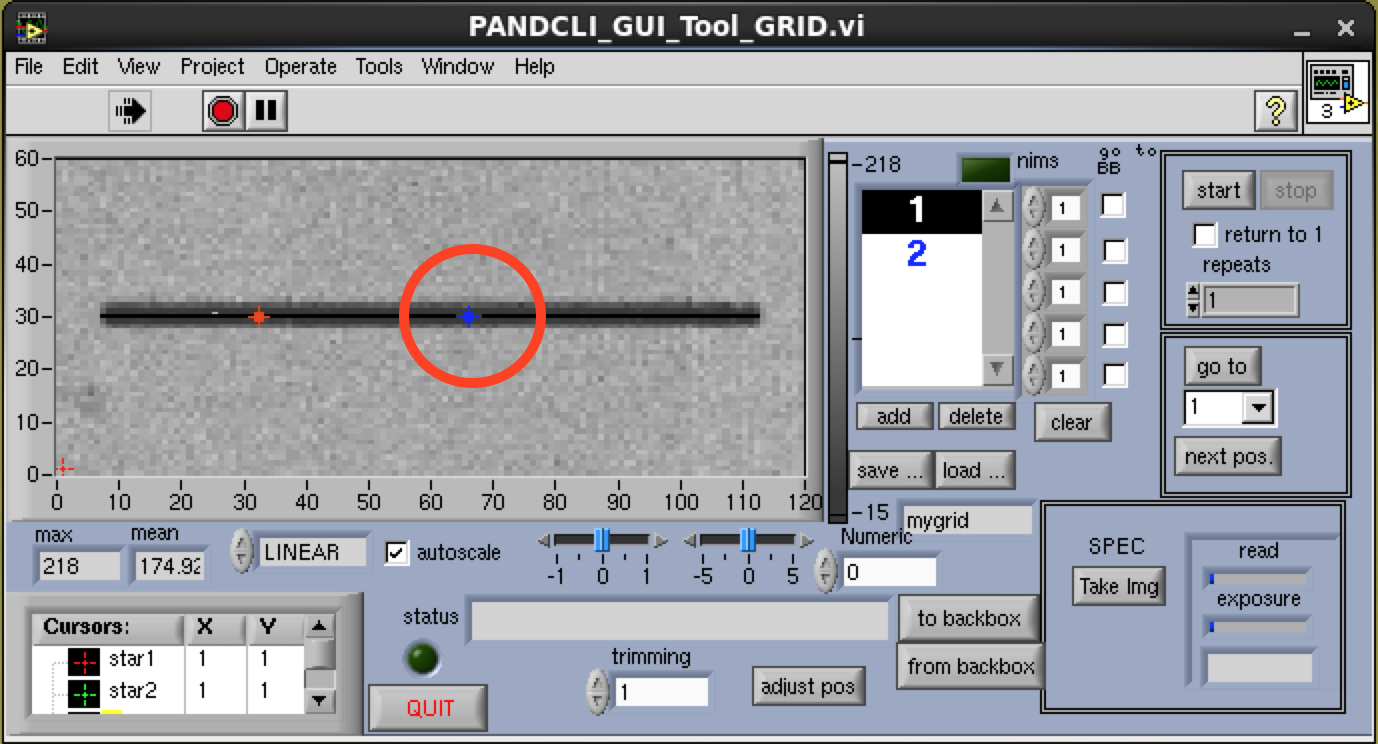
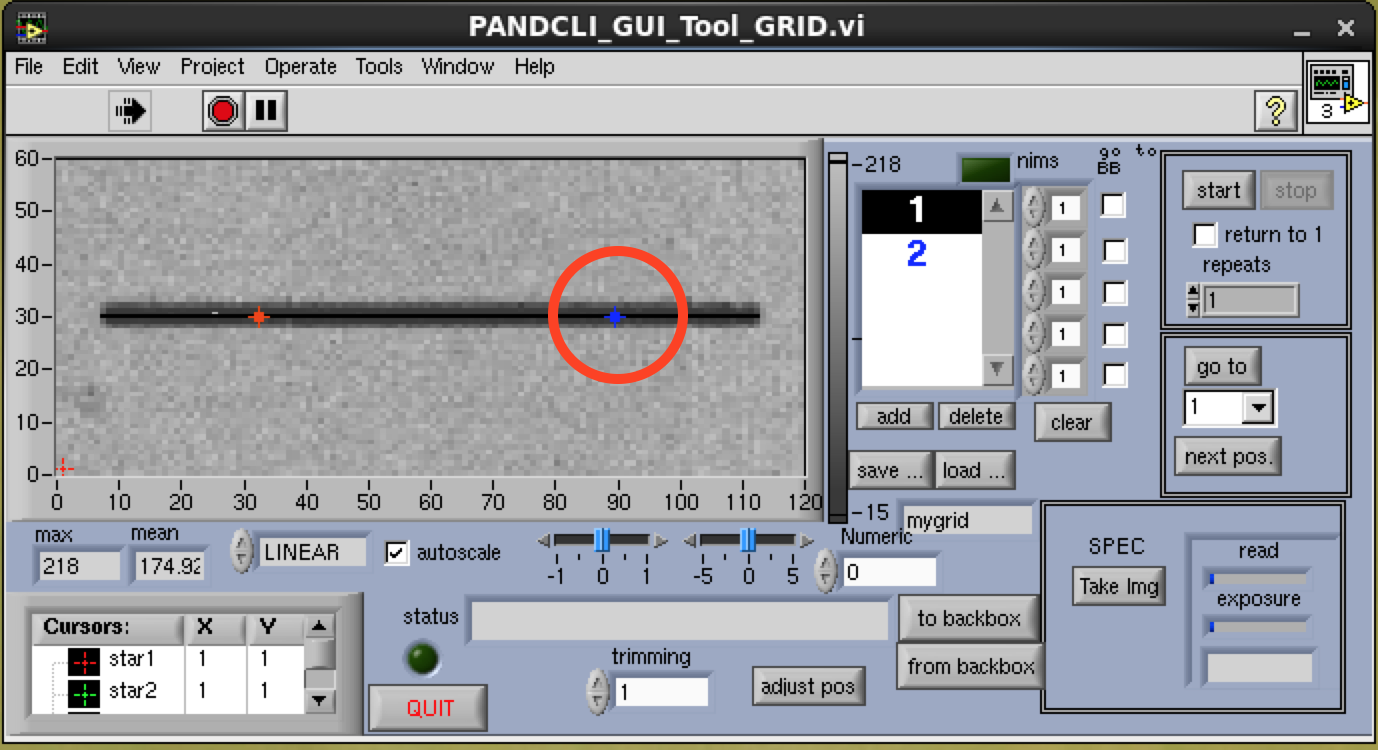
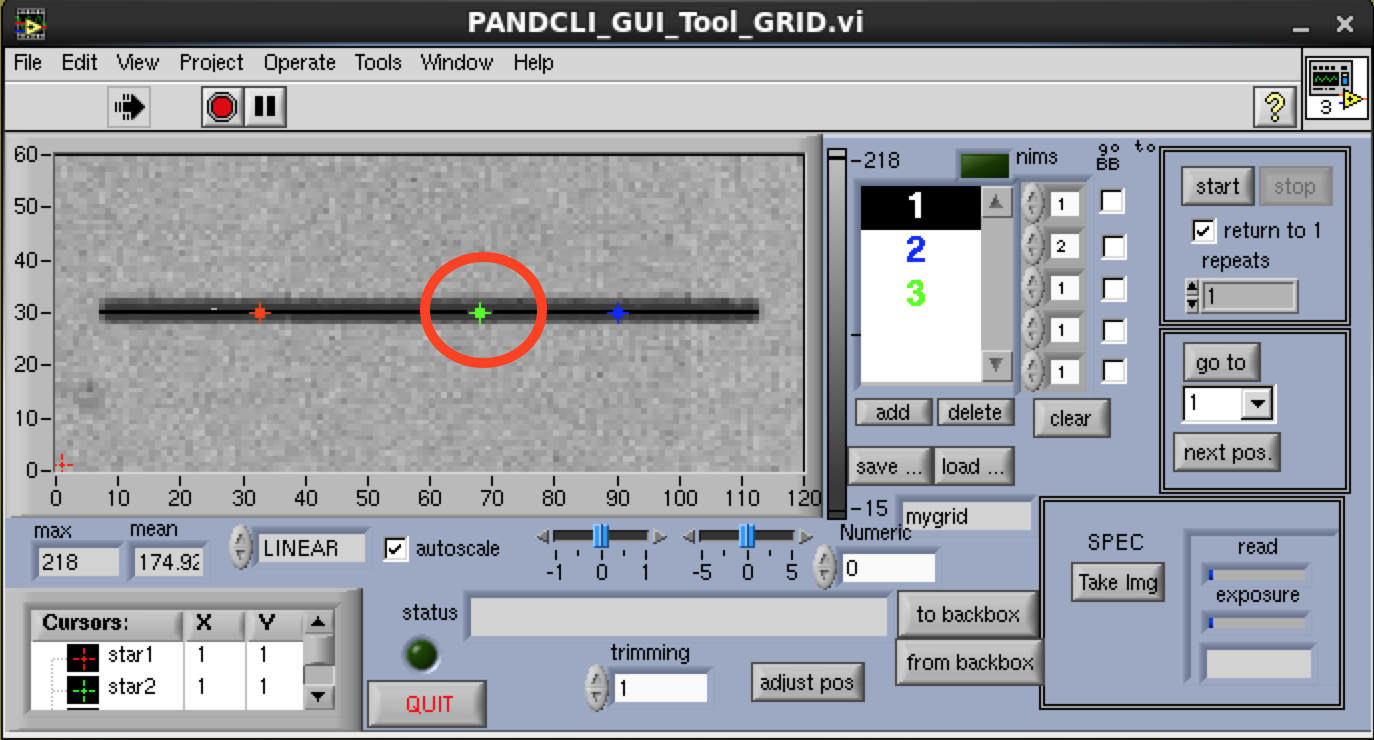
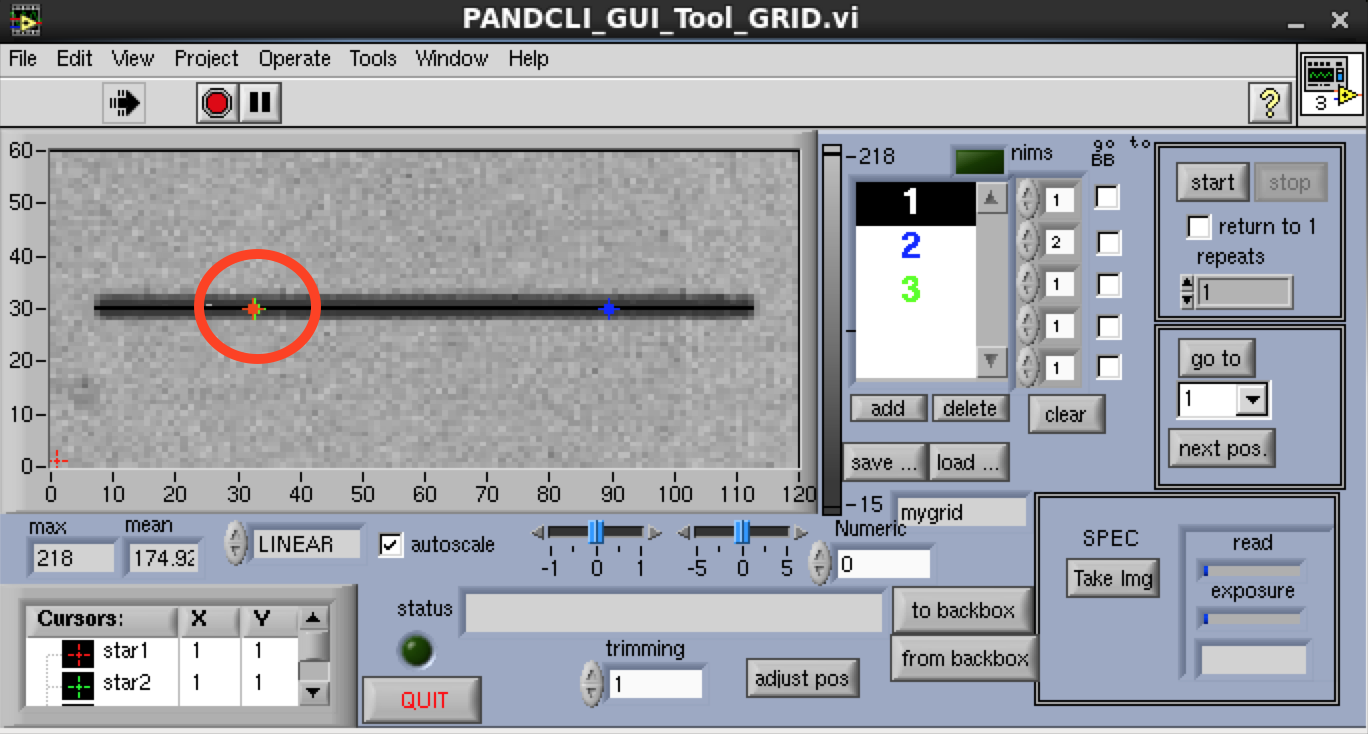
(2) Set your nod pattern (ABBA) in the Grid window.
(a) Add a cursor for your first "A" position and move it to the desired location on the slit.
(b) Add a cursor for your "B" position and move it to the desired location on the slit.
(c) Change the number of "B" exposures from 1 to 2.
(d) Add a cursor for your second "A" position and move it to the location of your first "A" position on the slit.
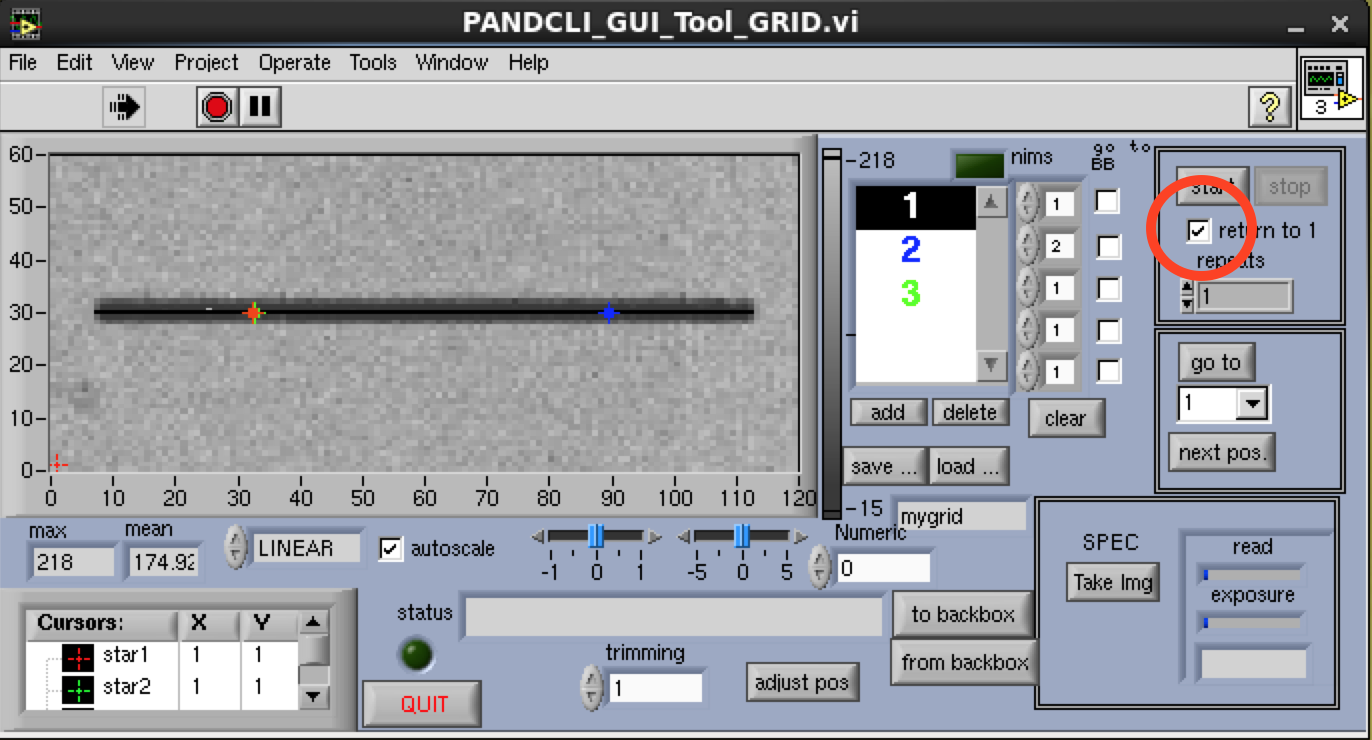
(e) Check the box so the telescope returns to the first "A" position at the end of an ABBA sequence.
(f) Set the number of repeats for the ABBA pattern.
(3) Set the slit center in the Offset window.
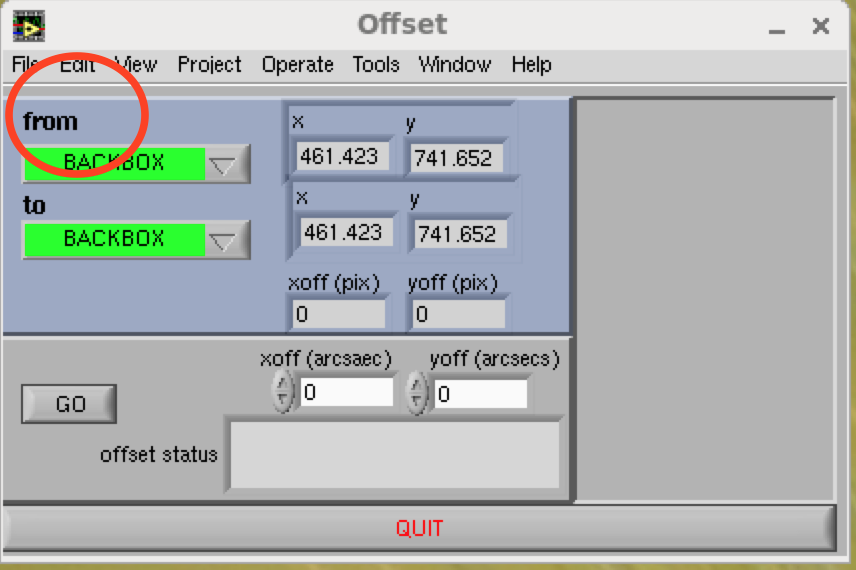
(a) Go to the "From" drop down menu and select the zoom window in which you have centered your target.
(b) Go to the "To" drop down menu and select the slit.
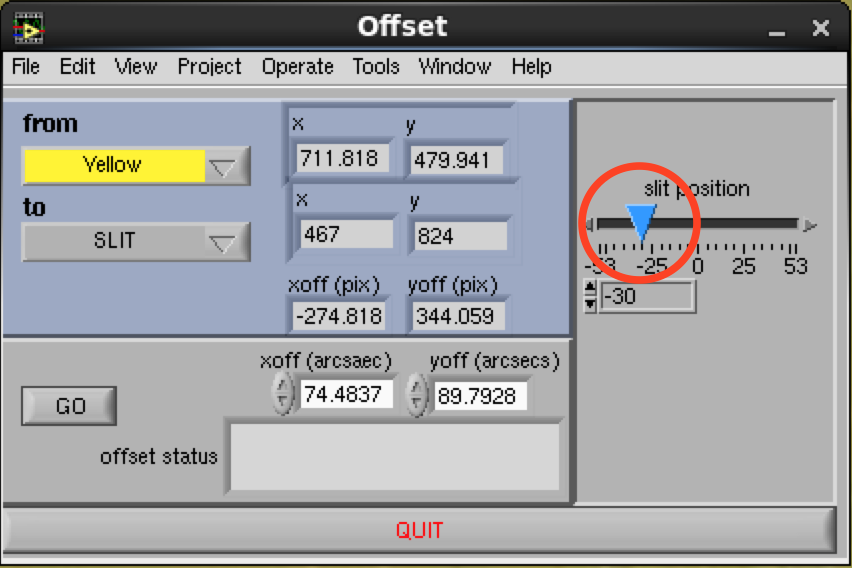
(c) Move the slit center cursor to the position of your first "A" position using the scroll bar.
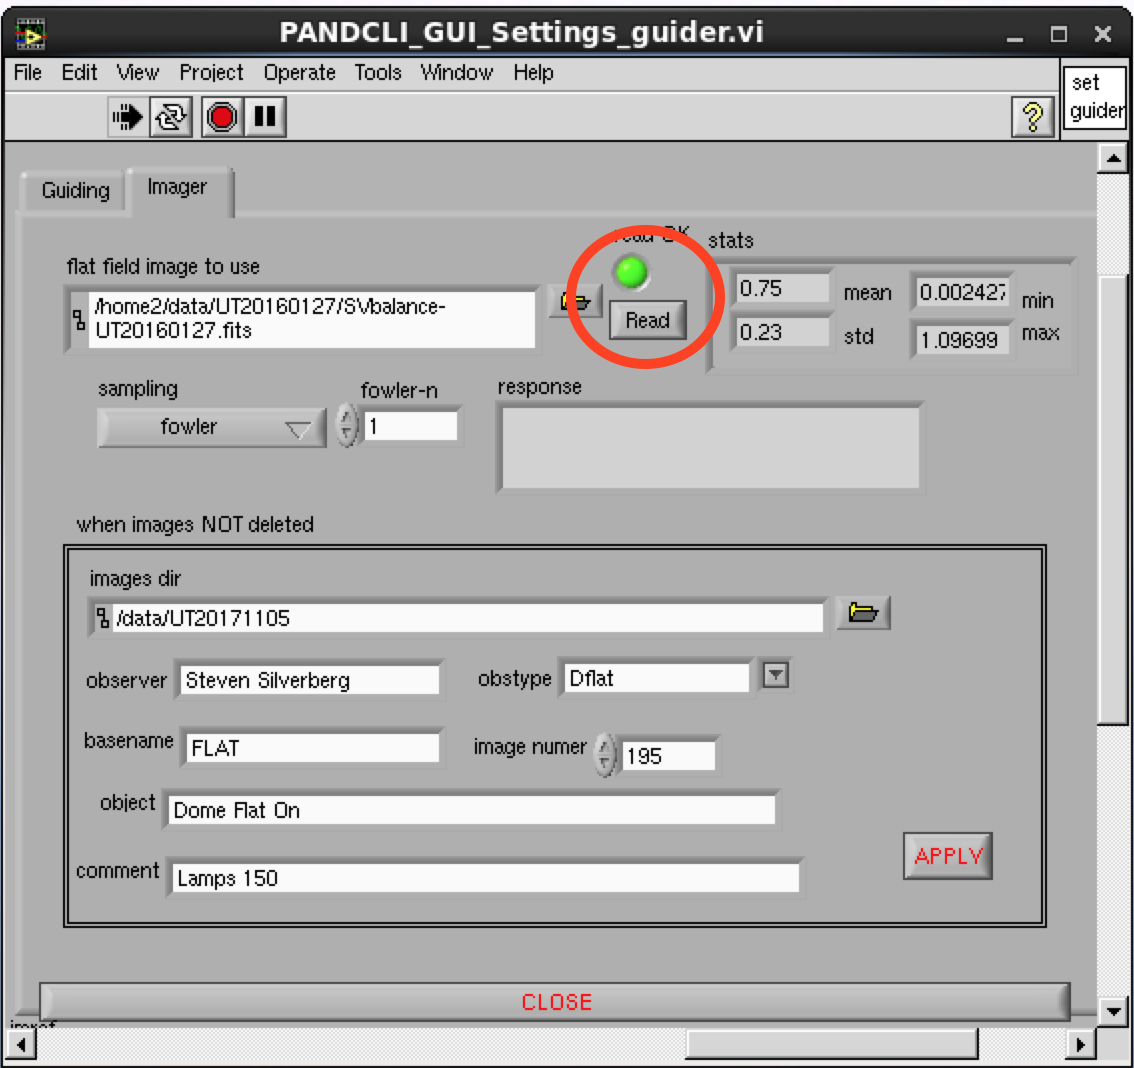
(4) Load the flat for the SV in the Guider Settings window.
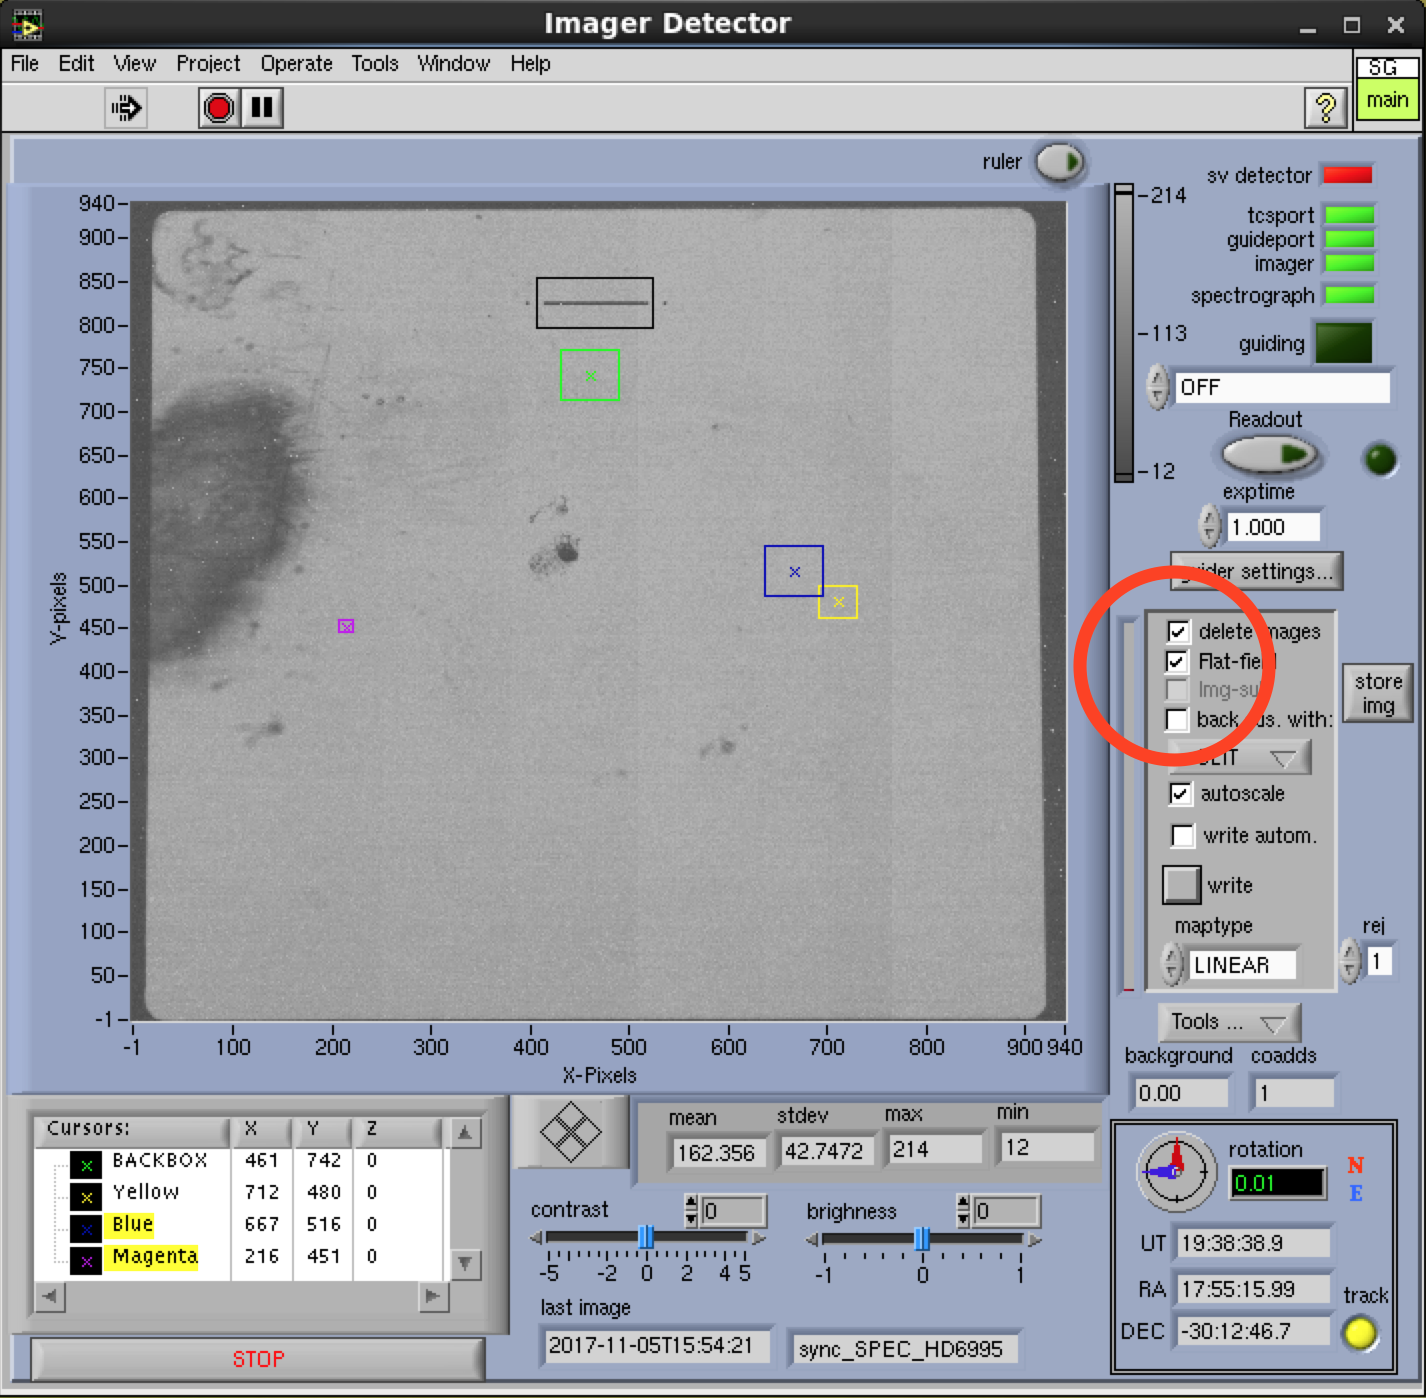
(5) Select "Flat-Field" in the Image Detector window.
For bright objects: (visible in < 5 second exposures with the SV)
- Find a bright, non-saturated star in the Image Detector window.
- Center the Zoom Guider box (magenta) on the star and click the "cm" button. You may also want to resize the Zoom Guider box. This helps to avoid hot or bad pixels which can affect guiding.
- Start guiding in the Image Detector window.
- Find your object in the Image Detector window and center the Zoom1 box (yellow) on the object and click the "cm" button.
- In the Offset window move the object box box to the Slit and perform the offset.
- The object should now be close to the desired position on the slit. To refine the position of the object activate the Zoom Guider window. Once the Zoom Guider window is active you can use the arrow keys to move the guide star in the desired direction. If you want the object to move left on the slit, use the left arrow key. If you want the object to move up on the slit, use the up arrow key.
For fainter objects: (barely visible in 5 second exposure with the SV)
- After an image is read out on the SV, click the "store image" button. This stores an image that will be used as the "sky".
- Nod the telescope a bit using the zoom boxes and the offset window.
- Check the "Img-sub" box in the Image Detector window.
- The SV detector will now be subtracting the "sky" image from each newly acquired image.
- Follow the steps listed for bright objects to start guiding and place your target on the slit.
For really faint objects:
- Set the SV exposure time to be long (i.e., 20 seconds)
- Turn the SV readout off.
- In the Guider Settings window check the path, image number, and basename in the section labeled "when images NOT deleted".
- Click the "Write" button in the Image Detector window. This will take and save a single image that will be written to the path in step (3) above.
- Nod the telescope a bit using the zoom boxes and the Offset window.
- Take another image by clicking the "Write" button in the Image Detector window.
- Use IRAF to create a difference image to better see the object
- iraf> imarith
- res=diff.fits - iraf> displ diff.fits 1 zs+
- iraf> imexam
- iraf> imarith
- Find your object and detemine its center pixel by using the "a" key in imexam.
- Put the coordinates of the object in the Zoom box that you are using.
- Find the position of a suitable guide star using the using the "a" key in imexam.
- Put the coordinates of the guide star in the Zoom Guider box.
- Do not use the "CM" button for either object because the guiding relies on the relative position of the two objects.
- In the Offset window move the Zoom box for your object to the slit.
- Decrease the exposure time for the Image Detector to be suitable for guiding (< 5 seconds).
- Turn on the Image Detector readout.
- Start guiding.
Taking Spectra:
- Set the "Observation Title" in the Spectrograph Detector window.
- Set the "Comments" in the Spectrograph Detector window.
- Set the "Exposure Time" in the Spectrograph Detector window.
- Set the number of "Fowler" samples in the Spectrograph Detector window.
- Set the number of "Coadds" in the Spectrograph Detector window.
- Set the "Basename" in the Spectrograph Detector window.
- Go to the Grid window and press the "Start" button. This will execute your ABBA sequence for the number of repeats selected.
Updated on April 12, 2024, 6:39 am
