Goodman Red Camera Cold Start procedure - for SOAR Support Staff
(Updated: Jun, 2021; C. Briceño)
ON-SITE STAFF IS NECESSARY TO PROCEED WITH A GOODMAN COLD START UP.
1. Go to Room 109 and verify that the Service Cabinet is powered on. The LCD display should read “Power On”. If the LCD display does not read “Power On”, open the cabinet door and verify that the switch is in the on position.
2. Once the power is on, log the pressure values on the Supply and Return lines. If cooling is not turned on (default state after complete power loss but not after computer loss), the pressures should be equal. If cooling is already enabled, typical operating pressures are approximately between 240-280 PSI for the Supply line and 30-50 PSI for the Return line.
3. Power up soaric6 (139.229.15.136). If this does not work, somebody will have to go up to the Nasmyth and manually cycle the power on soaric6 in the electronics box.
4.Log on to soaric6 using the vncviewer from some other computer. The linux example is : vncviewer 139.229.15.136 –Shared & (the password can be obtained from the TelOps staff: ops-soar@noirlab.edu, or the Instrument Scientist: sean.points at noirlab.edu).
Soaric6 should boot directly into the Desktop, there is only one user.
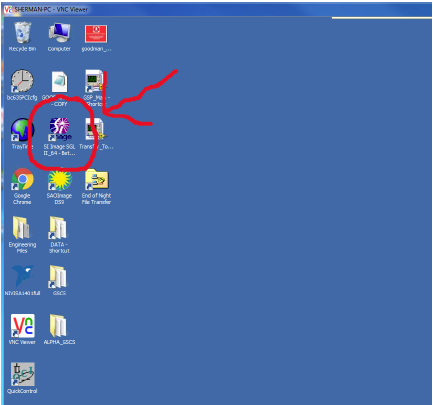
5. Starting SI Image SGL II: Start the SI Image SGL II software by double-clicking on the appropriate icon in the Windows desktop of soaric6. You will immediately be prompted with the pop-up “Do you want to open a camera now?”. Select “OK”. After a few seconds, the Red Camera should appear as “Camera: 1110-111”. Choose “Select Camera”. If “Camera 1110-111” cannot be found, return to step 1 and verify the camera is on. If it is, and the camera cannot be found, contact the Instrument Scientist.
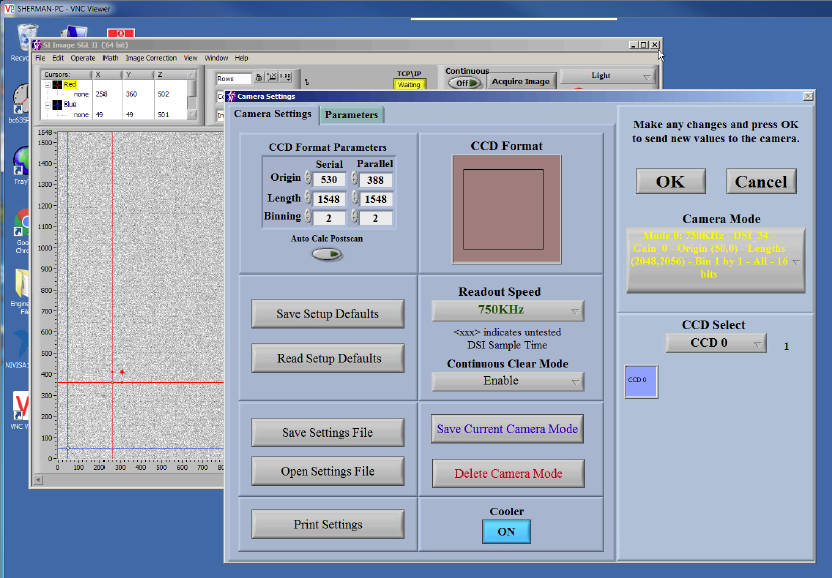
6. Check that the Cooler is ON as indicated in the image below. If it is OFF, click the OFF button to turn cooling ON. DO NOT TURN ON COOLING IF THE CHAMBER PRESSURE IS ABOVE 1.000 Torr. If the camera has been allowed to warm up to ambient temperature it will take between 4-6 hours to reach operating temperature and pressure. During the initial cooling phase, significant condensation can form on the cryo-lines. Be sure the Nasmyth rotator angle is positioned at 90 degrees to avoid condensation dripping onto the camera head.
7. Click the “Open Settings File” button and select “GOODMAN_RED.SET” to load in the Red Camera Set file.
8. Disable the “Auto Calc Postscan” by clicking on the button. Once disabled, the arrow within the button should be greyed out and not illuminated as shown below. Click “OK” in the top right corner of the panel to load in the changes.
9. From the SI Image front panel, open the Camera Status window to display the current CCD Temperature and Pressure. The operating Temperature and Pressure of the Red Camera are -100.0 C and 0.000 Torr. The pressure sensor is known to bounce between 0.000 Torr and 0.050 Torr on minute timescales so refresh as needed. Log the Temperature and Pressure.
10. If the Chamber pressure is above 1.000 Torr, the camera head will need pumping which can only be done by the SOAR day crew. Do not proceed to step 9 until the chamber pressure is below 1.000 Torr.
11. Close the Camera Status panel and open the Camera Settings panel.
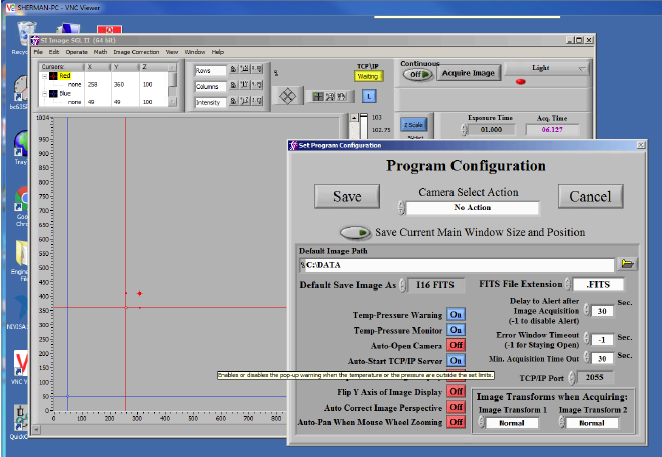
12. Under the “Operate” Menu , enable the TCP/IP server so that it shows up as a yellow box with the status “Waiting”. Also under the “Operate” Menu open the “Configure” panel. Check that the “Min. Acquisition Time Out” is set to 30 seconds as shown below. Save the settings.
13. Minimize the SI Image SGL GUI. DO NOT CLICK ON THE RED “X” Button since this will exit the GUI. SI Image SGL II is now configured and should continue to be run in the background.
14. Check the SAMBA server connection between soaric6 and soaric7: Open Computer on the Desktop. Under “Network Locations” you should find the three soarci7 folders cross-mounted. If the network drives show Red X’s, click on each drive on the left panel the window to ensure connection until they are all green.
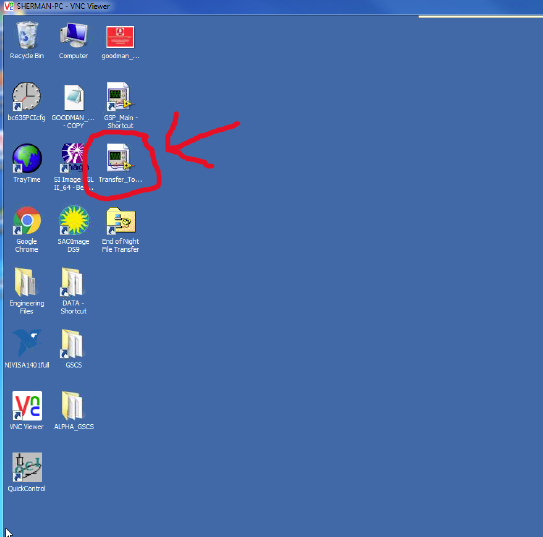
15. Start the automatic file transfer program: click on the “Transfer_To_ic7” icon on the soaric6 desktop.
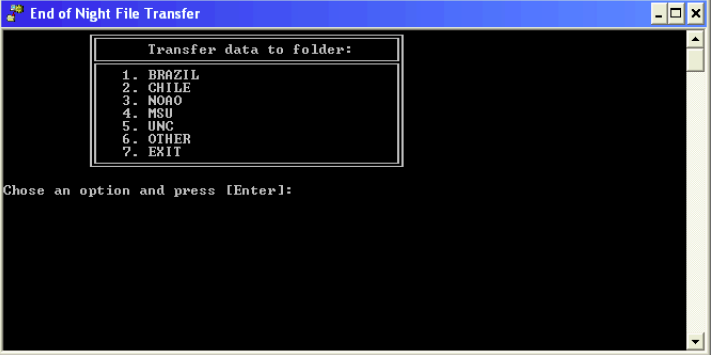
16. Check whether the files from the latest observation night were transferred to soaric7. If they are still in soaric6 you should see them in the C:\DATA folder. If so, run the End-of-Night-Transfer DOS program on soaric6.
17. Start the Symmetricom GPS Real Time clock and Tray Time program. Symmetricom should be minimized and left running. The Tray Time program will run in the background and appear as a small globe in the tray in the bottom right of the desktop. These programs will ensure the GPS time signal will be recorded in the Goodman FITS image headers.
18. Double check with the Telescope Operator or day crew that nobody is working inside the instrument and the Nasmyth rotator angle is ok. After these checks, ask the Telescope Operator to turn on the Goodman electronics, and start the Goodman GUI.
19. Log on to soaric7 using the vncviewer that is appropriate for your program. The linux example is: vncviewer 139.229.15.137:<n> -Shared & .The display number <n> and password can be obtained from the TelOps staff (ops-soar@noirlab.edu) or the Instrument Scientist (sean.points at noirlab.edu).
20. Check the disk space on soaric6 by double-clicking on the "My Computer" icon. Highlight "Local Disk (C:)". Right-click and select "Properties". If the disk is almost full, please contact TelOps (ops-soar@noirlab.edu) or the Instrument Scientist (sean.points at noirlab.edu) so they can delete older data.
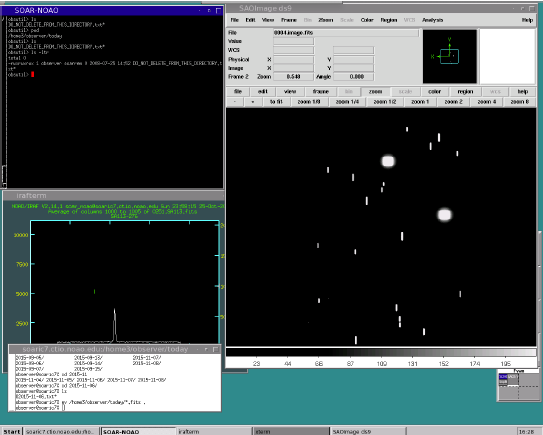
21. Check the disk space on soaric7 by issuing the command "df -h" from a terminal prompt. If the /home3/observer disk is close to full, contact TelOps staff (ops-soar@noirlab.edu) or the Instrument Scientist (sean.ponts at noirlab.edu).
Updated on April 30, 2024, 11:12 am
