Setup
Your support astronomer will meet you up in the control room of the 4m telescope on the afternoon of your first night and will show you the different components of the observing system.
OBSERVING STATIONS
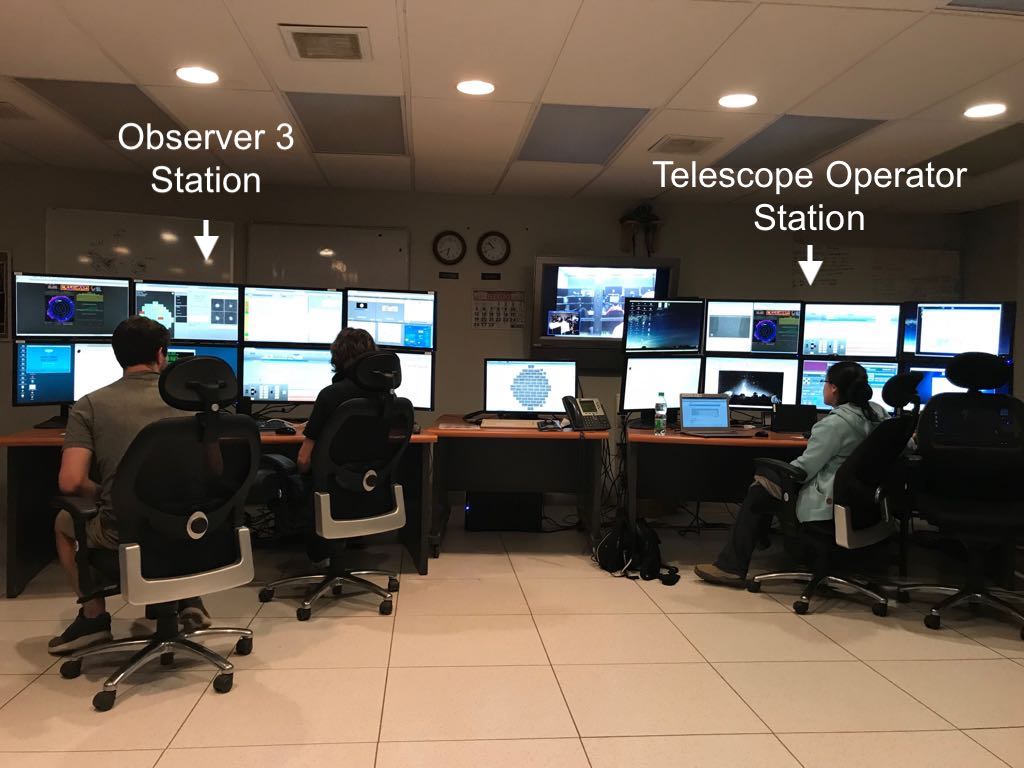
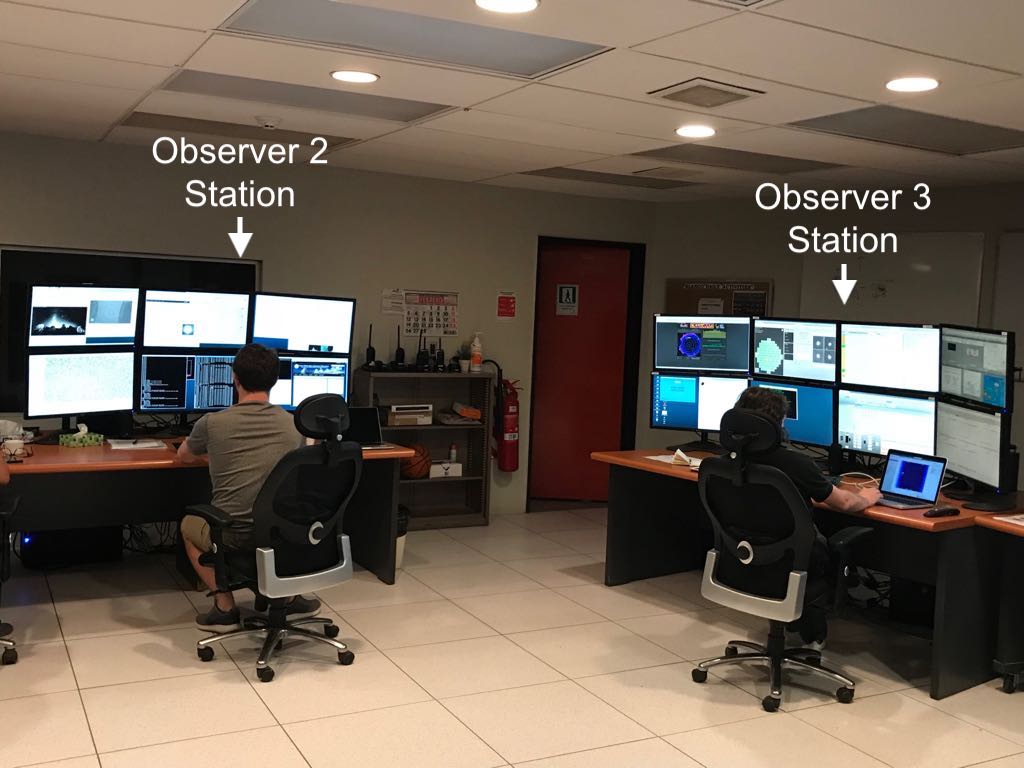
There are three stations in the control room, one for the telescope operator and two for the observer(s). The later are called observer3 and observer2. Observations are made from observer3 (the station with 8 monitors) while observer2 is mostly for data analysis.
LOGIN IN
At the beginning of your run, you will see in observer3 the DECam login prompt shown in the picture. The user name is DECamObserver and the password is the proposal ID of the observations taking place (for example 2014A-0245). This password is valid only during the days of the run and will expire automatically afterwards. Most likely the Observer Support Team will do the login for you early on your first night of observation. However, if for some reason SISPI (the observing control system) needs to be restarted during the night, you will need to login again.
GUI
Once you login a number of different windows will pop-up in observer3. The one that the observer really needs to know is the Observer Console which will be described in the next section. Here we provide a brief description of the information provided by each GUI. The interested reader may want to follow the links provided below.
- Observer Console: this is the most important window for the observer and the one that the observer will use the most (other windows are mostly informative). It is here that scripts are loaded, queues are executed and the observer can follow the status of each observation. Details on the use of this console are given in the next section.
- ICS (Instrument Control System): Gives information on the telescope position, hour angle, airmass, LST, filter in use, status of shutter, among others.
- Telemetry: Provides measurements of many different things, from temperatures and voltages of the CCDs, to environment conditions, telescope temperatures, guider status, pointing accuracy, image quality, among many others. By default, the GUI will cycle trough different screens during the night but the observer can select any view at any time.
- Exposure Table: keeps a log of the exposures taken in a night.
- Guider:shows the 4 guider CCDs and a plot with the guider corrections during an exposure. The guider starts automatically for exposures longer than ~30 seconds. A warning will be given if no suitable guide stars are found.
- Alarm History: displays warnings and alarms in the system. Alarms will produce an awful sound to catch the observer's attention. This GUI is the first place to look for the reason of potential problems.
- Architecture Console: this is a GUI mostly for experts. It displays the different roles of the observing system (SISPI).
- Interlock Viewer: displays the status of the different roles of SISPI
- RASICAM: an infrared all-sky view to check for sky conditions in Cerro Tololo in real time. Records of previous nights are accessible through YouTube
- Electronic Log: detailed log on each image taken. It is good idea to report problems on particular images (if any) so the experts can address them in a timely fashion.
- Image Health: color changes in each CCD depending on FWHM values, saturation, sky level, and others.
- Comfort Display: an automatic display of all science CCDs and focus CCDs. This is displayed in an additional monitor located between observer3 and the telescope operator station.
Some GUIs may freeze during the night (they suddenly get black). There is no need for panicking since no processes are affected by this. Just reload the windows to get them back. If no reload button is available, use the key F5.
SETTING UP YOUR PROJECT
In the System Control tab of the Observers Console you provide information on your observing program. This information will be reflected in the headers of the FITS images. Most likely this will be already setup for you by the Observer Support Team, but if SISPI has to be re-started during the night, you will need to enter the information again.
To setup a project:
Click on the Edit button to edit the values in the text fields. Enter the first two fields: Observer (name(s) of the observer(s)) and Prop-ID (your proposal ID, for example, 2014A-0270). Click Save and the other two fields (Description and PI) will be filled up automatically.
Now, configure SISPI by clicking the Configure button. Configuration might take 30 seconds to a minute. Check these indicators (in System Status):
- Monitor has to be green
- Interlock has to be green
- Setup has to be green
- OCS has to be green and (READY)
- In the title bar check that DECam is Ready.
- The Vsub can be either green or red at this point.
If you are starting your program in the second part of the night you will need to change the setup information. This is of the most importance since images will be available at the NOIRLab Astro Data Archive only to the owner of the project ID reflected in the header of the images.
To change the setup information go to the System Control tab, clear the information and fill the two first fields. Click on Save and the two other fields will be filled out automatically. You do not need to hit the Configure button. After that, loaded observations will have the new setup information independently of previous queued scripts (i.e., the queue doesn't need to be empty).
It is very important to enter first the program information before doing any observation or loading scripts to the queue. Things in the queue will produce images with headers having the information available at the moment the script was loaded.
THE IMPORTANCE OF VSUB
The Vsub button controls the CCD substrate voltages. Vsub must be Turn on ONLY when you are ready to take observations. ALWAYS check with the telescope operator that you can turn on Vsub. He will be sure that all lights are off in the dome and it is safe to turn on Vsub. The button to turn Vsub on/off is on the top right side of the Observer Console (under tab System Control).
Vsub must be turn off after you finish your observations. This is done by clicking on the button Safe Mode at the top right extreme of the Observers Console (System Control Tab). This button will not only turn off the voltages but also put a blocking filter in the beam.
LOADING YOUR OBSERVING SCRIPTS
Observing scripts (in .json format) must be uploaded to this sub-directory in observer3:
/usr/remote/user/DECamObserver/ExposureScripts/User_scripts/
Open a terminal in observer3 and create a new folder in the above directory. It is convenient if you use your program name for that folder (for example, 2014A-001).
You can then copy the scripts to that directory. For example, from your laptop you can type:
scp *.json DECamObserver@observer3.ctio.noao.edu:/path/.
where /path/. is the full path of the folder you created for your project.
Your support astronomer will supply the appropriate password.
Updated on June 13, 2024, 3:54 am


