Goodman User Startup/Shutdown Guide
Goodman High Throughput Spectrograph
Startup/Shutdown Guide
This is a step-by-step guide for the Goodman HTS users on the regular procedure for starting up the spectrograph GUI and related programs each evening. It assumes that the CCD camera SI Image SGL software is running, and hence that the camera cryostat is at the appropriate vacuum (Pressure=0, T=-106.7 C for the Blue Camera and Pressure=0, T=-100 C for the Red Camera).
Starting up the Goodman GUI programs
(the procedure is the same for both the Blue and Red Cameras)
Click here for a PDF document containing information and screenshots on the GUI-related startup procedures.
Starting the LabView Applications
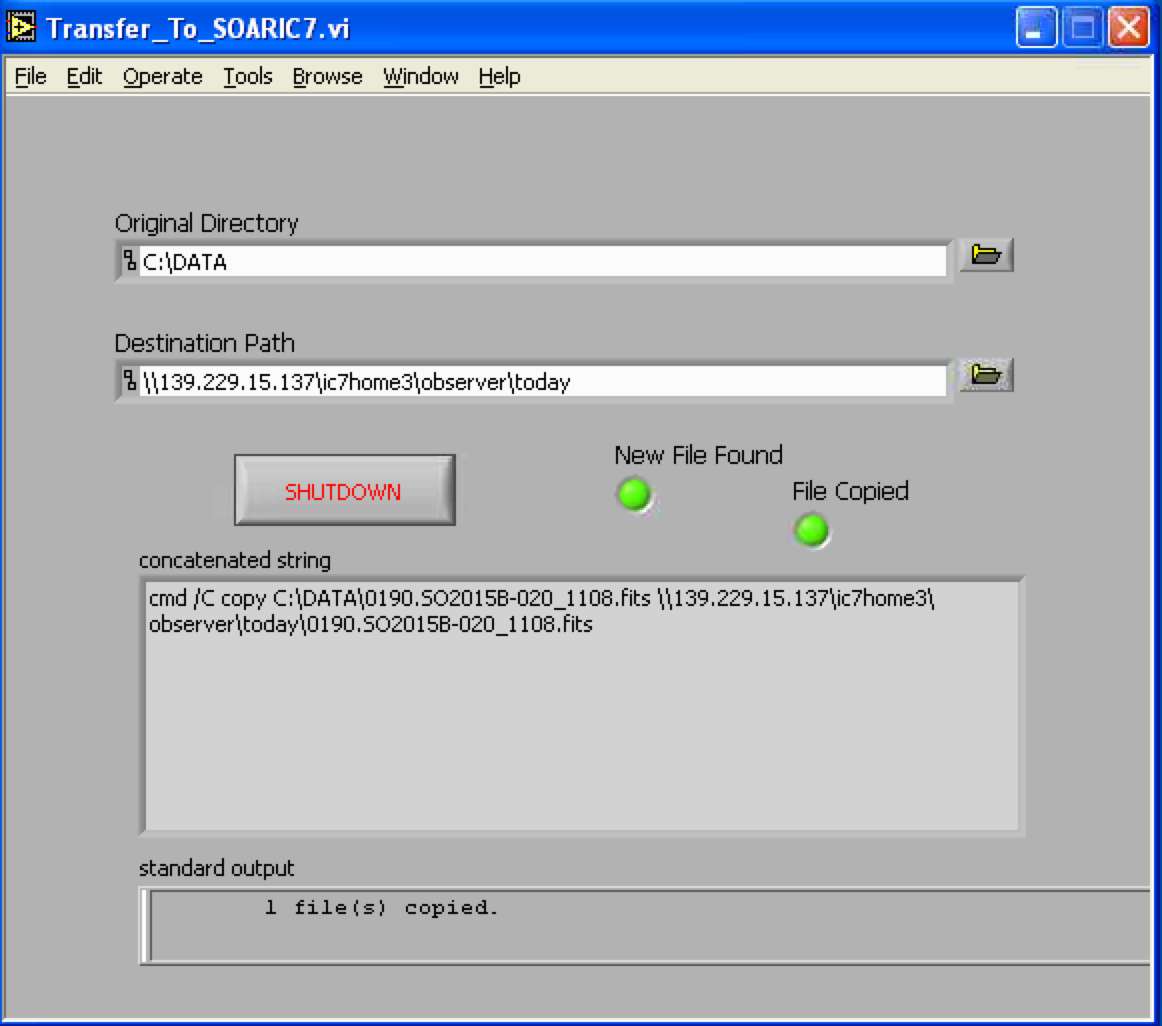
1) Make sure that the transfer to soaric7 is working.
2) Open the "My Computer" icon on the Desktop and see if "ic7home3" on "SOAR Data Samba Server" is present.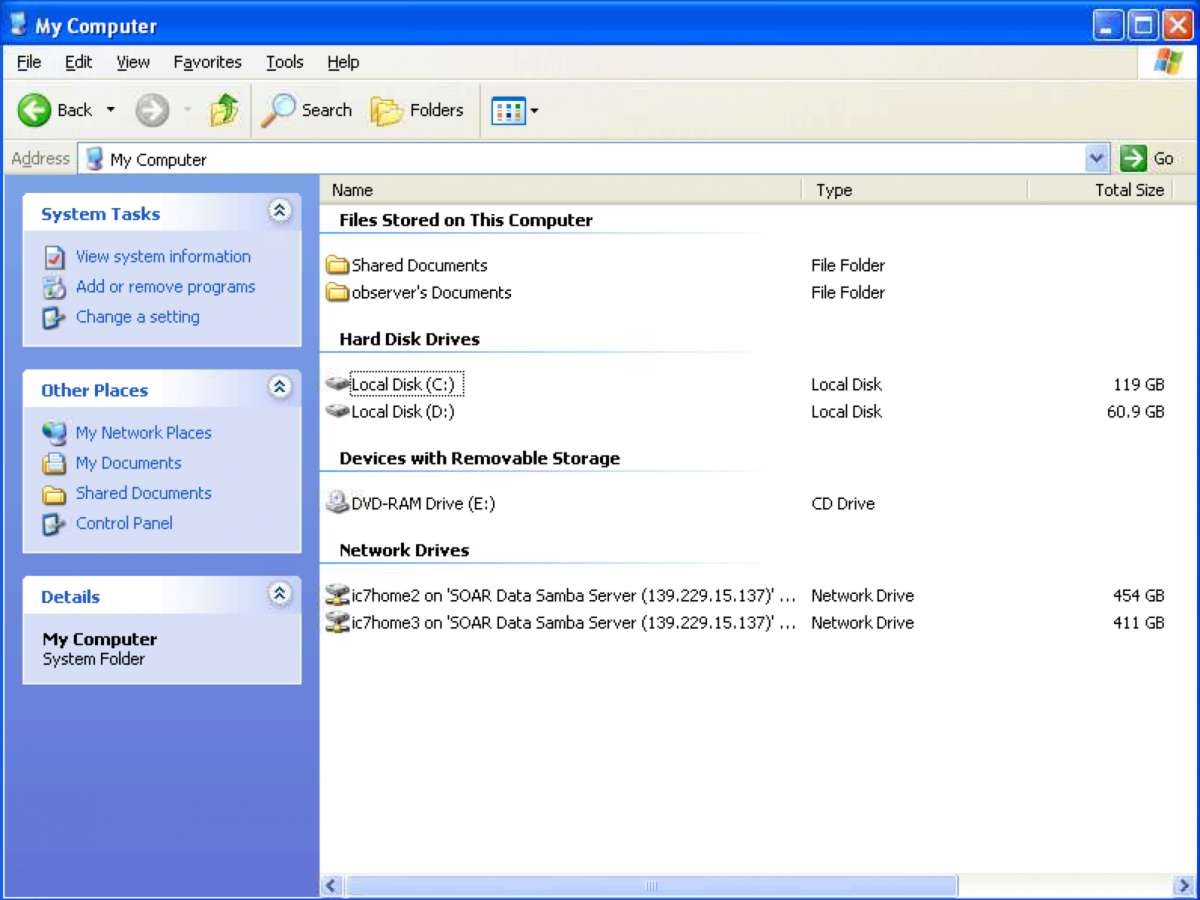
3) If it is not open, click on the "My Network Places" icon on the Desktop and then click on the "ic7home3 on SOAR Data Samba Server" icon. The Instrument Scientist has the logon and password information.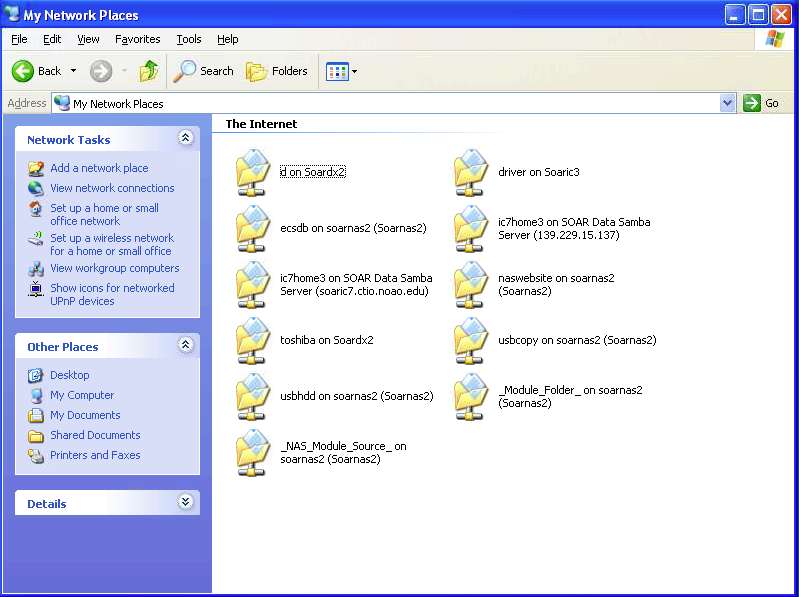
4) Click the "Remote Transfer to soaric7" LabView shortcut on the Desktop and start the application by clicking on the light grey arrow in the upper left corner of the LabView window.
![]()
5) Make sure the Symmetricon GPS Real Time clock is running, and minimize it. It should be left running. This will be the time signal that will be recorder in the Goodman FITS image headers:
![]()
6) Make sure the Tray Time Application is running. Tray Time is the little globe icon indicated in the screenshot below. Tray Time is used to automatically sync the computer's system time with the symmetricom gps time. Even with symmetricom running GSCS still only reads the system time so without Tray Time running we are not actually recording GPS times in the header. Once you double click Tray Time, you should see the little globe icon appear down in the taskbar on the bottom right of the screen.

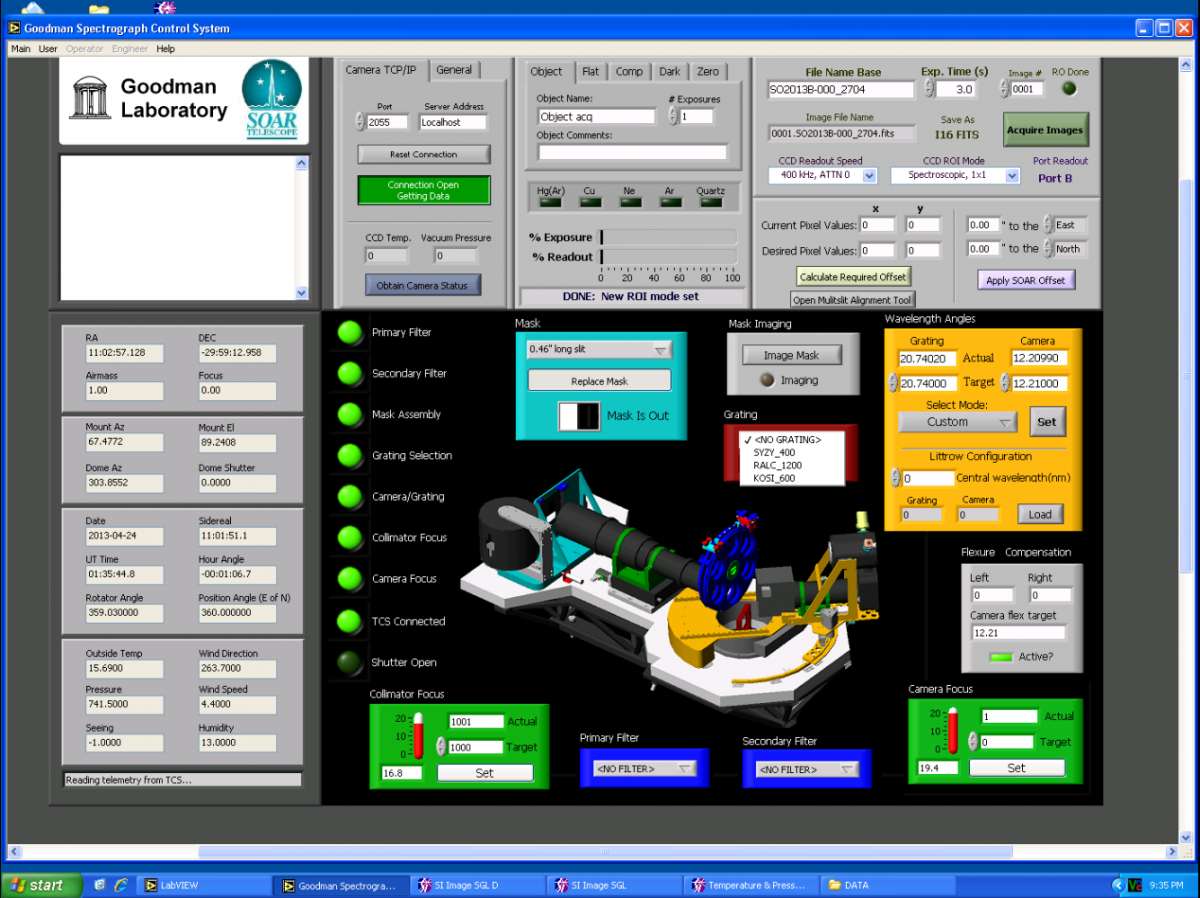
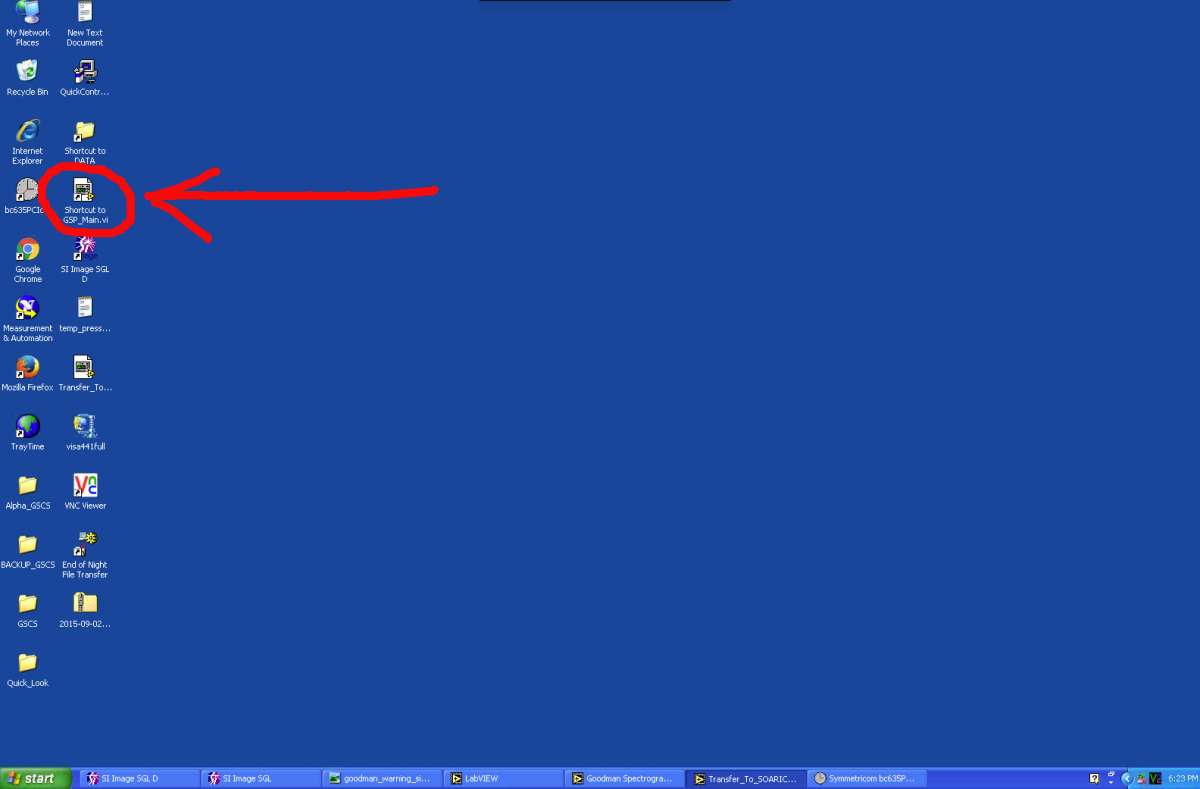
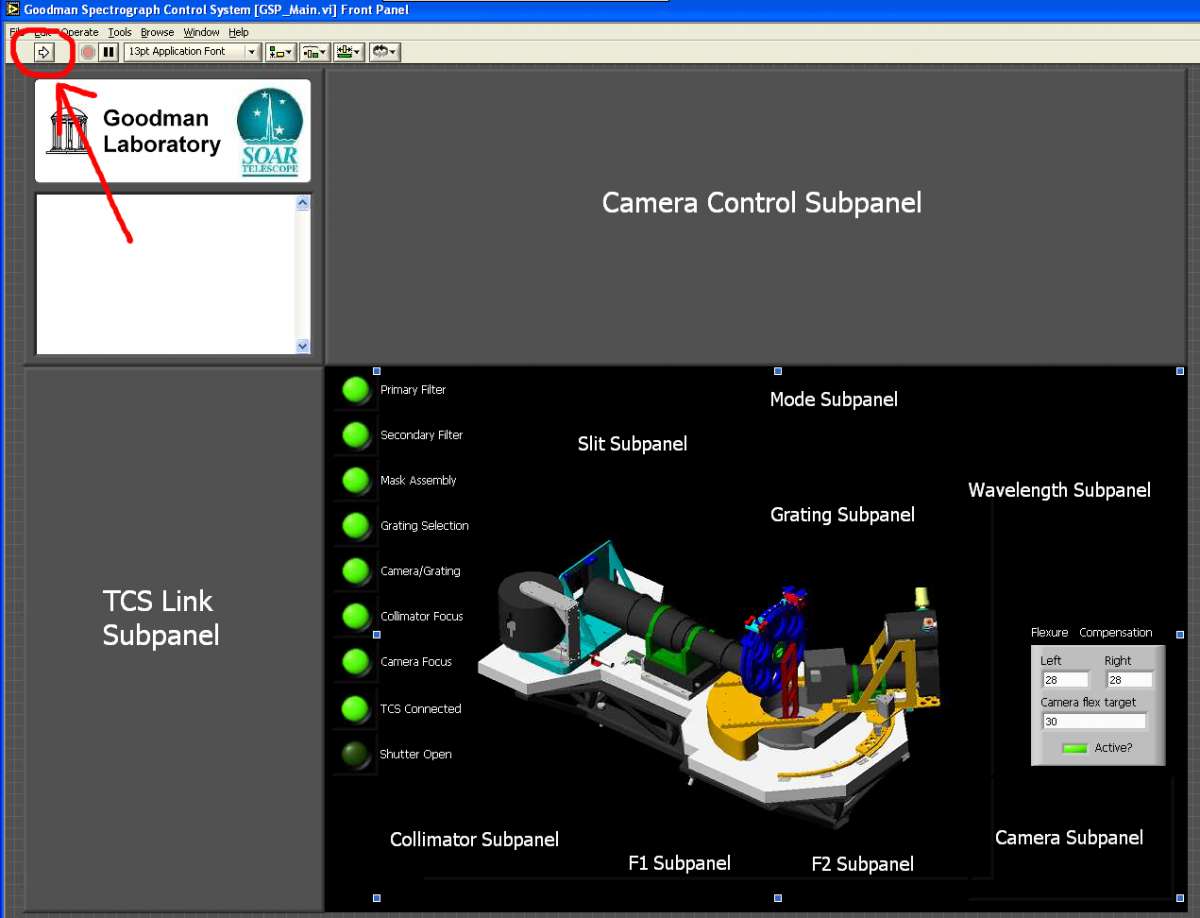
7) Open the Goodman controls by clicking on the "GSP_Main" LabView shortcut on the Desktop and start the application by clicking on the light grey arrow in the upper left corner of the LabView window.
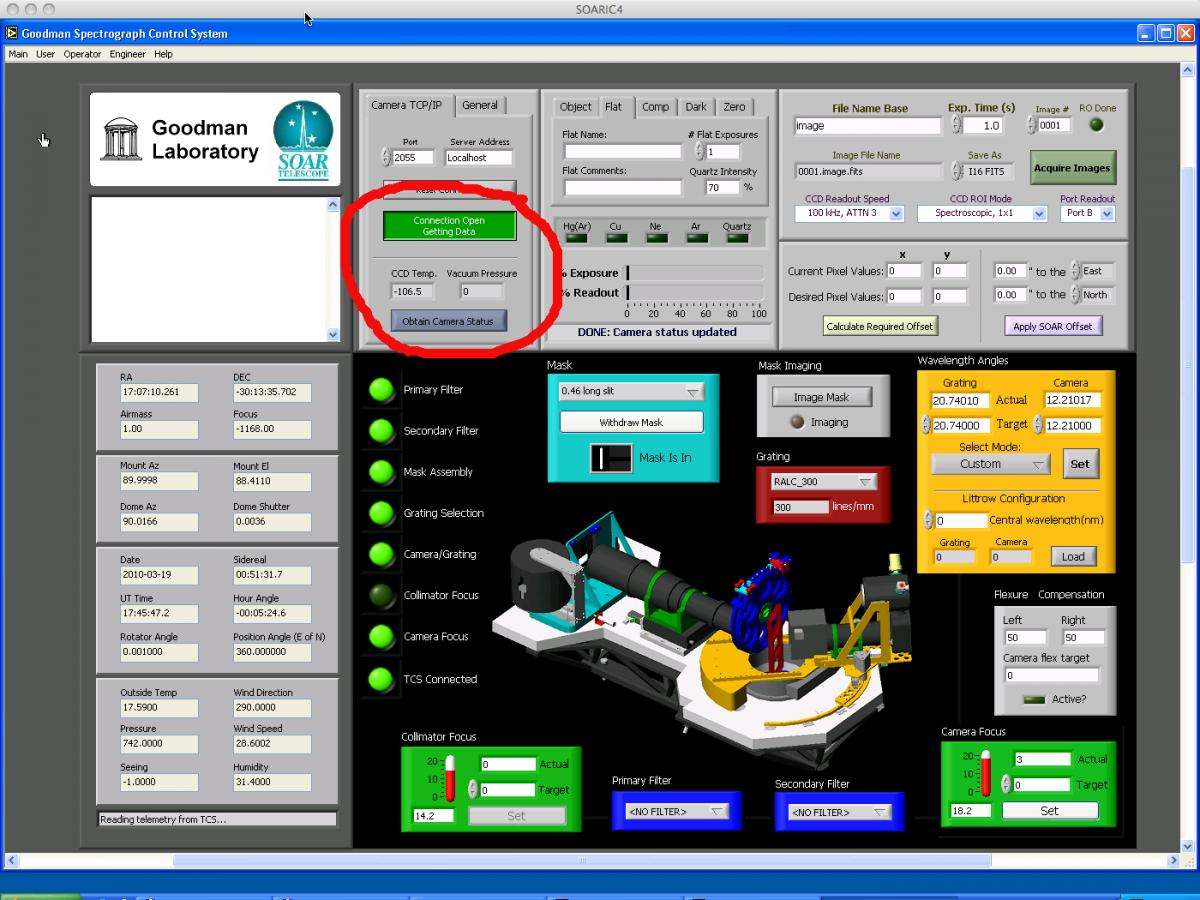
8) Check the camera panel. If a green button is present for "Connection Open/Getting Data" in the upper left of the GUI, Goodman "sees" the SI Image camera control software and a TCP/IP connection is available to take data. You can confirm this by clicking on the "Obtain Camera Status" button. During a normal startup of the GSP Main GUI the Camera Temp will read "0". If the TCP/IP connection is operating, clicking on the "Obtain Camera Status" will show the latest temperature. If Goodman is cooled, the CCD Temp should be -106.5. If the CCD Temp does not update, you will need to check the SI Image SGL D window and make sure that a TCP/IP connection is open.
9) Click on Main tab and logon;
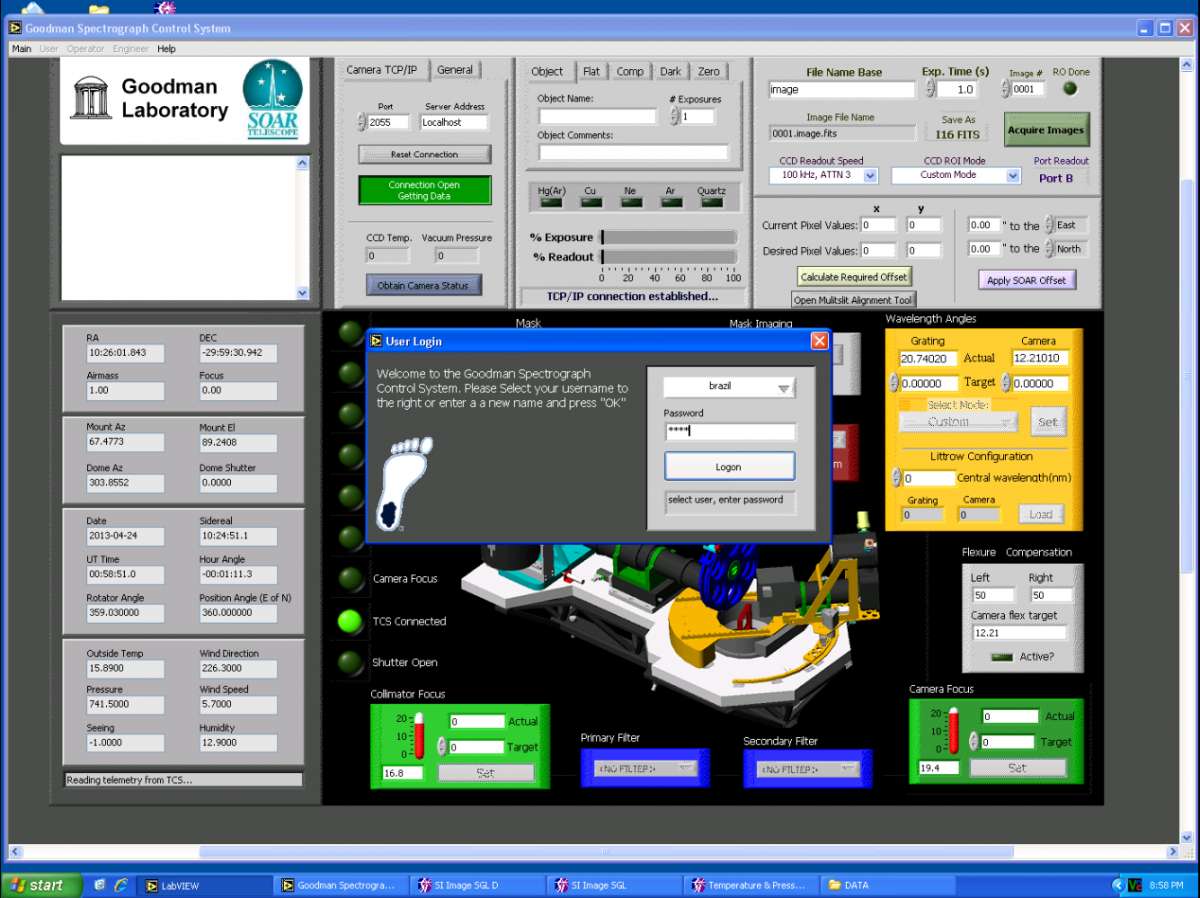
Use the account appropriate for your observing program (i.e., BRAZIL, CHILE, MSU, NOAO, OTHER, or UNC) with the password provided by your institution.
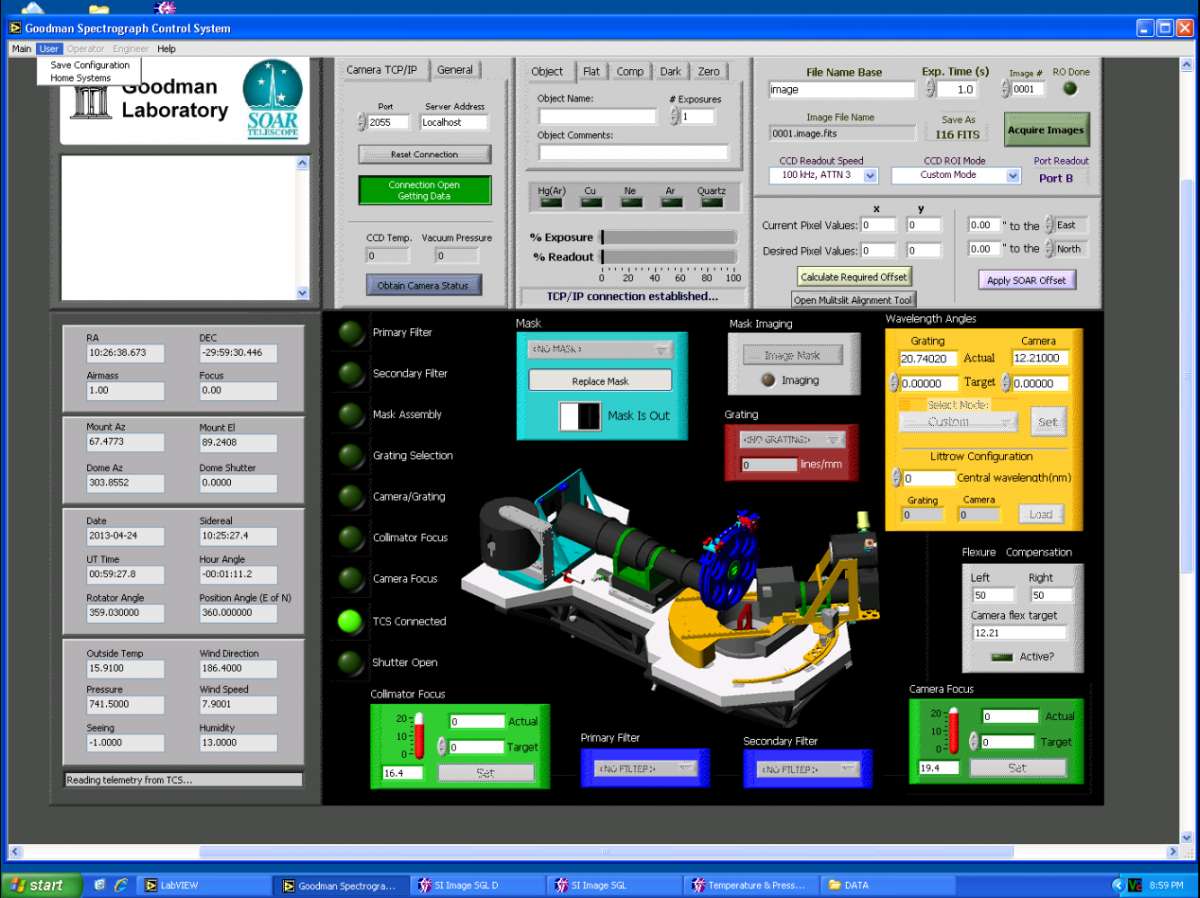
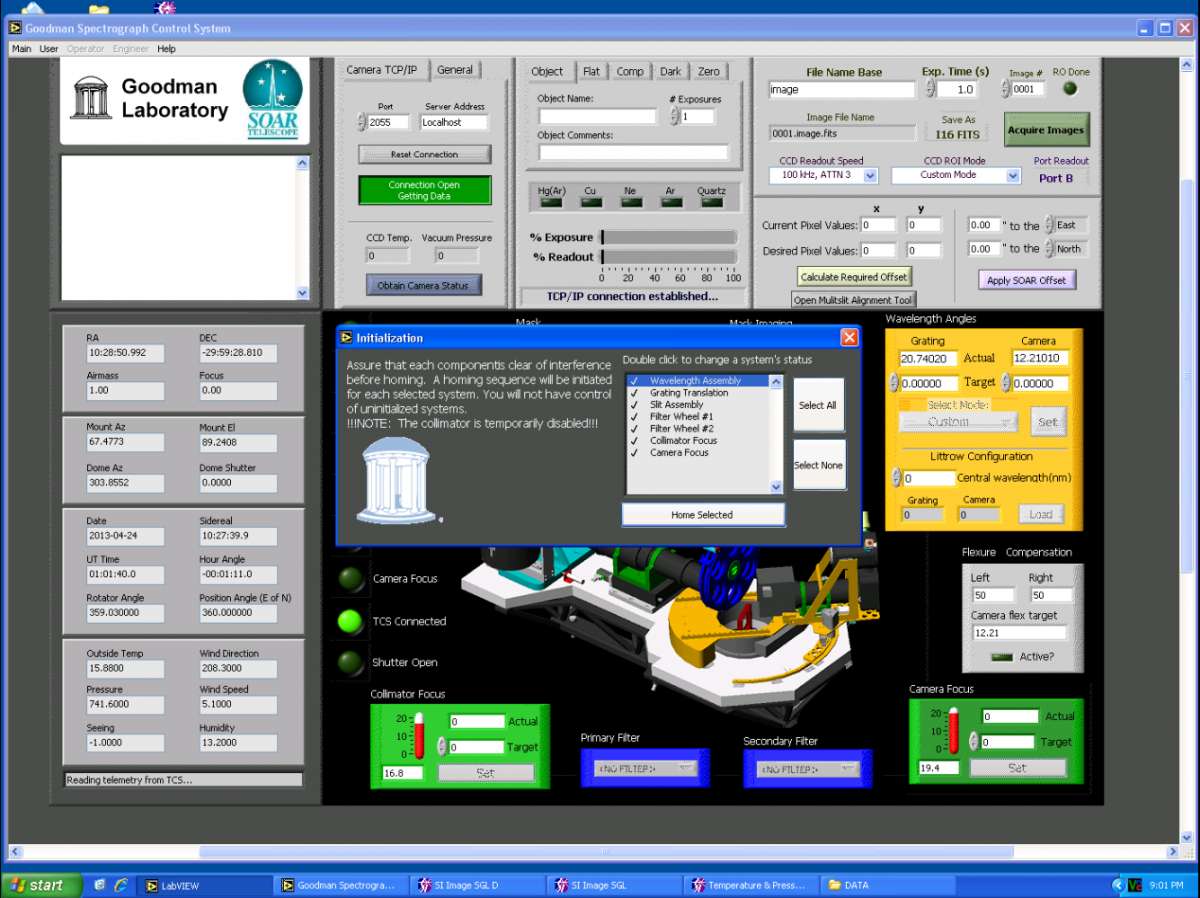
10) Click the User tab and go to "Home Systems" Select Home all (WARNING NOTE: Always make sure with the Telescope Operator that it is ok to home systems, e.g., that the telescope is at Rotator Angle=0, the instrument is at PA=0, and that the Goodman electronics have been powered on. If you see a red warning sign displayed in the Goodman VNC, STOP, do not proceed under any circumstance and contact the Telescope Operator before continuing with any task).
Once you have clicked on Home all you should see the dark green lights change to yellow on the control panel as systems are being homed. This process will take several minutes; the Slit Mask stage will take the longest. Upon a successful homing of the systems, all lights should be bright green. If there are any red lights, you will need to log out of GSP Main and shutdown and ask the Telescope Operator to cycle the power on the Goodman motor electronics.
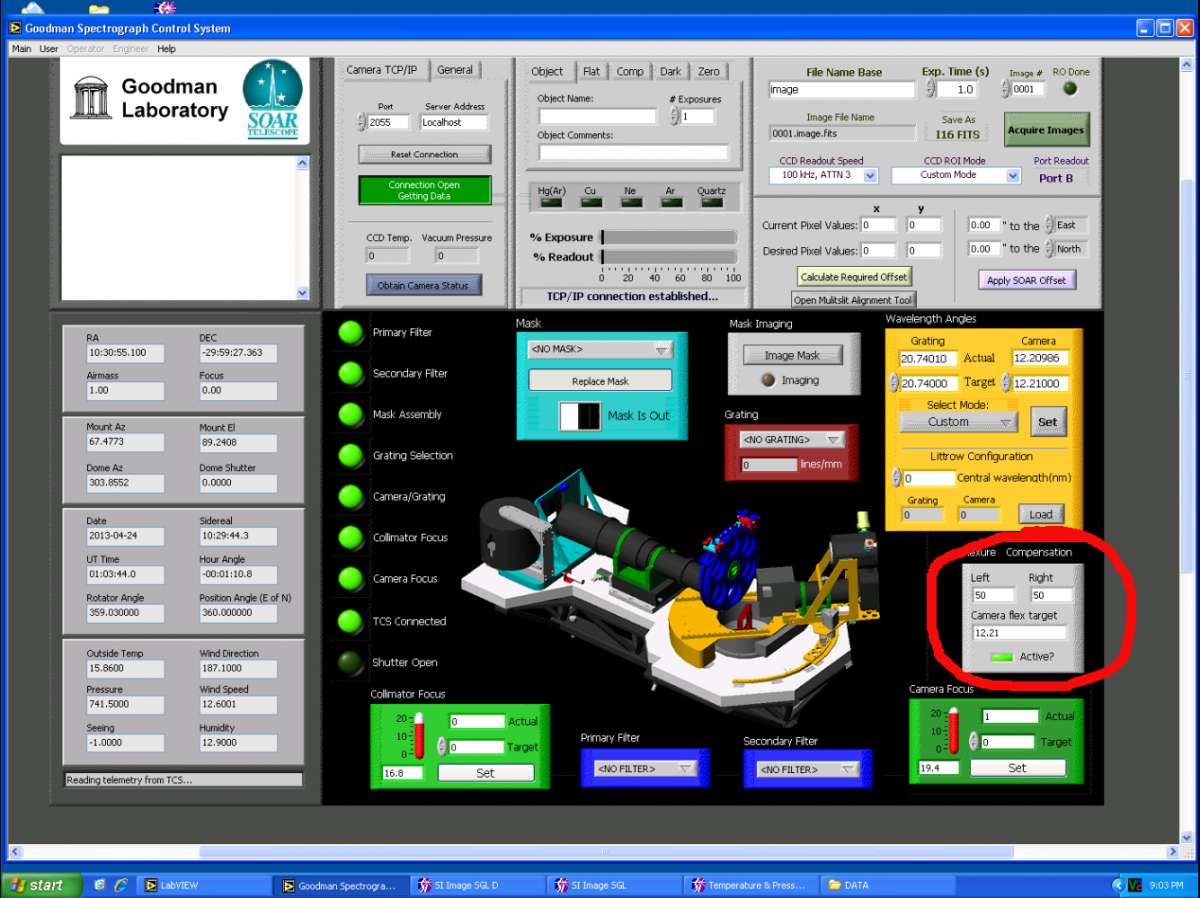
11) After the camera is homed, start the flexure correction by clicking the flexure LED. It should change from dark green to bright green.
12) Select Gain and Readout Setting. These values are given in the table below. The default is 100kHz ATTN3, but as with the Port readout, it needs to be changed to another value before it is initialized correctly.


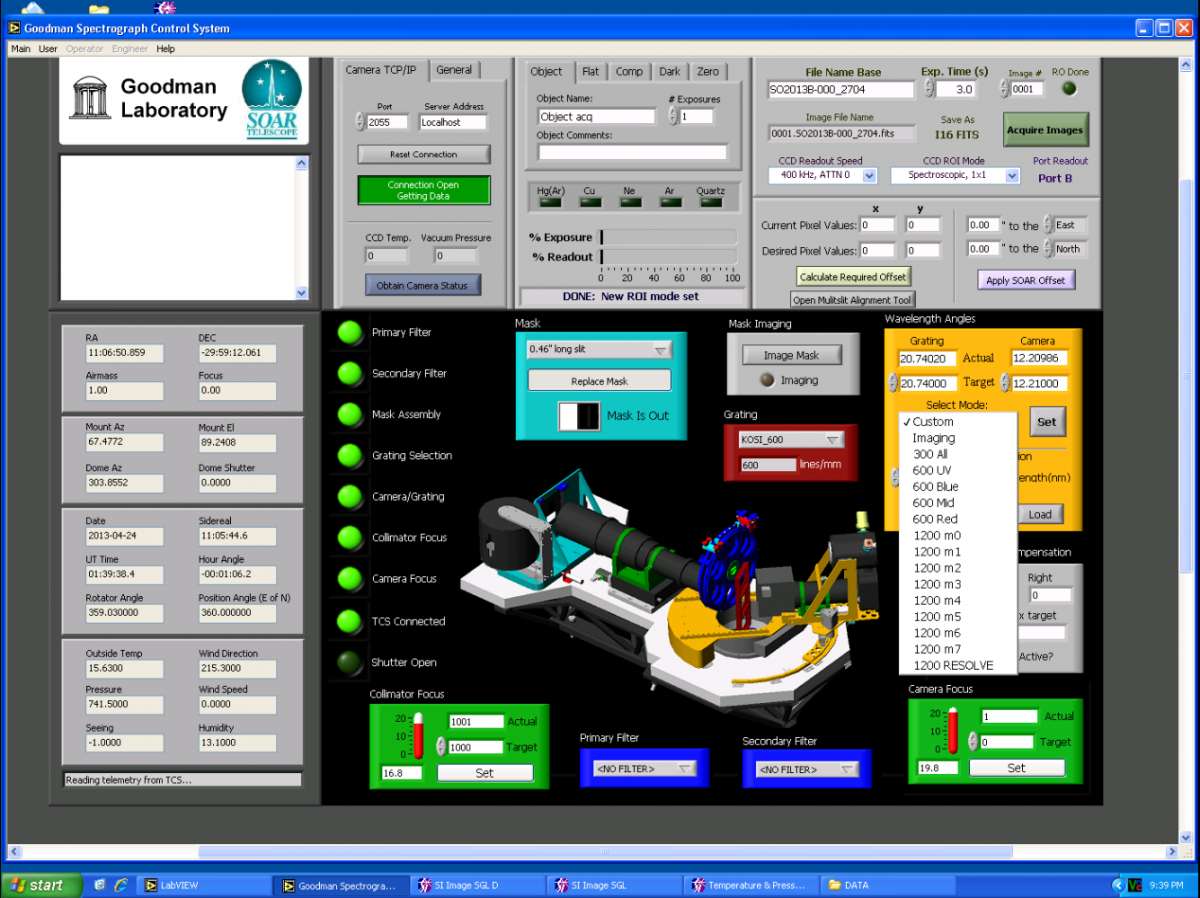
13) Select the imaging or spectroscopic mode in which you want to work.
Make sure that the "Save As" type is "I16 FITS".
14) Set up the grating and camera angles for your observations. The pre-defined modes are listed in the Goodman Overview page.
These steps are illustrated and explained in more detail in the User's step-by-step Guide to Observing with Goodman.
Shutdown
At the end of the night, the observer and TelOps staff should do the following:
- Logout of the Goodman GUI. This is found under the Main tab.
- Shutdown the instrument motors. This is also found under the Main tab and will store all of the mechanisms in their home position.
- Create a directory on soaric4 (Goodman Data Acquisition computer) in C:\Data for the night of your observations (YYYY-MM-DD). Move all FITS files to this directory. Do not move the DO_NOT_DELETE_FROM_THIS_DIRECTORY file.
- Create a directory on soaric7 (Goodman Data Anaylsis computer) in /home3/observer/GOODMAN_DATA/<PROGRAM> /YYYY-MM-DD, where <PROGRAM> is one of [BRAZIL, CHILE, MSU, NOAO, OTHER, or UNC].
- Move the FITS files from /home3/observer/today to /home3/observer/GOODMAN_DATA/<PROGRAM> /YYYY-MM-DD.
- After the logout and shutdown are done, the power to the Goodman Electronics box should be turned off on the remote power control panel.
IC7 Shutdown and/or Rebooted:
If soaric7 is rebooted or shutdown, the postproc (PPROC) process to move data to the NOAO Science Data Archive (SDA) needs to be restarted.
- To restart PPROC, open a vncviewer to soaric7.ctio.noao.edu:8 (the VNC password is the same as for SOI).
- Open a terminal window.
- Execute the command
- ~/APPROOT/PPROC/exe/PPROC &
- The PPROC command should now be restarted. One can take a test image and see if it appears in the list of "Last Processed Files".
Updated on July 26, 2024, 7:40 am
